

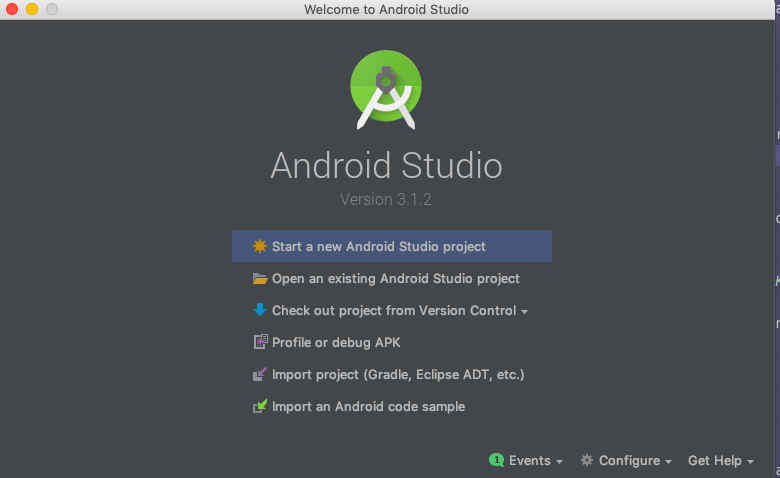
The most powerful way to build an Android application I have used this date is to build one using Android Studio. It is an official IDE (Integrated Development Environment) developed for the Android platform and use as a tool for your workflow on daily basis.
Android Studio was first announced as an IDE at a Google I/O conference event in 2013 and was released for public use in 2014. Since then, it is constantly updated and supported by teams at Google. Prior to its release, a not so recommended way to develop Android applications was using Eclipse IDE.
Android Studio provides an interface to create your applications and handle complex tasks such as project file management, testing the application on a virtual device and debugging the application. It has these features, important from the point of view for building an application, integrated with it by default. Some of the characteristics of this IDE can be defined as:
- Supports Gradle-based build system
- Provides a fast and feature-rich emulator
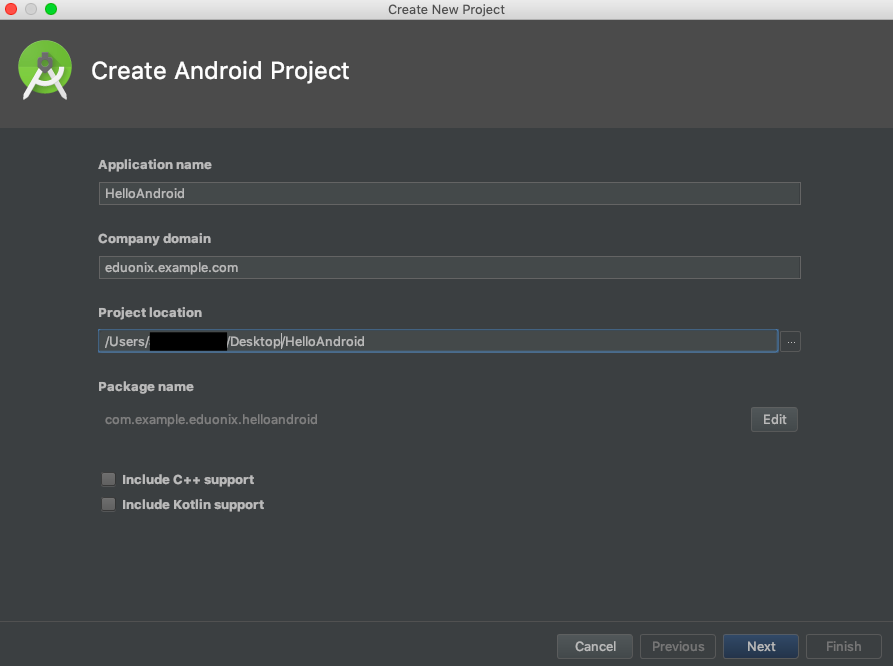
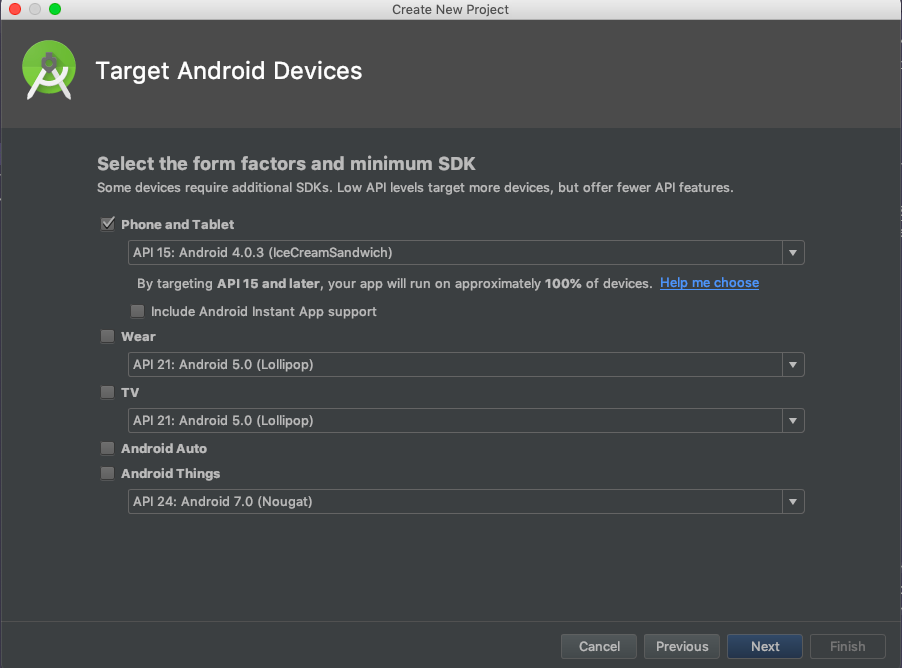
Notice that the latest version has support for Kotlin too. Choose an application name, and the company domain and click on the next button. After that, the next screen lets you choose the target set of Android devices. I am going to leave it to default, but you can go ahead and play around. You now have an option to select the minimum Android OS version on which your app can run.
Next screen is called the Activity Screen. You can choose from a number of different types of activities. They are also known as screens in an application. In some cases, this will be the entire app or in others, your app might transition from one screen to the next. You can go ahead and start a new project with no activity, the first option. I am going to choose the Basic Activity, the second screen. Of course, you can add more activities later. Click Next, accept the default options, and then choose Finish.
After the build process is done, you will get the following screen.
The Android App File System
Developing an Android app involves a lot of files. The java folder includes Java class files in three subfolders. The com.example.eduonix.helloandroid folder contains all the files for an app package. The main file will be a Java file that has the same name as your activity. By default, this is MainActivity.Java. This is where you will enter your Java script and where you’ll define the behavior of your apps.
package com.example.eduonix.helloandroid;
import android.os.Bundle;
import android.support.design.widget.FloatingActionButton;
import android.support.design.widget.Snackbar;
import android.support.v7.app.AppCompatActivity;
import android.support.v7.widget.Toolbar;
import android.view.View;
import android.view.Menu;
import android.view.MenuItem;
public class MainActivity extends AppCompatActivity {
@Override
protected void onCreate(Bundle savedInstanceState) {
super.onCreate(savedInstanceState);
setContentView(R.layout.activity_main);
Toolbar toolbar = (Toolbar) findViewById(R.id.toolbar);
setSupportActionBar(toolbar);
FloatingActionButton fab = (FloatingActionButton) findViewById(R.id.fab);
fab.setOnClickListener(new View.OnClickListener() {
@Override
public void onClick(View view) {
Snackbar.make(view, "Replace with your own action", Snackbar.LENGTH_LONG)
.setAction("Action", null).show();
}
});
}
@Override
public boolean onCreateOptionsMenu(Menu menu) {
// Inflate the menu; this adds items to the action bar if it is present.
getMenuInflater().inflate(R.menu.menu_main, menu);
return true;
}
@Override
public boolean onOptionsItemSelected(MenuItem item) {
// Handle action bar item clicks here. The action bar will
// automatically handle clicks on the Home/Up button, so long
<?xml version="1.0" encoding="utf-8"?>
<manifest xmlns:android="http://schemas.android.com/apk/res/android"
package="com.example.eduonix.helloandroid">
<application
android:allowBackup="true"
android:icon="@mipmap/ic_launcher"
android:label="@string/app_name"
android:roundIcon="@mipmap/ic_launcher_round"
android:supportsRtl="true"
android:theme="@style/AppTheme">
<activity
android:name=".MainActivity"
android:label="@string/app_name"
android:theme="@style/AppTheme.NoActionBar">
<intent-filter>
<action android:name="android.intent.action.MAIN" />
<category android:name="android.intent.category.LAUNCHER" />
</intent-filter>
</activity>
</application>
</manifest>
// as you specify a parent activity in AndroidManifest.xml.
int id = item.getItemId();
//noinspection SimplifiableIfStatement
if (id == R.id.action_settings) {
return true;
}
return super.onOptionsItemSelected(item);
}
}
The res folder holds resources, such as layouts, strings, and images. Short for ‘resources’ and that includes drawables (images you will place in your app) as well as layout which is where your XML files go. An Activity is usually associated with a layout of UI views defined as an XML file. This file is usually named after its Activity.
The manifests folder contains files that provide essential information about your app to the Android system, which the system must have before it can run any of the app’s code. It contains the AndroidManifest.xml file that describes all of the components of your Android app. All components for an app, such as each Activity, must be declared in this XML file.
The actual layout of your app is handled in another piece of code entirely. This code is the file called activity_main.xml. XML is a markup language that defines the layout of a document, much like HTML which is used for creating websites.
<?xml version="1.0" encoding="utf-8"?>
<manifest xmlns:android="http://schemas.android.com/apk/res/android"
package="com.example.eduonix.helloandroid">
<application
android:allowBackup="true"
android:icon="@mipmap/ic_launcher"
android:label="@string/app_name"
android:roundIcon="@mipmap/ic_launcher_round"
android:supportsRtl="true"
android:theme="@style/AppTheme">
<activity
android:name=".MainActivity"
android:label="@string/app_name"
android:theme="@style/AppTheme.NoActionBar">
<intent-filter>
<action android:name="android.intent.action.MAIN" />
<category android:name="android.intent.category.LAUNCHER" />
</intent-filter>
</activity>
</application>
</manifest>
You might have noticed Gradle at the bottom of the file structure which can further be expanded. This is a build automation tool which essentially helps Android Studio to turn all those different files into one single APK. Every Android Studio project contains a single, top-level Gradle build file.

Introduction to the Layout Editor
Latest version of Android Studio offers an approach to build the UI of your application using a Layout Editor. Another powerful tool like Xcode which is solely for iOS development already has this feature for past few versions.
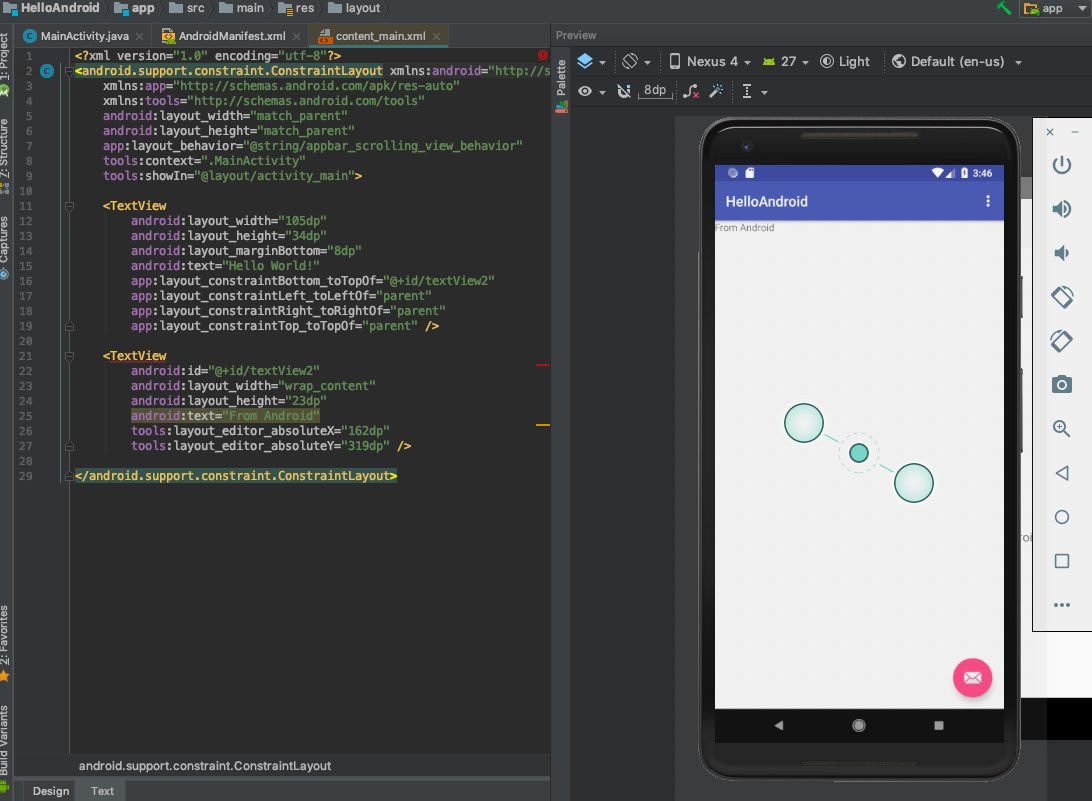
In the Layout Editor, you can quickly build layouts by dragging UI elements into a visual design editor instead of writing the layout XML by hand. The design editor can preview your layout on different Android devices and versions, and you can dynamically resize the layout to be sure it works well on different screen sizes.
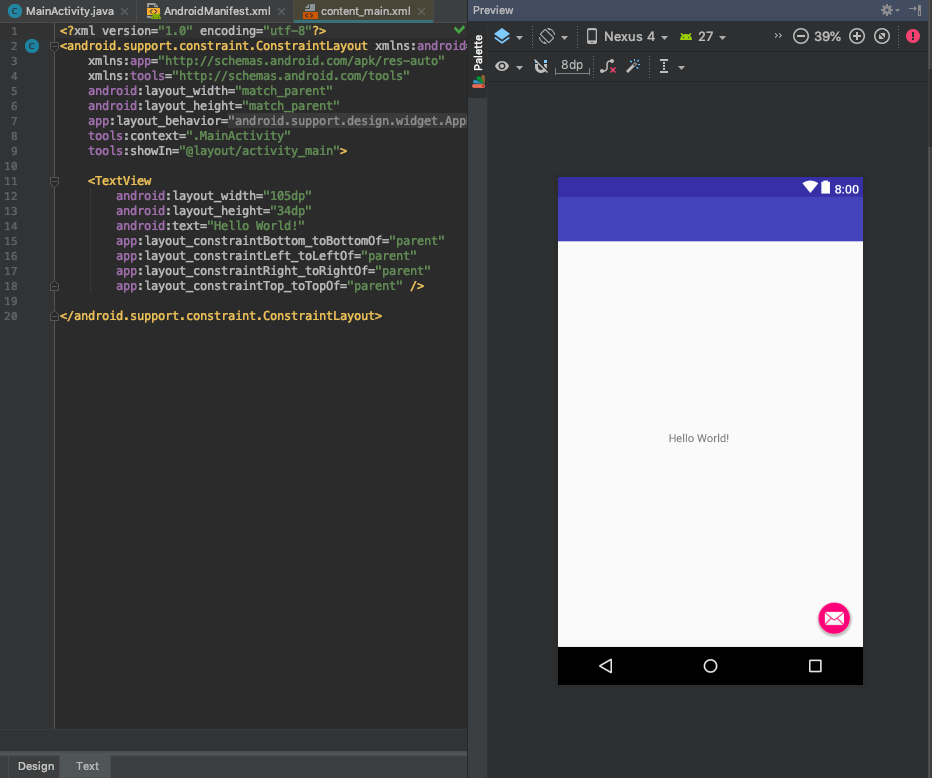
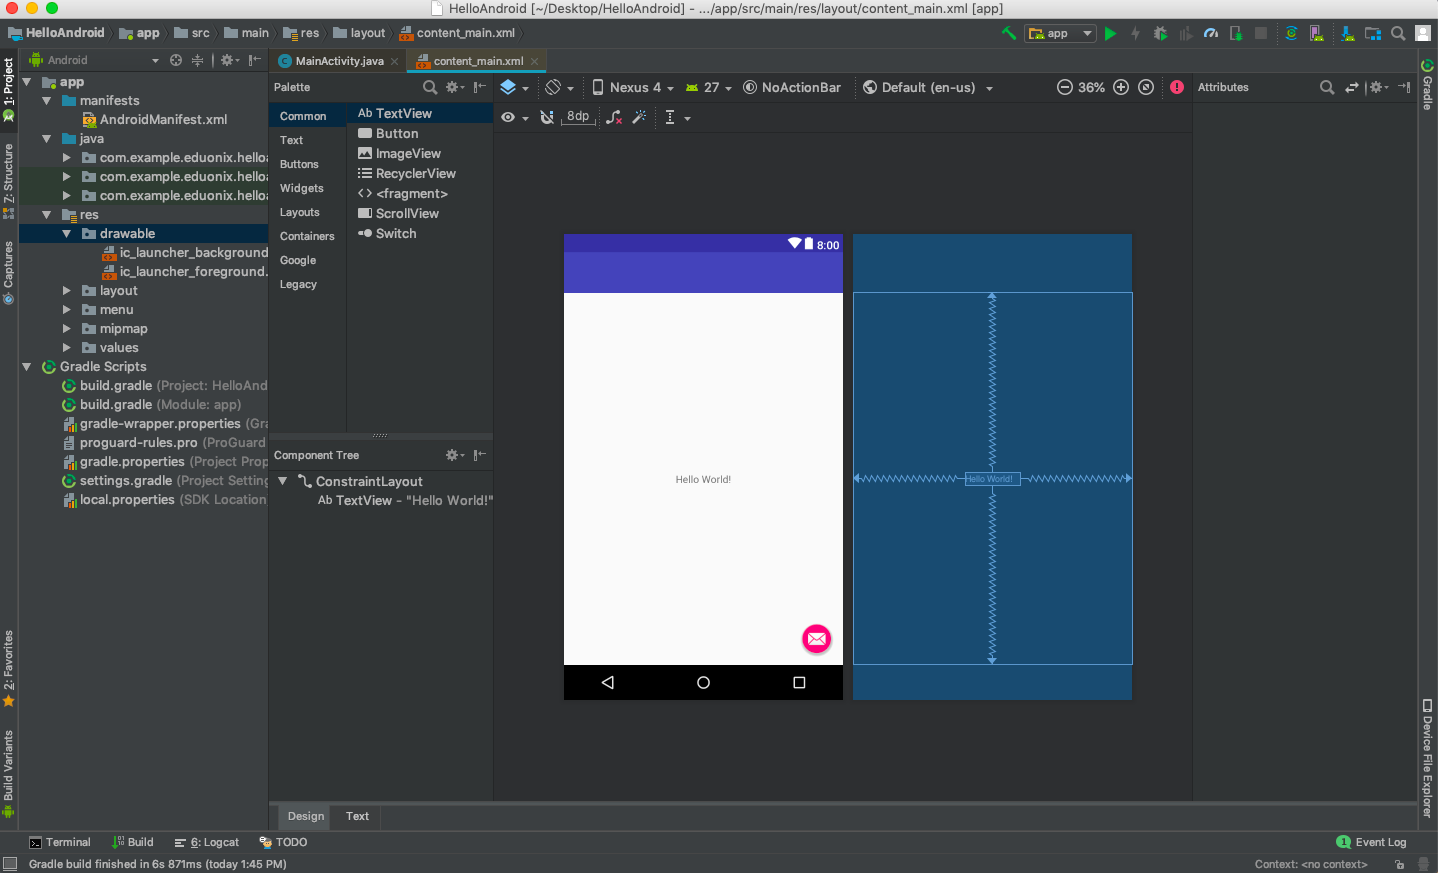
If you click on tab Text at the bottom as shown below in the screenshot, you add the changes by dragging the UI elements from Palettes tab. You will also notice how the XML code for that UI element is added automatically to the file. Let’s try this out. Right now you will see the following default screen if you have followed every step described above closely.
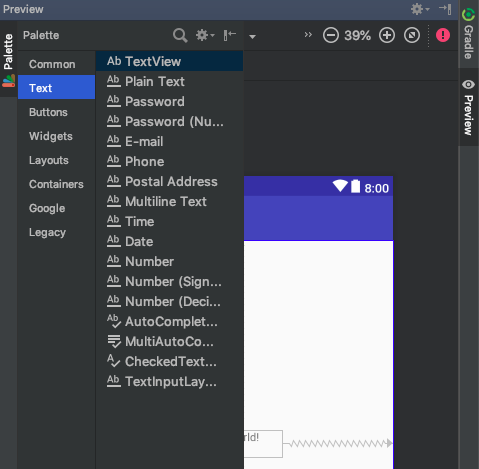
Select a Text field such as TextView from the Palette section.
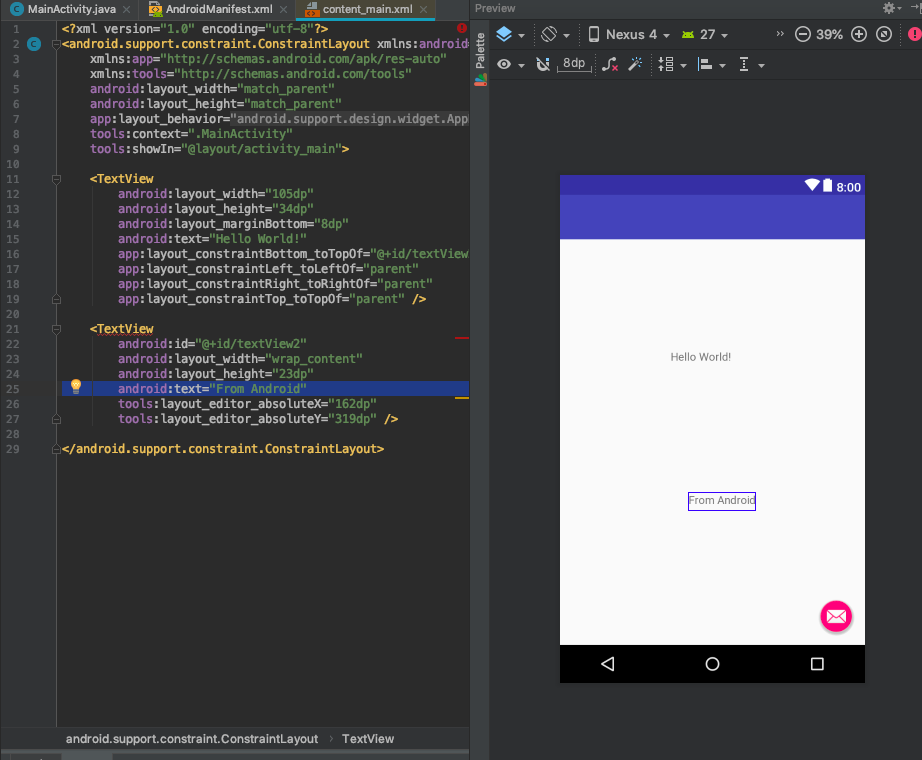
Now notice how a new XML tag named TextView appears in content_main.xml file when you place the UI element on the device’s screen.
To edit it, change android:text with a desired value. The changes will appear on the device’s screen automatically.
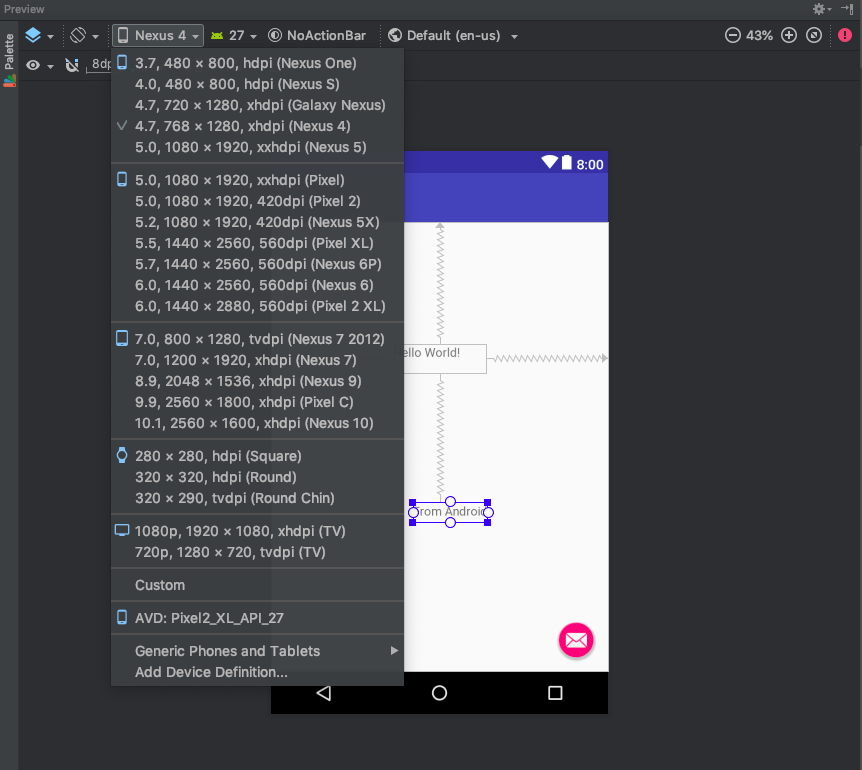
In the layout editor, you can also select the which device screen you want to build for by default by selecting a specific device as shown below.
Debugging and Testing the Application
Once you’re ready to test your app, you have two options. One is to run it on your physical device and the other is to create a virtual device to test it on an emulator. An emulator runs on the local machine, the same one on which you are running the IDE. Running it on your device is simple. Just plug it in via USB, make sure you’ve allowed USB debugging and installations from unknown sources in your phone’s settings and then hit the green play button at the top, or Run > Run App.
To use the virtual device though, you first need to build one by downloading the required components and setting the specifications as you want them. To do this, navigate to Tools > Android > AVD Manager.
You will then choose your hardware and choose the Android platform you want it to run. If the Android version you want to run hasn’t been downloaded yet, then the option will be presented next to it.
Once you have set up some devices to use, you will then be able to select one of these when you run your app and debug just the same as you would on a physical device.

