

Building a modern app requires modern tools. That’s why we have seen a trend in the usage of React Native. JavaScript frameworks, for example, provides excellent features which supersede the use of fundamental development methods. The frameworks open up a new way of handling the problems associated with mobile app building.
React Native lets you make direct native calls using APIs which offers custom development more fluid. React Native can be used effectively to build Android and iOS applications natively. This is made possible by running React on the server side rather than the browser. Technically, React Native is first to run in JavaScriptCore embedded instance, and then high-level components render it.
In today’s article, we will be focusing on how to build an Android app with React Native. We will develop a basic “movidedb” app that will list movies and information regarding them. So, let’s get started.
Building an Android App with React Native
Step 1: Blank React Native Project Creation
Our first step would be to create a blank React Native project. To do so, you need to install Node on your system you are going to build your Android app.
To install node, you need to run the following terminal command.
npm install -g react-native-cli
Are you still confused? Then, follow the official guide to get a better understanding.
Once Node is installed, now you need to create the project in the directory of your choice. Once you are in the folder, type the following command to install the required modules.
react-native init Moviester
This will create a new folder named, “Moviester” and the required modules within it.
As React Native is used to creating both iOS and Android apps together, JavaScript code is shared between the two files, index.ios.js, and index.android.js. As we are developing an android app, we will be using index.android.js
Step 2: Connect Android Device
It is now time to connect your android device to the system. After connecting, run the following command.
react-native run-android
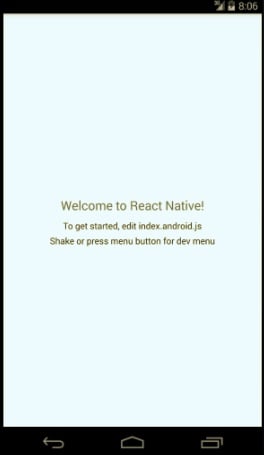
If you did everything correctly, you would see the blank app on the device.
Step 3: Getting information from themoviedb API
It is now time to setup your app to connect to the themoviedb. To get started, you first need to get the required API. Once you get the API, you can then start to write your app code. The Moviester class should look like below.
class Moviester extends Component {
  render() {
    return (
      <View style={styles.container}>
        <Text style={styles.welcome}>
          Welcome to React Native Android App Development!
        </Text>
        <Text style={styles.instructions}>
          To get started, edit index.android.js
        </Text>
        <Text style={styles.instructions}>
          Shake or press menu button for dev menu
        </Text>
      </View>
    );
  }
}
The basic code initialize the Moviester module, however, it still needs a constructor to work effectively. A constructor will also initialize the variables. For now, we are going to focus on moviesData array as it will store all the JSON data that is fetched using the API.
constructor(props) {
    super(props);
    var ds = new ListView.DataSource({rowHasChanged: (r1, r2) => r1 !== r2});
    this.state = {
      moviesData: ds.cloneWithRows([]),
    };
  }
Step 4: Defining the fetchMoviesData method.
Now, we need to code the module for fetching the data using the API. To do so, we will use the code below.
fetchMoviesData() {
    var url = 'http://api.themoviedb.org/3/movie/now_playing?api_key=YOUR_API_KEY';
    fetch(url)
      .then( response => response.json() )
      .then( jsonData => {
        this.setState({
          moviesData: this.state.moviesData.cloneWithRows(jsonData.results),
        });
      })
    .catch( error => console.log('Error fetching: ' + error) );
  }
Step 5: Creating the lifecycle componentDidMount method.
Lastly, we need to create the componentDidMount method which will act as a lifecycle method. It will be executed once the first rendering takes place.
componentDidMount() {
    this.fetchMoviesData();
  }
Step 6: View creation
The last few steps are to create the front-end of your app. To do so, you need to import some components. These components will be used to create the view for your React Native android app.
import {
  AppRegistry,
  StyleSheet,
  Text,
  View,
  ListView,
  Image
} from 'react-native';
The few components that we need to learn about include the following:
- ListView: It is used to display the vertical scrolling lists in an app effectively.
- Image: This component is used to display different types of images on the app. It includes static resources, network images, temporary local images and so on.
Step 7: Restructuring the return method.
Now, that we have written different modules which take care of the various aspect of the app, we now need to edit the return () method and make it more readable.
render() {
    return (
      <ListView
        dataSource={this.state.moviesData}
        renderRow={this.renderRow}
        style={styles.container}
      />
    );
  }
We have already written code for the dataSource method which fetches the movie data from the moviedb using the API. However, the “renderRow” method takes care of the template required to be rendered for each row. We will now define it below. Also, the renderRow method should be defined within the Moviester module.
renderRow(rowData){
    return (
      <View style={styles.thumb}>
        <Image
          source={{uri:'PUT URL HERE’}}
          resizeMode='cover'
          style={styles.img} />
          <Text style={styles.txt}>{rowData.title} (Rating: {Math.round( rowData.vote_average * 10 ) / 10})</Text>
      </View>
    );
  }
You need to put the source URI correctly for the above code to work properly. We are now set to make the app work as intended. However, we need to create some stylesheets to give the app some serious looks. You can do so by using the following code.
var styles = StyleSheet.create({.........});
Step 8: Running the app
The last step is to run the app using the following command.
react-native run-android
This will start your app on your smartphone/device.
Congratulations! You have created your app successfully.
Conclusion
This leads us to the end of our tutorial on creating the Android App using React Native. As you can see, it is easy to use React Native to build an android app. You can use the steps mentioned in the tutorial and start building your React Native Android app. However, to get the deeper insights into React Native you can opt for the course React Native: The Practical Guide.
So, what do you think about the tutorial? Comment below and let us know. We are listening.

