In our blog today you will learn to develop a simple application in android. We will show you the simple steps to follow
- Steps to develop simple application :
- Open the eclipse application file.
- A Workspace Launcher dialog box will appear.
- Browse to the folder where you want to save your workspace.
- A welcome screen will appear.
- Close the welcome screen.
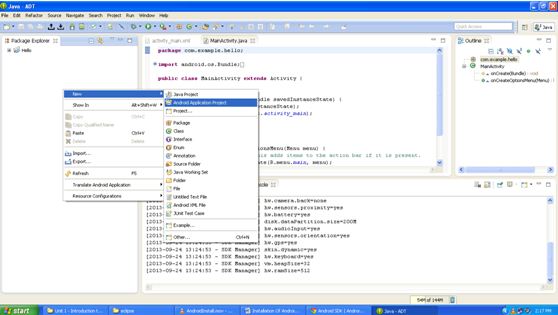
- Go to File->New->Android Application Project.
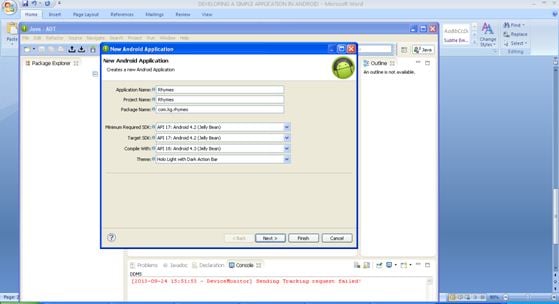
- After clicking Android Application Project a “New Android Application Window ” will appear.
- Here we have to specify the Application Name.
- Also mention the Package name (Any name) example: com.bean.Application Name .
- Select the Minimum Required SDK from the drop down list , also select the Target SDK
- The window will look like….
- After clicking next a window will appear in which uncheck the create custom launcher icon and click on next.
- Create activity window will appear which consists of three activities like Blank Activity ,Fullscreen Activity, Master/Detail Flow.
- Select the Blank Activity and click on next button.
- Now Blank Activity Window will appear which consists of the Activity Name of the workspace , Layout Name and Navigation is to be kept none.
- Main Activity is the name of the Workspace.
- The window will look as shown in the figure below.
- Click Finish.
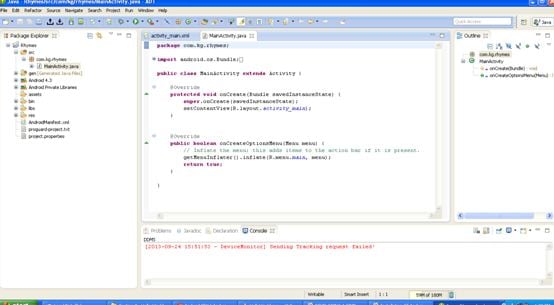
- Workspace will get opened with the MainActivity that is the runnable code.
- Now we are going to develop a simple application so we are not going to have an onCreateOptionsMenu so delete the code for the respective.
- Now go to import in the MainActivity and delete the import statement import android.view.Menu;
- As we are not using onCreateOptionsMenu.
- The MainActivity is the controller of our application and activity_main.xml is the view of our application
- Now the window will look like this…
- Now go to activity_main.xml and delete the Hello World text from the application Layout.
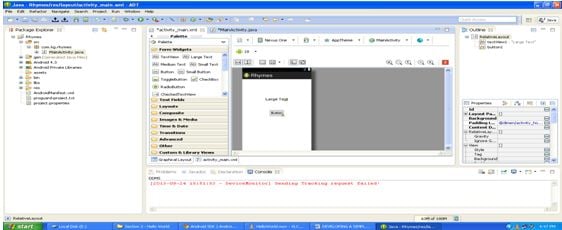
- Now from Graphical Layout ,select Form Widgets and from this select and drag Large Text and a Button on the android application screen.
- Once you are done with it your screen will look like as shown below…
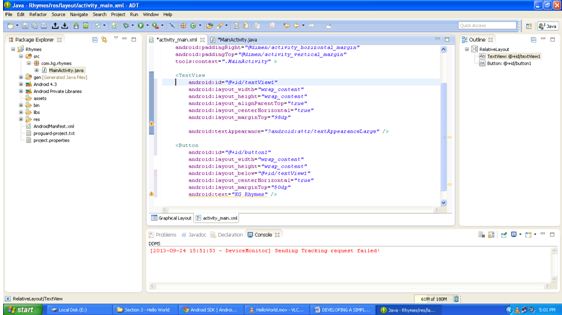
- Now go to the properties by clicking on the activity_main.xml.
- Go to Button properties and in that reset the android:text=”Say Hi” .here we are only changing the name of the button.
- Also delete the text in the TextView i.e android:text=”Large Text”.
- Now the window will look like as shown..
- Now there is id-textView1 in the TextView which we want to find in the MainActivity.java.
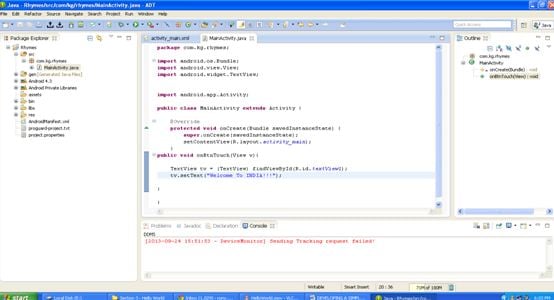
- So now go to MainActivity.java and now write the code which will respond to the button touch.
- When you specify the (View v) the system doesn’t understand it and gives erron with a red mark sign on its left, on clicking, it specifies whether we want to import the View .
- So write the code inside the main activity:
Public void onBtnTouch(View v)

{

	TextView tv=(TextView) findViewById(R.id.textview1);

	tv.setText(“**Welcome To INDIA**”);

} - The window will look as follows:
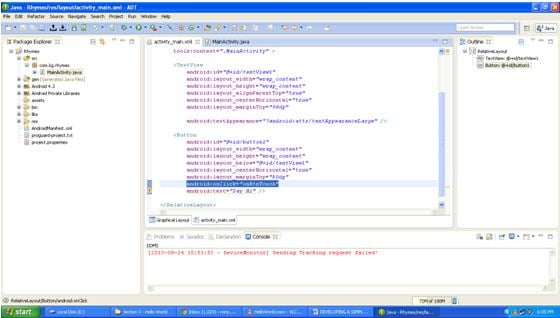
- So on click activity should be specified in the button properties i.e android:onClick=”onBtnTouch” in the activity_main.xml
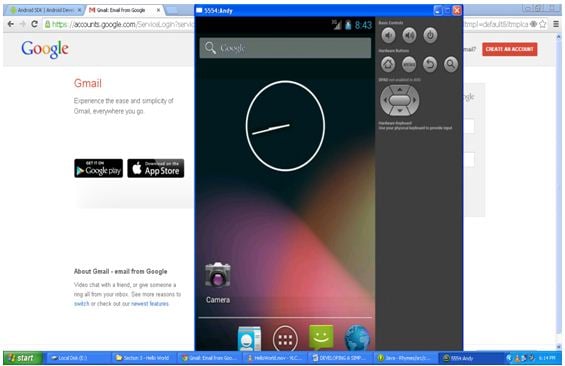
- Now when you run the MainActivity.java a Run As window will appear.Select the Android Application and click OK.
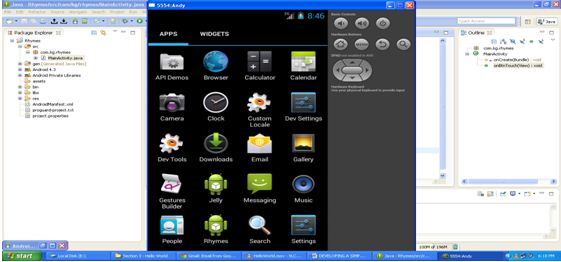
- On Clicking OK an Android Home Screen will appear.
- On clicking applications various applications are displayed along with your application.For example: Rhymes as shown in figure.
- If we click on Rhymes application, it will display the button we had taken.
- When we click on the button “Say Hi” ,it will display the Written Text.
- Thus we have created a simple android application.