

Adobe Photoshop’s power not only lies with its prowess on creating beautiful graphic designs, but photographers also use this software program to improve their workflow.
Learning how to create actions in Photoshop will improve the way you edit photos or what is known as “post-processing”.
Today we will give you a step-by-step productivity hack to create your very own, using this Adobe Photoshop action tutorial.
BONUS: – If you stick until the end, you will get a FREE Photoshop Action made for this tutorial that you can download for personal use!
Whether you’re a newbie or a pro, it’s no doubt that you will find the Photoshop Action feature handy for editing your photographs.
What Are Photoshop Actions Anyway?
In its essence, Photoshop Actions are shortcuts.
Yeah, cool isn’t it?
They’re these recorded automated tasks (aka actions) that can simplify and streamline your editing process.
So in just a click of a button, you can sit back, relax and watch the whole process of editing photos with your Photoshop actions.
Wow, Awesome! But What Else Can I Do With Them?
Aside from recording mundane tasks like editing curves, brightness, levels, among others; you can also add cool special filters and effects to your photographs like this one:

Caption: Before

Caption After
Doing these kinds of effects can take a lot of your time, and if you have a ton of photographs to post-process, it might even take you a day or two to finish!
So what you need is a productivity hack for Photoshop.
When you edit photos on Photoshop using Actions, you will save as much time as it would take you to do the whole batch edits originally.
Talk about cutting your time in half!
Nice! But How Do I Create A Photoshop Action?
Whoa, hold your horses.
Before creating your own Photoshop Action; Did you know, you can also download and use ones made by other users?
Yep! So if you wanna learn how to make great Photoshop Actions, we recommend starting with the ones that already exist out there.
Reverse-engineer them.
Dissect each part so you understand how the Action unfolds.
Tip: – Photoshop Actions uses the .ATN file format extension and you can get them from almost any website that offers Adobe Photoshop resources to download.
Okay so now we got that out of the way, let’s teach you how to create Photoshop Actions.
How To Create Your Own Photoshop Actions
Creating your own Actions for your photography is easy.
Step 1: – Open Photoshop and the Actions Panel
The program might take a while to load but when it does, head on over to the Actions panel.
Tip: – You can open Actions panel using the shortcut key Alt + F9 on Windows.
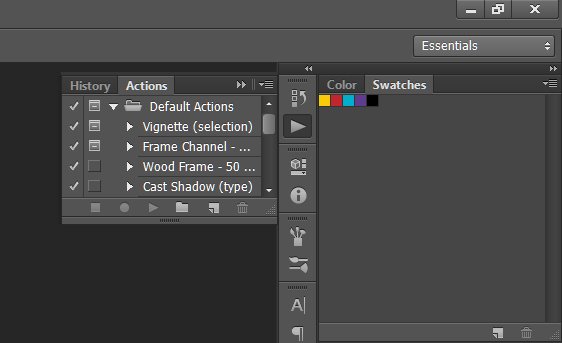
You can check if the Actions panel is already active by going to the right hand side of the screen. The Actions panel is usually next to the History panel.
Step 2: – Time To Record Your Action
Click the Action menu as shown below.
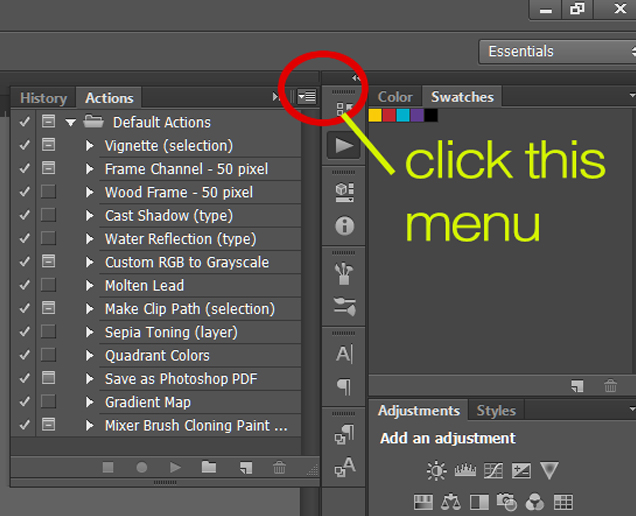
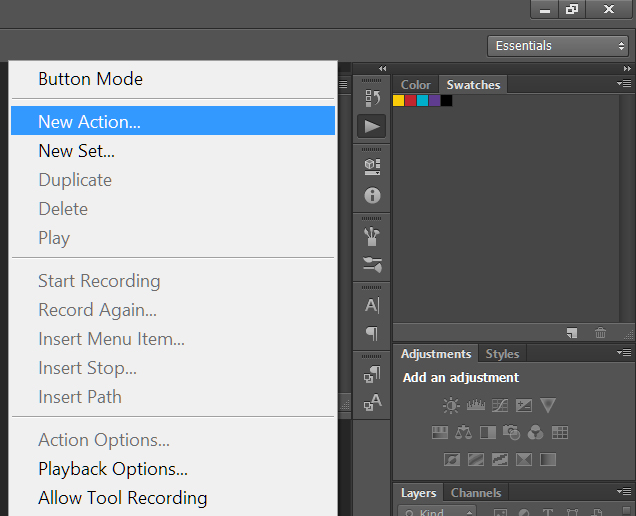
Once you’ve clicked this, a set of commands will be shown in a sub-menu.
Click New Action.
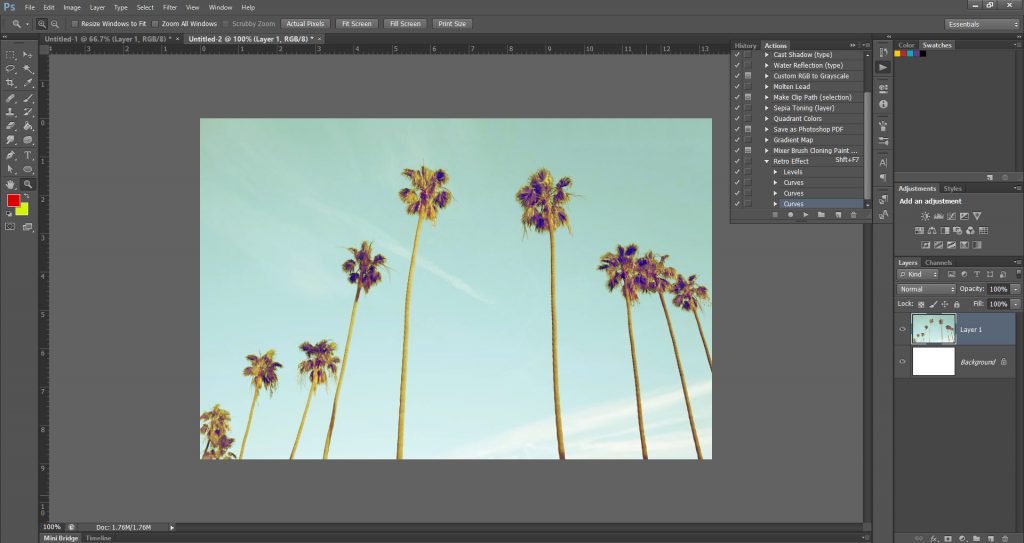
Here, we’re going to use a photo of palm trees during the summer. As you can see, once you’ve clicked New Action it will open up the New Action pop-up dialog box.

For this tutorial, let’s name the Action “Retro Effect”. We’re naming it this way because it describes the effect we’re about to apply to this photograph.
Remember you can name your Action to whatever you want, but a good Photoshop Action is one that describes what it does.
That’s also to prevent you and other users from getting confused.
Before we jump in and create, it’s important to understand what’s on the pop-up menu:
• Name – name of your Action
• Set – the set to which your Photoshop Action belongs. A set is a collection of several actions bundled together. You will need to create a set so you can save your Action.
• Function Key – this is the assigned shortcut button to trigger the Photoshop Action
• Shift & Control – tick these boxes if you want your shortcut key to have a combination trigger on top of the Function Key.
• Color – your Photoshop Action’s color symbol for easy identification on the interface.
See our example below.

Notice how we’ve set the following:
• Name: Retro Effect
• Set: Default Actions (we don’t have a specified set here yet)
• Function Key: F7
• Shift: Checked
• Control: Unchecked
• Color: Green
Then hit Record to begin. Now watch as the magic happens.
Step 3: – Do Your Enhancements Or Adjustments
After hitting the Record Button, you’re now ready to begin editing your photograph.
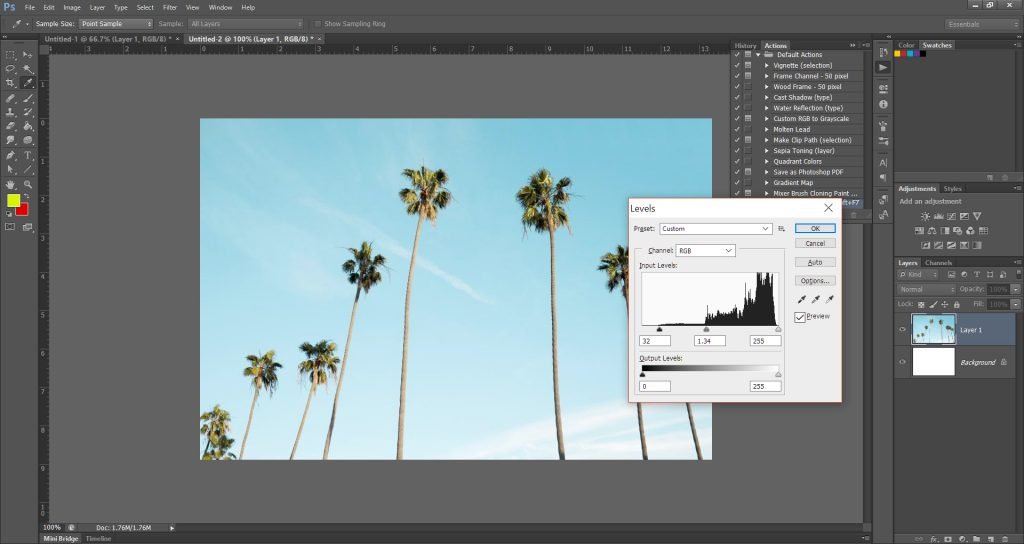
In this tutorial, our post-processing begins by adjusting the Levels of our picture.
Levels allow you to tweak and explore the brightness levels of your image. You can adjust brightness, contrast and tonal range by using the sliders given in the dialog box. The sliders represent the location of complete black, white and midtones.
Tip: – Open Levels using shortcut Ctrl+L on Windows
What we’ve done here is to brighten up the photo and make the details crisper (such as the tips and shadow of the palm leaves).
Next up, we’re gonna use Curves.
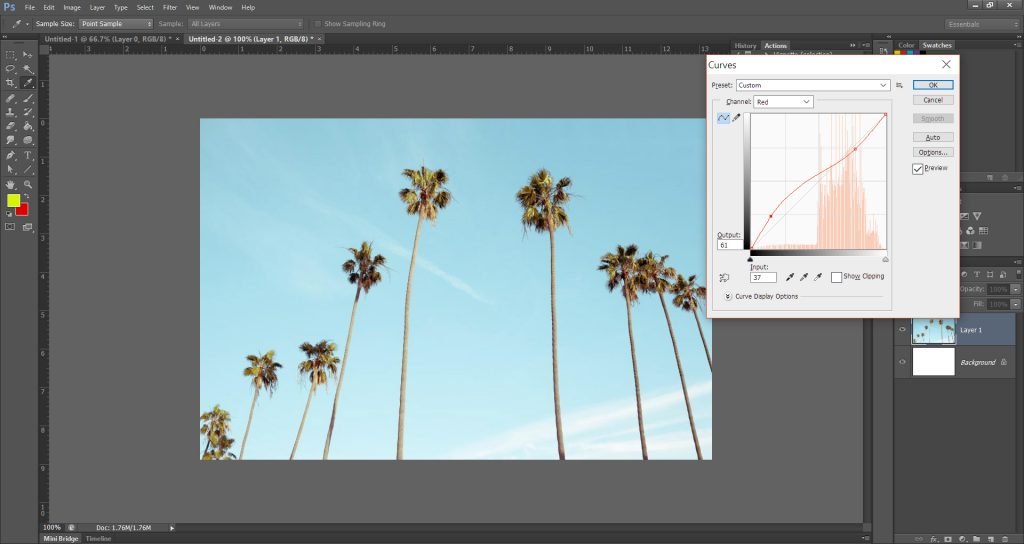
Curves allow you to modify the tone of your photograph. Again, using the histogram, you can specify the exact location of where you want the adjustment.
Unlike Levels, Curves uses points instead of sliders.
Here, we’re increasing the red in the shadow area of the photograph.
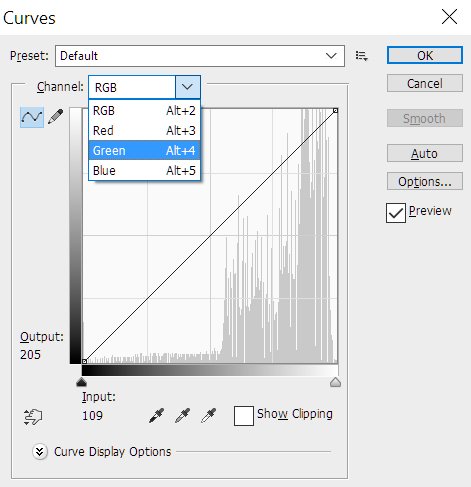
Aside from the Reds, you can also tweak the RGB state along with the Green and Blue curves.
Let’s make this photograph look more retro, shall we?
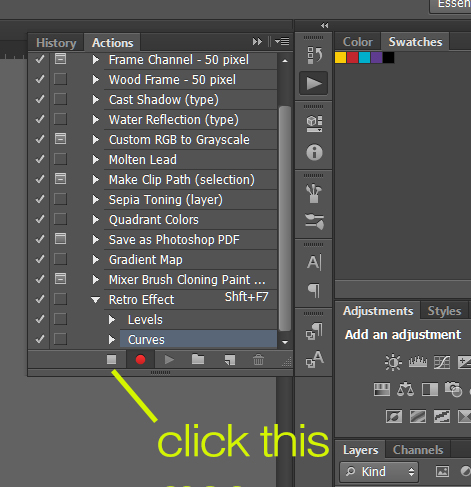
Tip: – When you feel like you need to pause your Action, just hit the Stop button as shown below. It’s the little square icon next to the red button (“Record”).
Step 4: – Stop and Save Your Photoshop Action
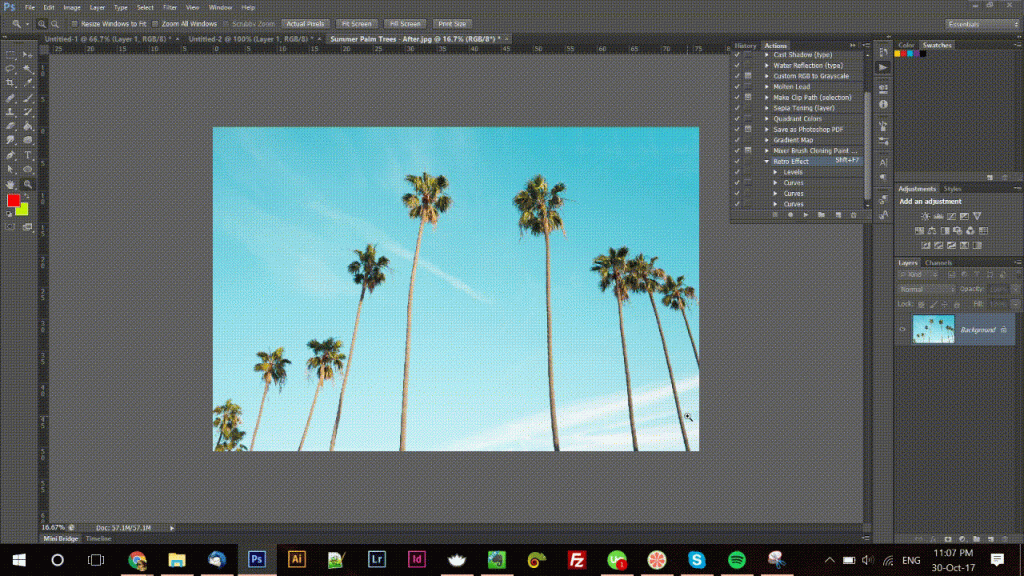
Now that we’ve applied some Levels and Curves, let’s see our retro image now.
Looks very fancy!
Let’s see the before and after:

Caption Before

Caption After
And here is the entire process:
Tip: – Don’t forget to save your work!
How To Save Your Photoshop Action
1. Create a set to place your Action under. If you already have one, skip this step.
2. Click the set to select it.
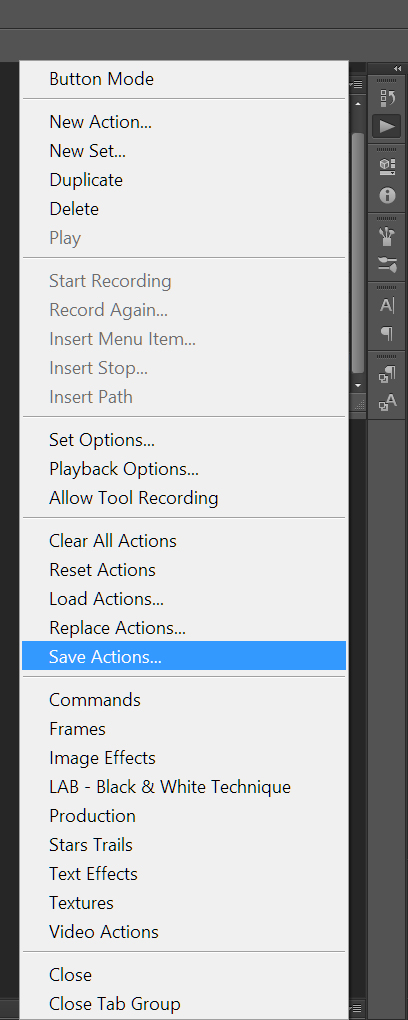
3. Click on the Action menu to reveal the sub-menu (similar command to New Action). You will find Save Actions.
4. Click it and save your work as a .ATN file.
You can make a bunch of cool stuff using Photoshop Actions, and they’re not just limited to filters.
We hope this tutorial was easy but insightful for you.
Let us know your comments or questions below.
And as promised; here’s your FREE Retro Effect Photoshop Action.
[insert your email subscription opt-in form here directing your readers to download the Photoshop Action lead magnet]

