Generally validating of your web forms fields are done by using “client side script” (javascript –of course you can still use javascript for various other purpose) or “server side scripts” (php, asp, jsp etc), but with HTML5 it makes your life much easier, you can form validation script below more helpful and reliable.
Requirements :
Firefox 4+, Chrome 4+, Opera 11+, Safari 4+, IE 10+, iPhone 4+ and Android 2.1+.
Ok then, let’s get started with basic HTML5 web form. Currently in this example we will have only name and email validation. Open notepad or your favorite editor and start HTML5 with
[sourcecode language=”html”]
<!DOCTYPE html>
<html xmlns="http://www.w3.org/1999/xhtml">
<head>
<title>EDUonix Required field Demo</title>
</head>
<body>
Start form with form tag
<form>
Add label and name field
<label>
First Name:
<input type="text" name="name" required title="First Name is Required!" />
</label>
[/sourcecode]
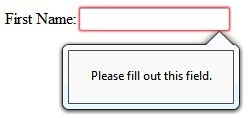
The required attributes inside text field informs HTML5 supported browser that the field is compulsory, The error message or stop the form getting submitted with blank field may vary from browser to browser. Soon there will be some standardization across all browsers.
If end user doesn’t enter anything in First Name field then below messages will be showed based on browser.
| FireFox 10.x | Chrome 22.x |
 |
 |
Now let’s move to the next field
<input type="email" name="email" required />
NOTE – title is missing from this field, if you skip this then browser will display its default message, with title option inside field allows you to your customized message along with browser’s default message, again this is browser specific.
This is the beauty of HTML5, you can have field type called “email” and this will allow browser to validate email address of course with some limitations but it can definitely stop users from entering spaces or invalid values in it. There are various field types available in HTML5 but for now we will continue with email only.
And now add form button, by simply adding this
<button>Register</button>
End your form and html tag
  </form>
 </body>
</html>
Save your file and run it in your browser, viola
Please stay tuned for more tutorial and tips on HTML5


