
We had learned some of the new HTML5 elements in last session. So today let’s try them practically.
Using the input elements and the form elements, we will modify our contact form of “Blue Developer Directory”.
The contact form that we had worked on last time looks like this:

fig 1
We will now make it somewhat like this, by adding new fields using new HTML5 input and form elements:
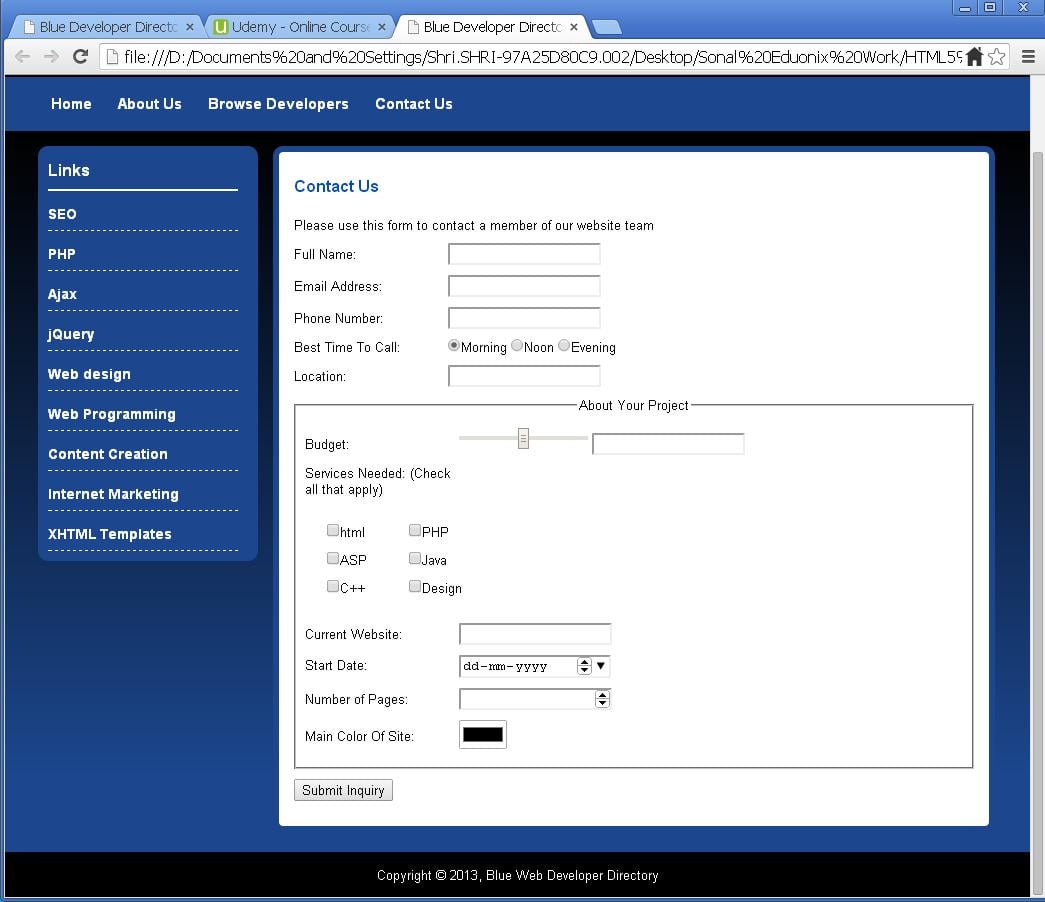
fig 2
Come on, now let’s start.
- Open the “blue_developer” folder, that we had created last time.
- Open the “contact.html” file in “blue_developer” folder with “notepad++”.
- Let’s change everything step by step.
- Change “Email Address” input field:
- We had used a simple “text” field as an input field for “Email Address” in the contact form shown in figure 1.
- But now we have learned “email” input field for email addresses in HTML5.
- So, let’s use it.
- You will see the code
<p>
  <label for="email">Email Address:</label>
  <input type="text" name="email">
</p>
in the form.
- Just change the line
<input type=”text” name=”email”>
to
<input type=”email” name=”email”>
. Save and then reload the browser.
- The output is shown below:
- Here, in the output you can see that, when you type a wrong email id without an “@” symbol or a period, you will get a pop-up message instructing you about it.
- And when you put a correct address, it will accept it.
- So, using an “email” input type, we have validated our control without using any of the scripting languages.
- Change “Phone Number” field:
- We had used a simple “text” field as an input field for “Phone Number” in the contact form shown in figure 1.
- But now we use “tel” input field instead of “text” input field.
- You will see the code
<p>
	     <label for="phone">Phone Number:</label>
	     <input type="text" name="phone">
</p>
in the form.
- Just change the line
<input type=”text” name=”phone”>
to
<input type=”tel” name=”phone”>
. Save and then reload the browser.
- The output is shown below:
- Here, you might have understood that, “tel” input element does not provide any validation for “Phone Number” field. It accepts numbers as well as alphabets.
- But one good thing about it is that, if you are browsing on the mobile devices, your keypad will pop-up.
- So, it’s good to use “tel” wherever you need to take phone number as an input.
- Adding Location field:
- In figure 1 we don’t have “Location field”. But you can see it in figure 2.
- In figure 2 you can see just a label “Location” and a “text” input field in front of that.
- But along with the above said structure, we are going to use a datalist.
- What will it do? Datalist is a pre-defined list. Whenever you type any alphabet in the “text” input field, a word starting with that alphabet will be autocompleted, if it is present in the datalist.
- So, write the following code above “Budget” field:
- Here, in the above code you will have a label “Location”.
- Datalist is created using
<datalist> --- --- --- </datalist>
tags.
- The datalist items are created using option tag. Option tag has an attribute “value” which provides the datalist item.
- The datalist needs to be bound with the input field. For this “list” attribute of input tag is used.
- Value of the “id” attribute of datalist should match with the value of the “list” attribute of the input tag, so that they are bound together.
- The output is shown below:
- Here, you can see that, when you just type “N” or “n” a drop-down type list containing “New York” has appeared. If you want, you can select it and it will be placed in the text field.
- If the datalist does not contain words starting with the alphabet typed in the text field, it will not show any drop-down list.
- Grouping the project details:
- Observe figure 2, you will see that the personal details are separated from the project details by grouping the project details in a bordered box.
- This box is created using a
<fieldset> --- --- --- </fieldset>
tag pair.
-
<fieldset>--------</fieldset>
is used to group number of fields together.
- So write a
<fieldset>
above the
<p>
of “Budget” and write the
</fieldset>
above the
<p>
of “Submit Form” button.
- You will get the box.
- Now for heading you can use
<legend>-----</legend>
.
- Just type the following line below fieldset tag:
- Output is shown below:
- Replacing the dropdown list with the slider and text field:
- Observe figure 1 and 2, you will notice that in figure 1 you have a dropdown list in front of label “Budget” and in figure 2 you have a slider and a text field instead of dropdown list.
- To have a fig 2 type of structure of the “Budget” input field, you can create a slider using “range” input field and a text field near it.
- In fig 1 you would get the budget in dropdown list as shown below:
- You can select anything you want from the list shown above.
- But using slider and text field you can select the budget by just sliding the slider, and the budget will appear in the text field next to it as you go on sliding.
- As we know, we can just design the slider and text field using HTML5 but the processing of showing the budget in the text field as slider moves, can be made possible only by using javascript or any other scripting language.
- So, first remove the code for dropdown list of budget from contact.html file. The code to be removed is as shown below:
- Secondly, write the javascript code above the label for “Budget”. The scripting code should be written in head section, but for this tutorial we will write it in body. The code to be written is shown below:
- Now, thirdly write the code for designing the slider and text field. The code is shown below:
- Here, onchange=”updateTextInput(this.value);” is an event which tells us that whenever a change occurs in the slider, the function “updateTextInput(val)” will be called and the value in the text field will be changed.
- The input type “range” is used to design a slider.
- Output is shown here:
- Adding “Current Website” field:
- There is no need to do anything to the checkboxes, they are perfect.
- We will add a new field “Current Website”, so write the following code below the code for checkboxes:
- The input type “url” in above code creates a input element which is validated to intake a proper formatted url address. If you put any text which is not an url, it will give you a popup message telling you “Please enter a URL”.
- The output is shown below:
- Adding “Start Date:” field:
- Now to add “Start Date“ field code is given below, write it below “Current Website” code:
- The type “date” in the above code creates the date element which enables us to select a date from a calendar and show it to the user.
- The date is displayed in the format “dd-mm-yyyy”.
- The output is shown below:
- Adding “Number of Pages” field:
- For “Number of Pages” field the following code is written below date field:
- The input type “number” creates a input element which shows numbers. It has one upward and one downward arrow which increments and decrements the number by 1 respectively.
- his field can accept alphabets too. So to validate it, you have to use javascript or any other scripting language.
- The output is as shown below:
- Adding “Color Box” field:
- Color box means, we want to show the whole color picker so that we can pick and use any colour.
- The code is shown below:
- The input type color in the above code, shows a color picker which allows us to select any color and use it.
- When you click on the colorbox, the color picker appears as shown in the figure below:

fig 3
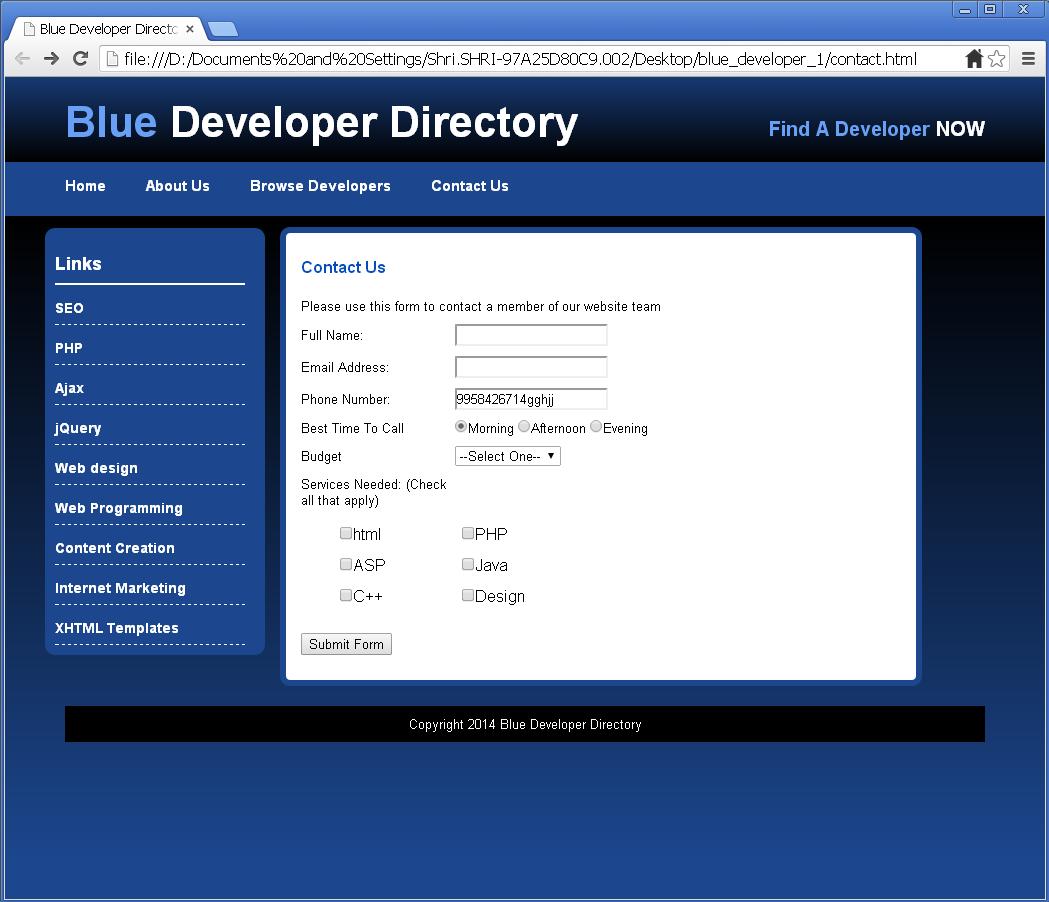
fig 4
<p>
<label for="location">Location</label>
<input list="location">
<datalist id="location">
  <option value="New York">
  <option value="Boston">
  <option value="Miami">
</datalist>
</p>
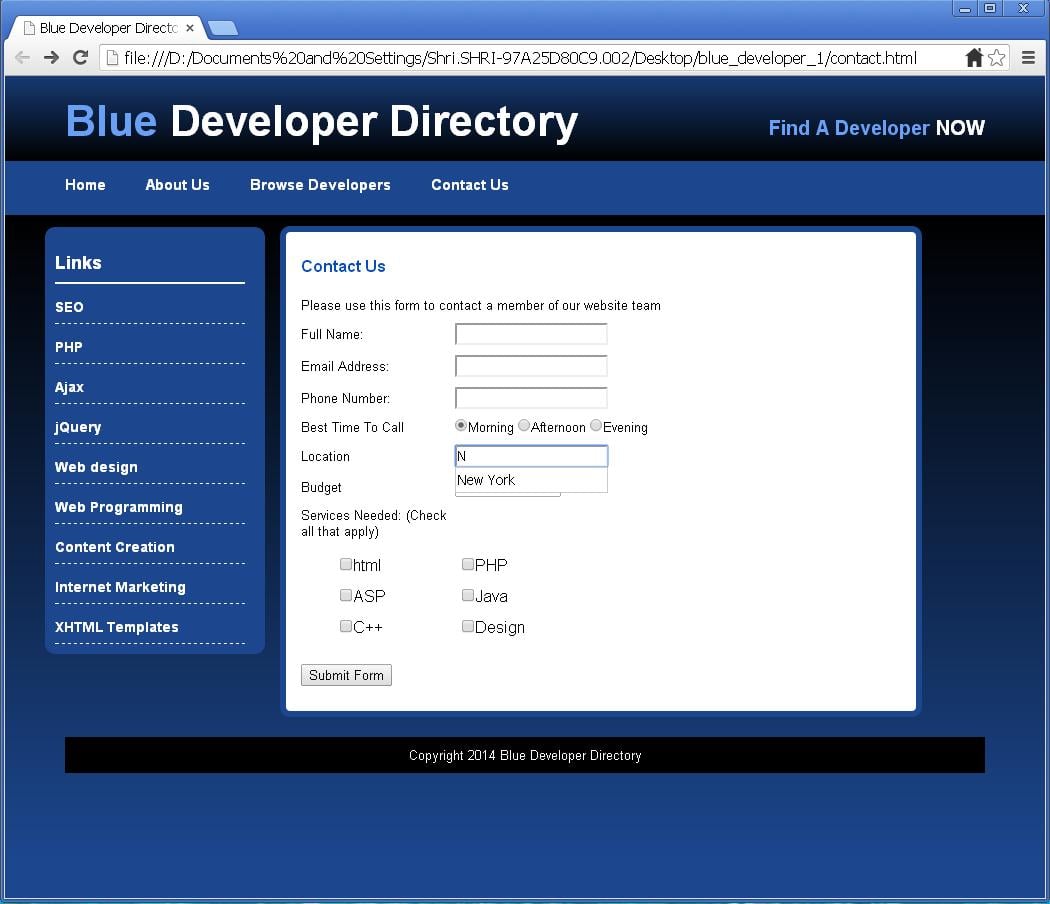
fig 5
<legend>About your project</legend>

fig 6
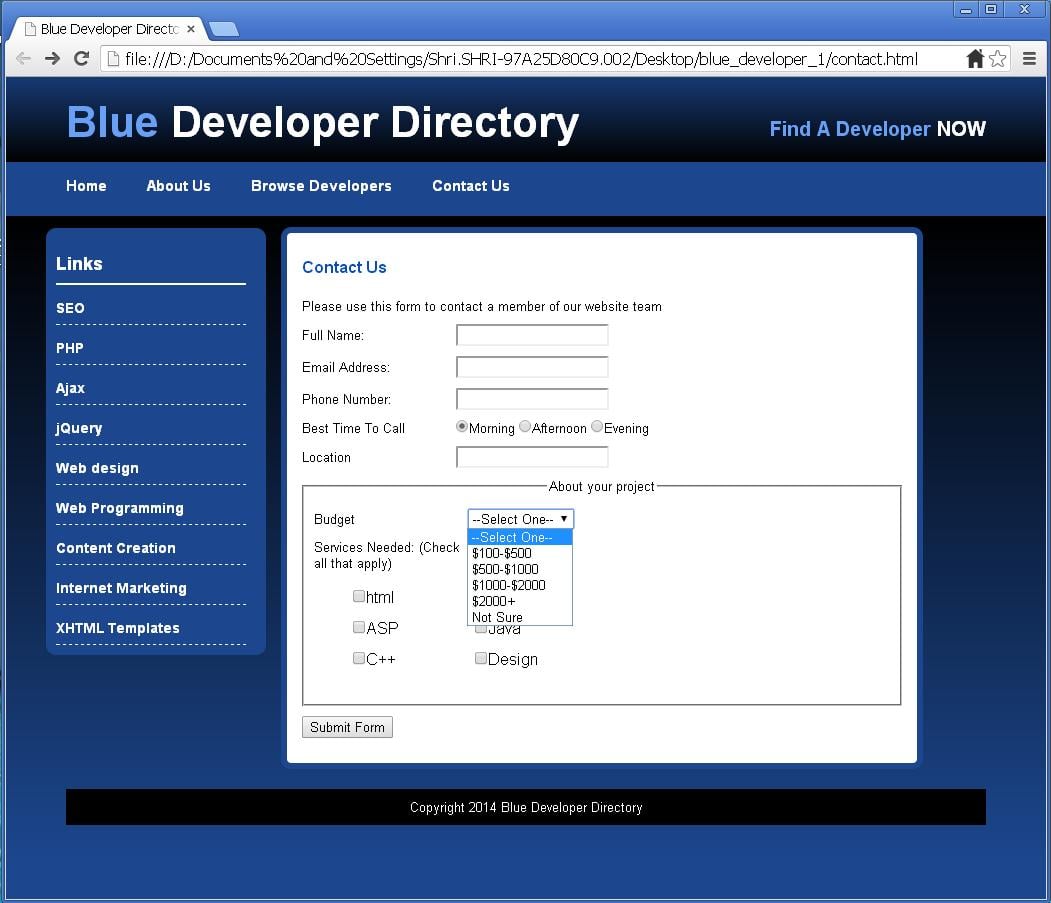
fig 7
<select type="list" name="budget">
  <option>--Select One--</option>
  <option value="100-500">$100-$500</option>
  <option value="500-1000">$500-$1000</option>
  <option value="1000-2000">$1000-$2000</option>
  <option value="2000+">$2000+</option>
  <option value="not sure">Not Sure</option>
</select>
<script type="text/javascript">
function updateTextInput(val)
{
   document.getElementById('textInput').value=val;
}
</script>
<input type="range" name="budget" min="500" max="10000" onchange="updateTextInput(this.value);">
<input type="text" id="textInput">
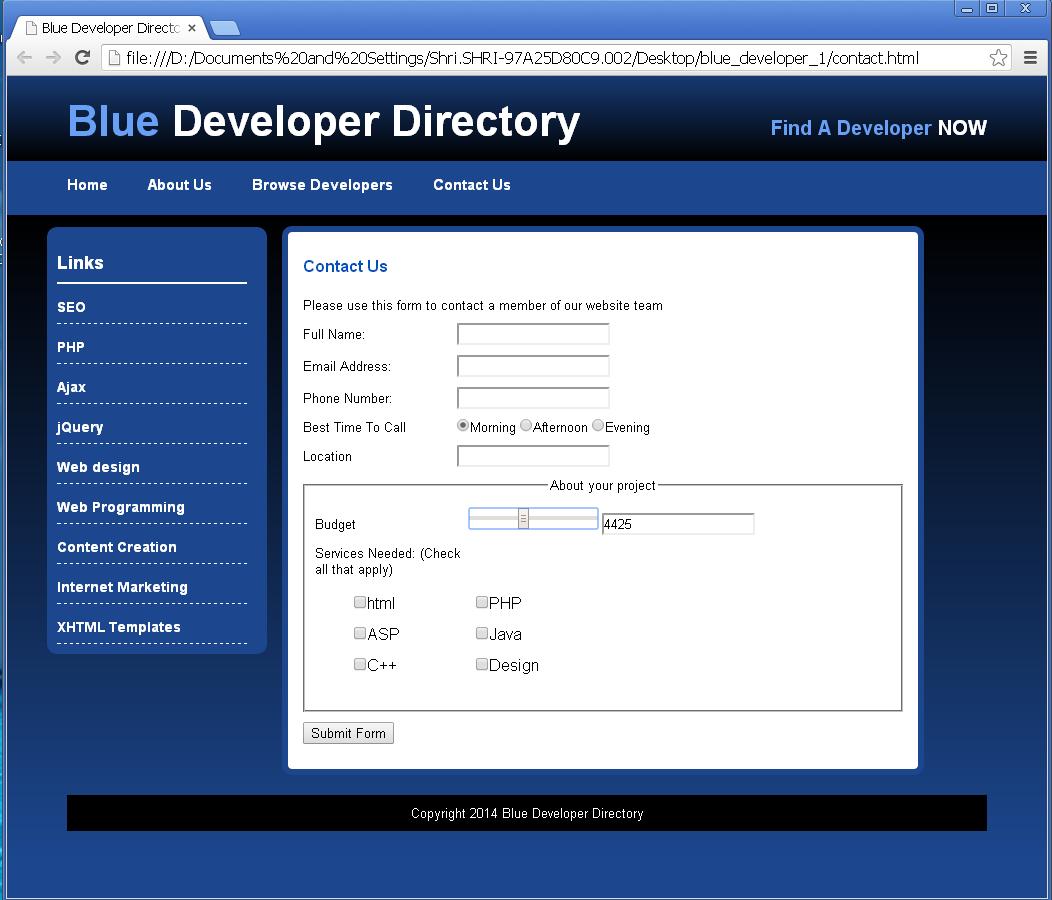
fig 8
<p>
   <label for"website">Current Website:</label>
   <input type="url" name="website">
 </p>
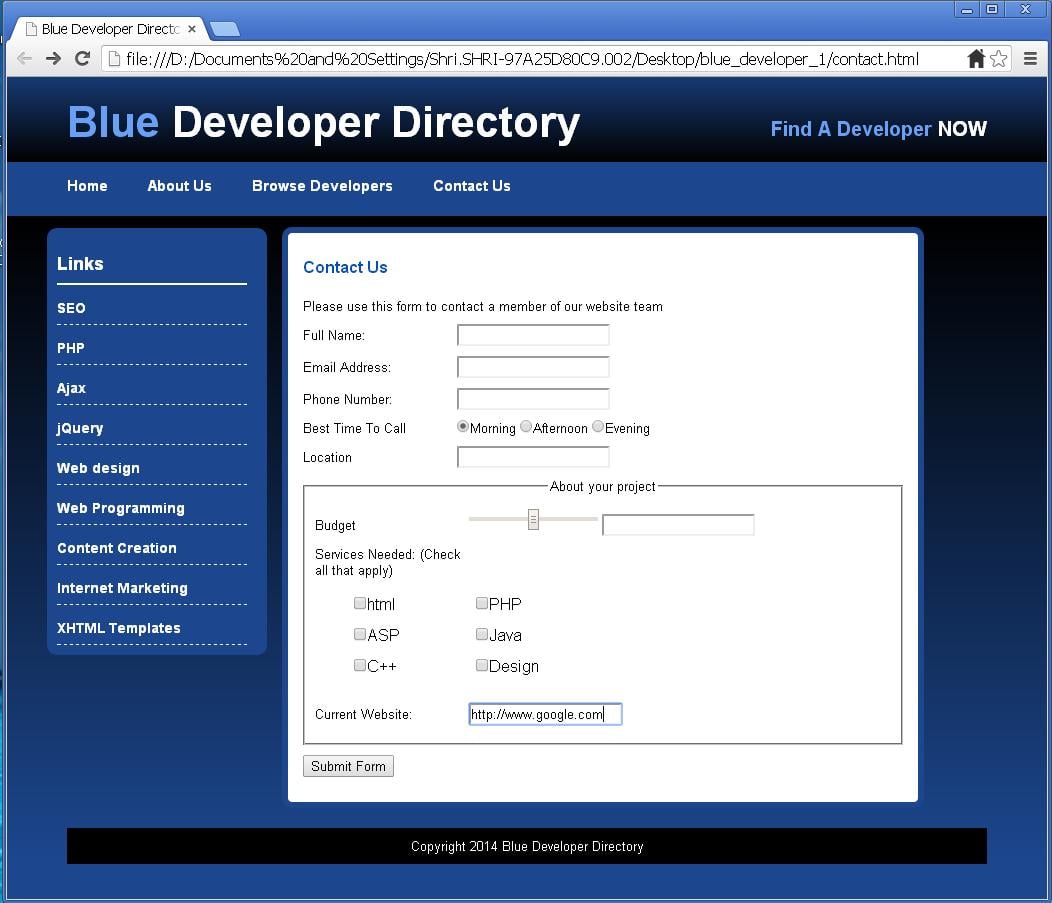
fig 9
<p>
  <label for="date">Start Date:</label>
 <input type="date" name="start">
</p>
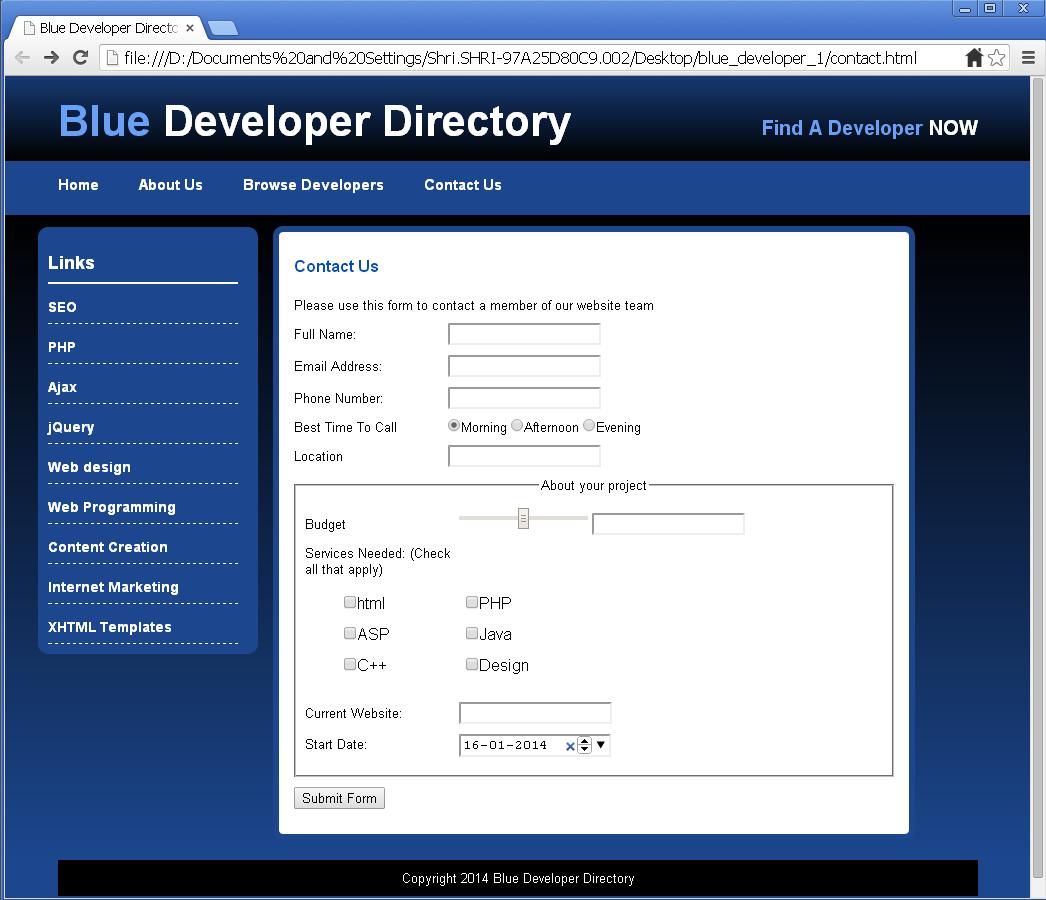
fig 10
<p>
 <label for"pages">Number of Pages:</label>
 <input type="number" name="pages">
</p>
T
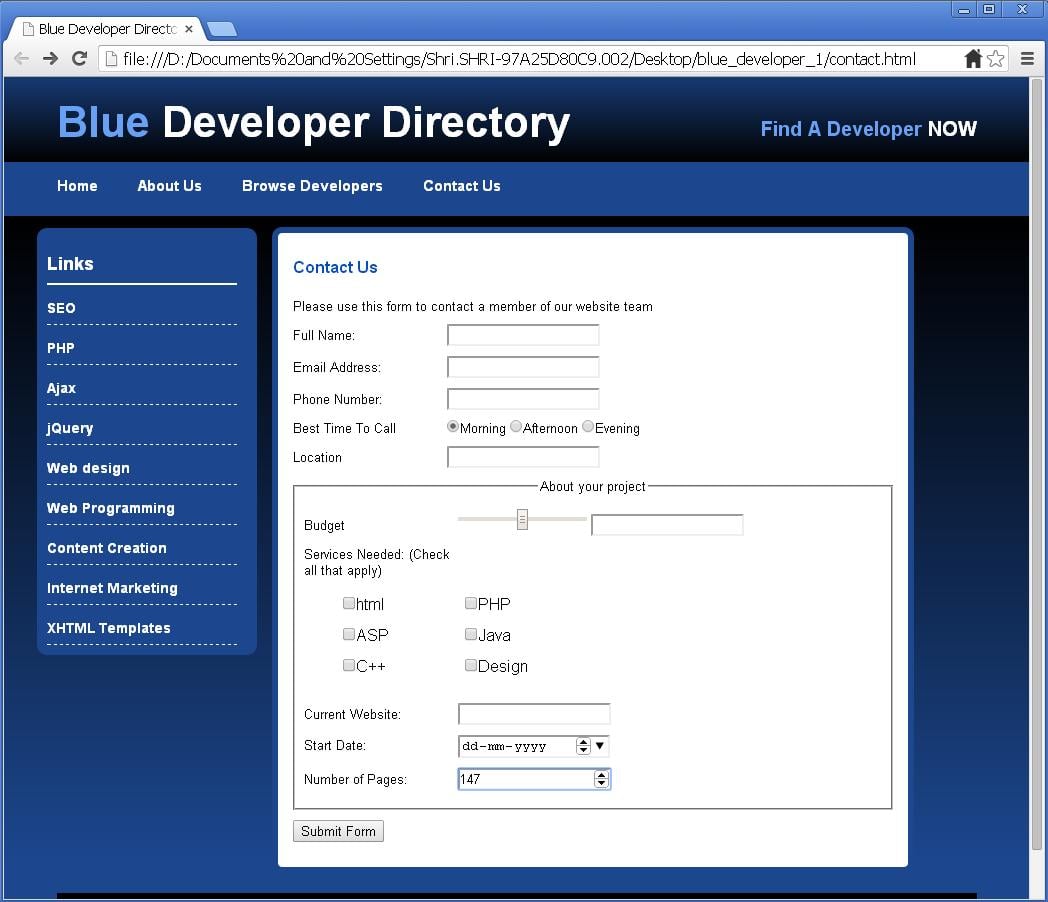
fig 11
<p>
 <label for"color">Main Website Color:</label>
 <input type="color" name="color">
</p>
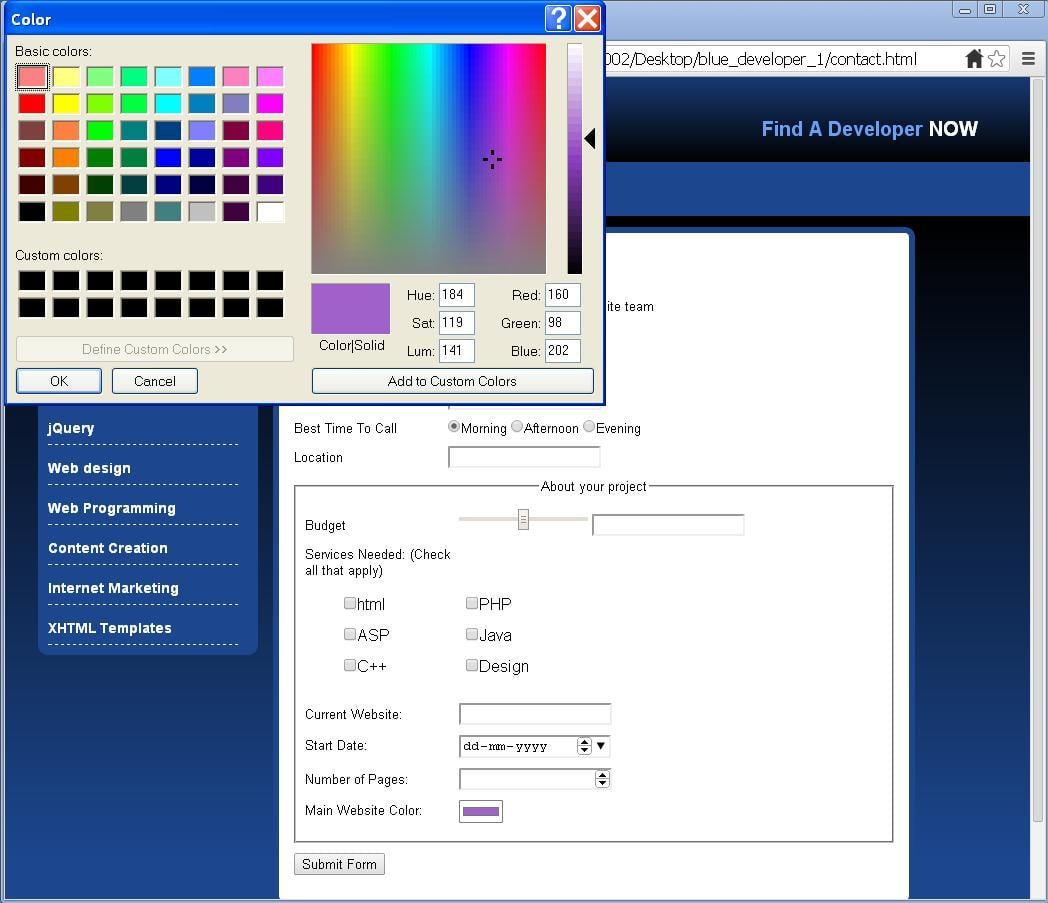
fig 12
In this way we finised using most of the different input elements and form elements.

