

To develop programs in Scala you have several integrated development environments (IDE) to choose from. Most mature options available are Eclipse and IntelliJ IDEA. In this tutorial we will demonstrate how to set up an Eclipse based environment. For Scala development there is an Eclipse based IDE called Scala IDE. This IDE comes bundled with most necessary components required for development. The lates IDE supports development of Scala version 2.10 and version 2.11 programs in the same environment. Earlier versions of the IDE required a separate installation to develop programs in each of the language versions.
Scala IDE supports development of pure Scala programs and programs that combine Java and Scala code. The IDE supports auto completion of code, incrementally compiling code, debugging, refactoring and source navigation.
To run Scala IDE you need at least JDK 1.6.0 installed. The commands below are used to install JDK version 1.8.0 on ubuntu.
sudo apt-get update
sudo apt-get install openjdk-8-jdk
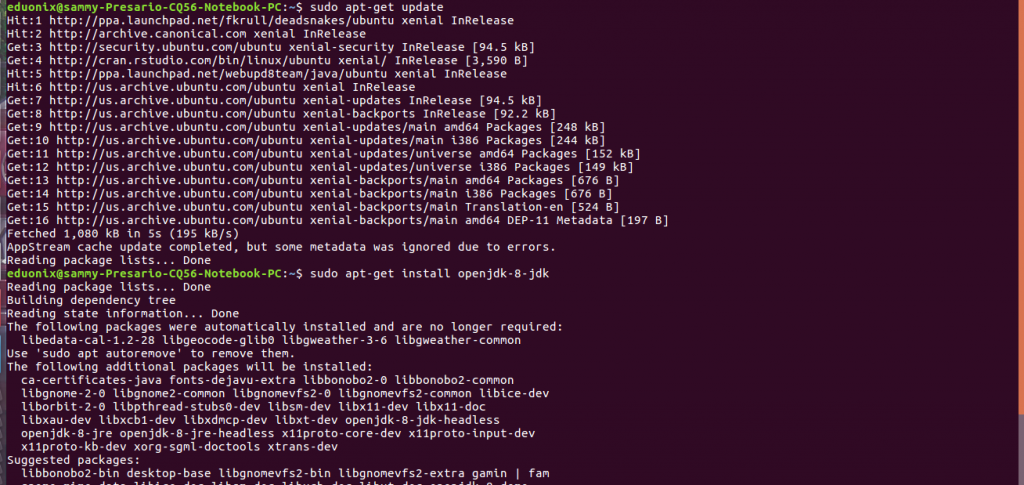
After JDK has been successfully installed you will get output similar to that shown below where there are no installation errors.
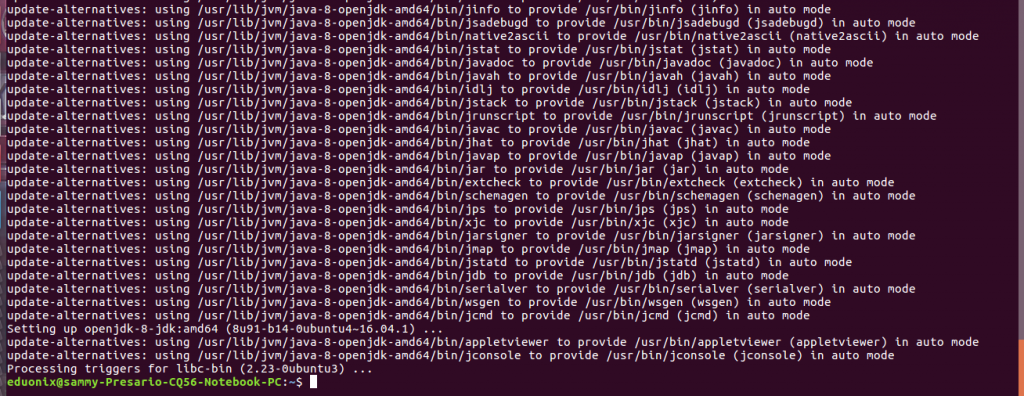
Once installation is complete test installation using this command java -version. If installation was okay you should get similar output to what is shown below.
![]()
The next step is to install eclipse. Download eclipse Mars from this link http://www.eclipse.org/downloads/packages/release/Mars/2. Create a directory where you would prefer to install eclipse, unpack the download and move it to its installation directory.
mkdir /usr/local/eclipse
cd ~/Downloads
sudo tar xzvf eclipse-java-mars-2-linux-gtk-x86_64.tar.gz
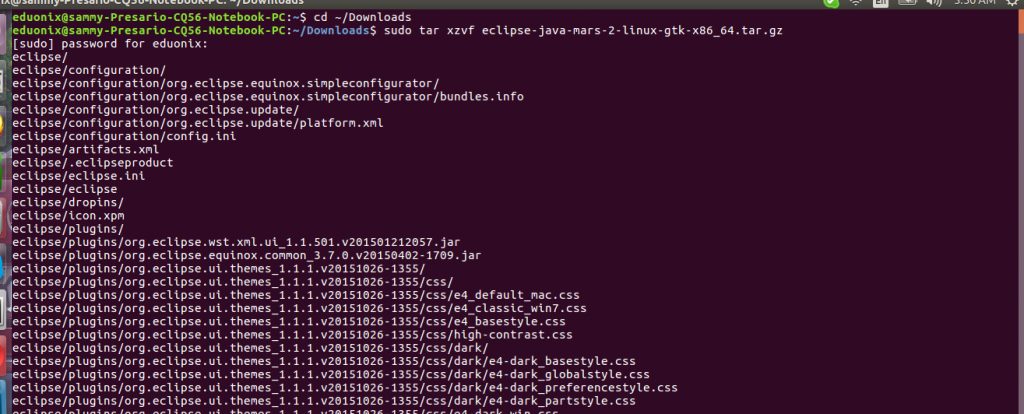
The Eclipse IDE will be unpacked into a directory named eclipse so move it to its installation directory. Change the ownership of the directory to the appropriate user.
sudo mv eclipse /usr/local/eclipse
sudo chown -R eduonix /usr/local/eclipse
Open the directory where eclipse was moved and double click on eclipse icon. You will be requested to specify a workspace directory that will be used to store projects.
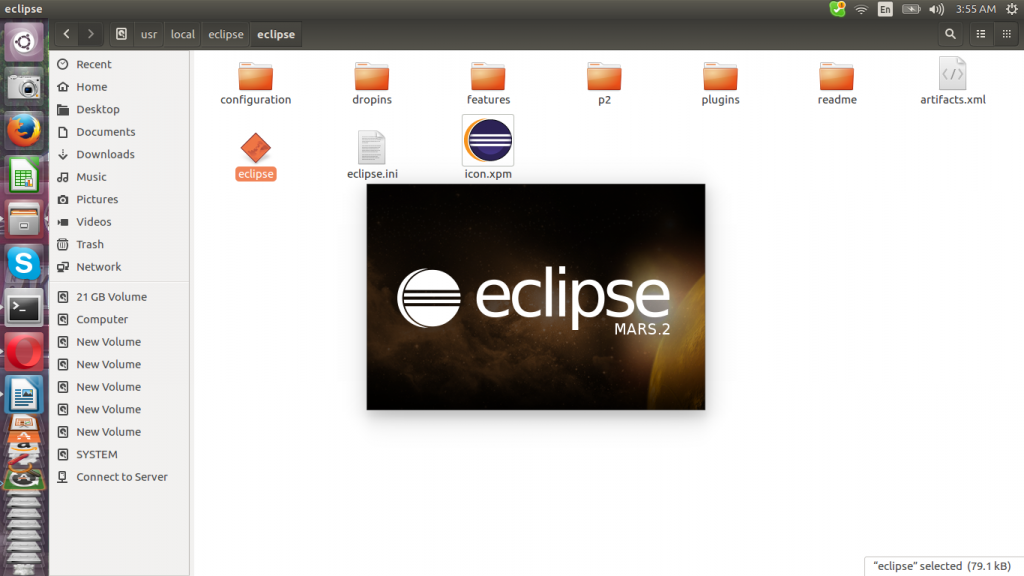
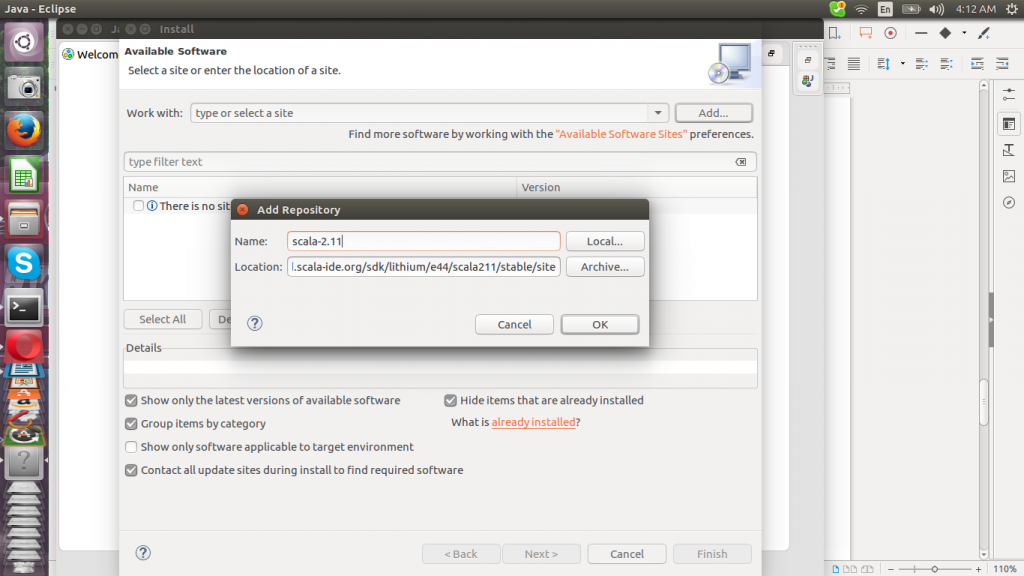
You will be led to Eclipse from where you can create your projects. Before we can begin developing Scala projects we need to install Scala IDE that is available as an Eclipse plugin and customize Eclipse for Scala. Within Eclipse click on help then install new software then click add from the pop up menu. Here we need to specify the site location that will be used to install Scala IDE. To use Scala 2.11. add scala-2.10 as the name and as the location then click OK. It is possible to use a different version of Scala by specifying its repository.
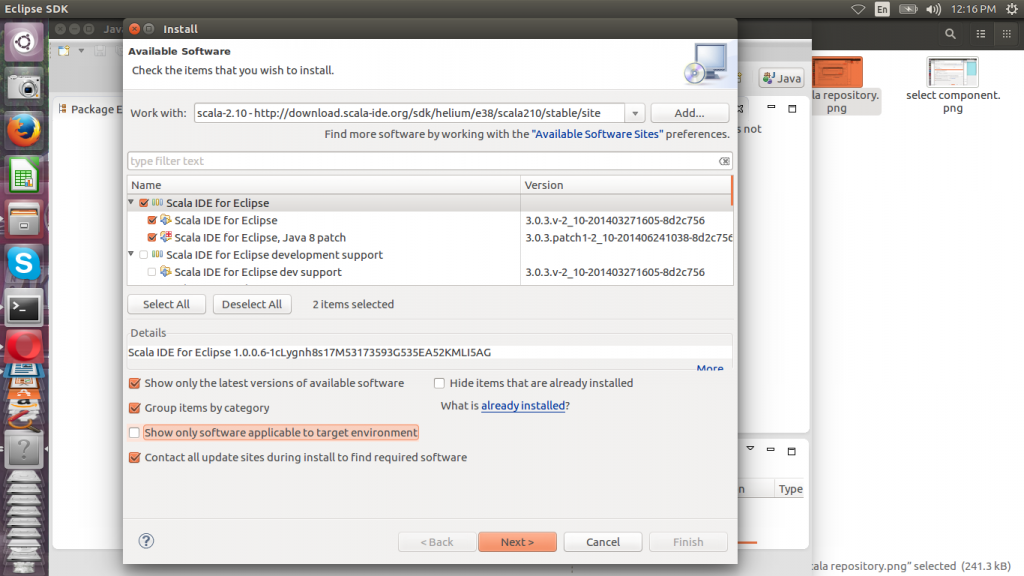
Select the Scala IDE for Eclipse component and click next to install it.
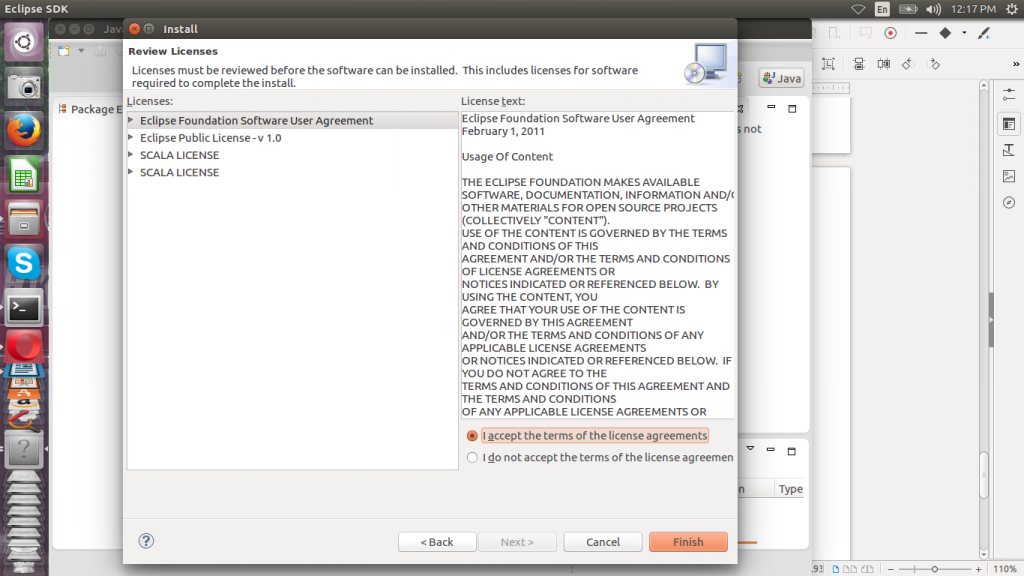
Accept license terms and click finish to install the Scala IDE plug-in. The installation process will take a while depending on your Internet connectivity speed.
If you have problems installing the IDE online download a zip version to your machine and install it from there. Extract the zipped file and and specify its path as the location for example /home/eduonix/Downloads/base
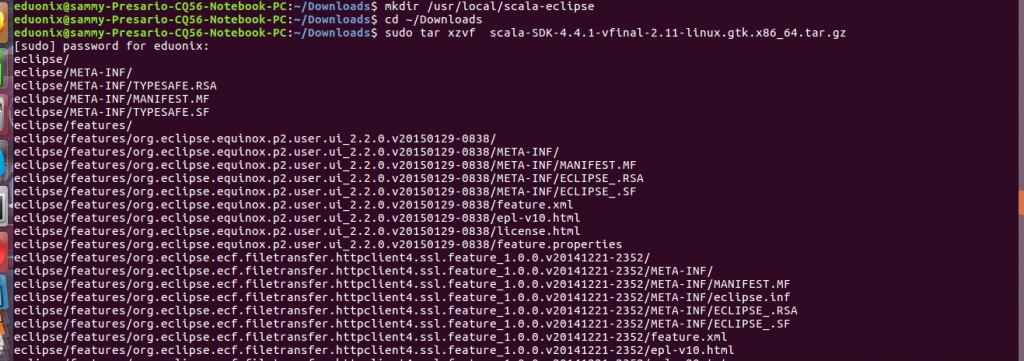
Another alternative is to download an eclipse IDE provided by Typesafe that comes preconfigured for Scala development. It is available for download at this link http://downloads.typesafe.com/scalaide-pack/4.4.1-vfinal-luna-211-20160504s/cala-SDK-4.4.1-vfinal-2.11-linux.gtk.x86_64.tar.gz. Extract the download, move it to a preferred directory and double click on eclipse to start the IDE.
mkdir /usr/local/scala-eclipse
cd ~/Downloads
sudo tar xzvf scala-SDK-4.4.1-vfinal-2.11-linux.gtk.x86_64.tar.gz
sudo mv eclipse /usr/local/scala-eclipse
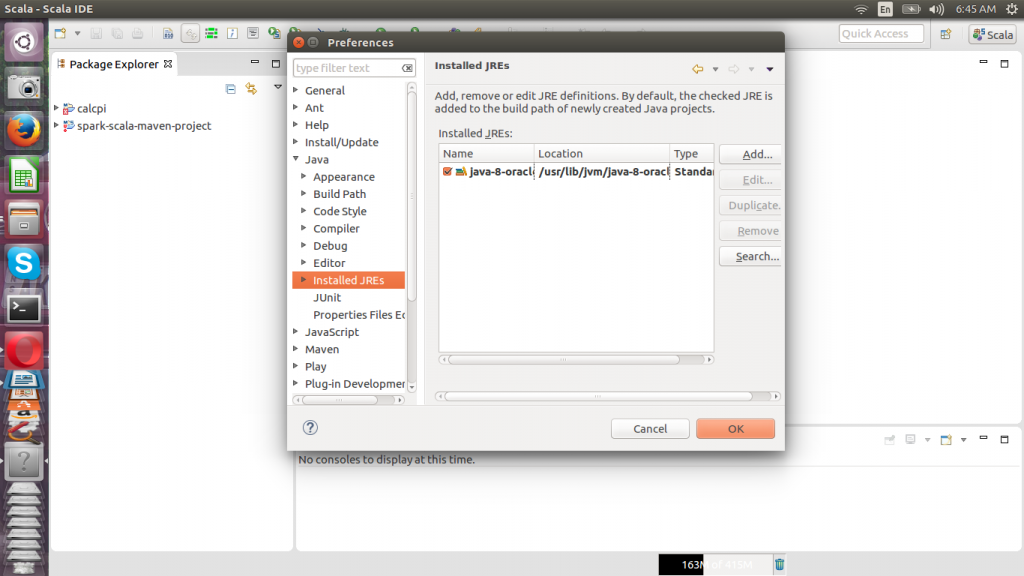
Before we can begin using the IDE for development we need to make sure it is using the correct JRE. Click on window, preferences, click on Java then select Installed JREs.
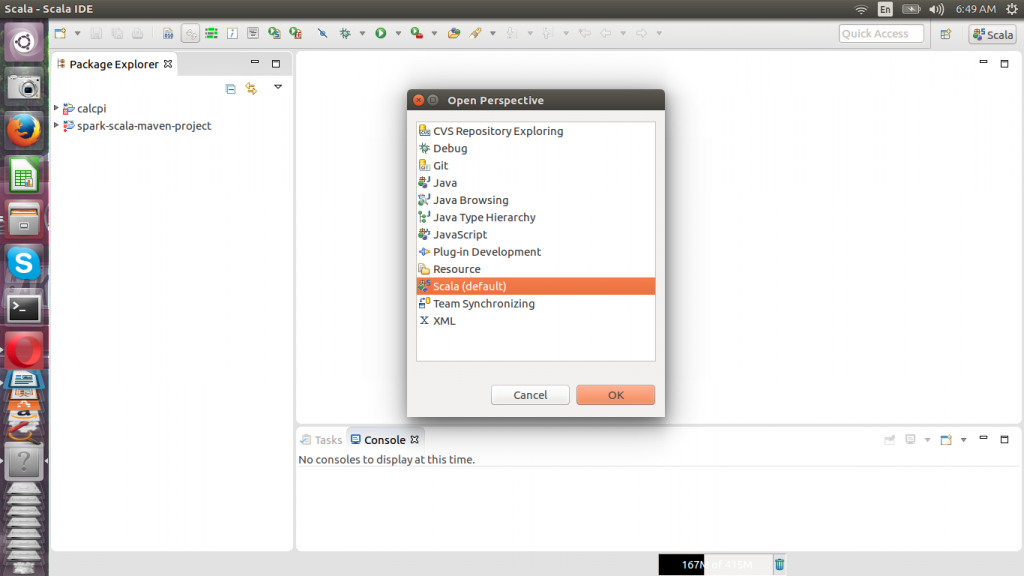
The final step before using the IDE is to customize it for Scala. Open the perspective and select Scala then click OK.
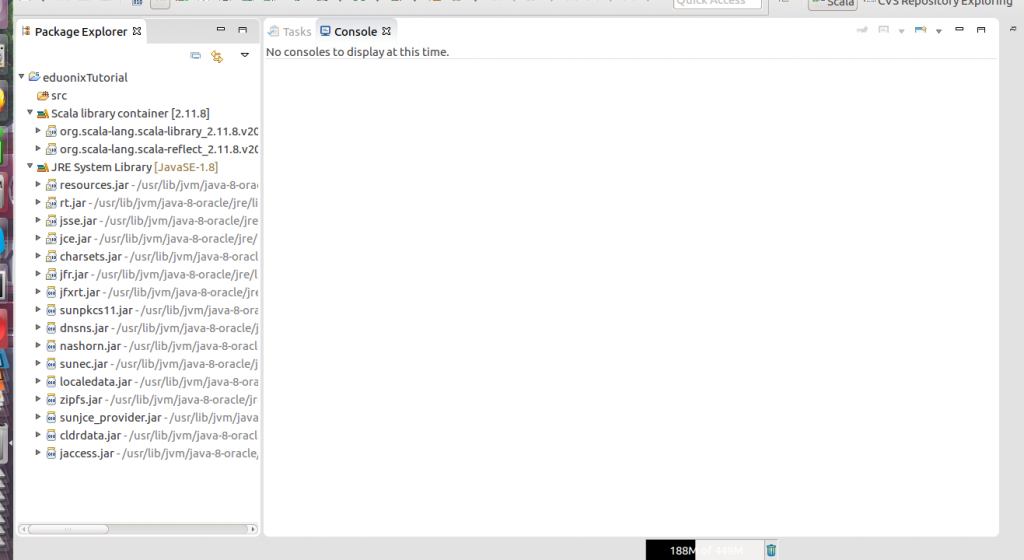
To create a new Scala project click on file menu, new then Scala project. Specify the name of the project and you can also change the location where the project will be created if you would not like it saved in workspace directory. You can also change the JRE version. Once you are satisfied with the settings click on finish to create your project. From the package explorer on the left you can explore the project structure. The src directory is used to store the Scala code we create. The other directories contain Java and Scala reference code.
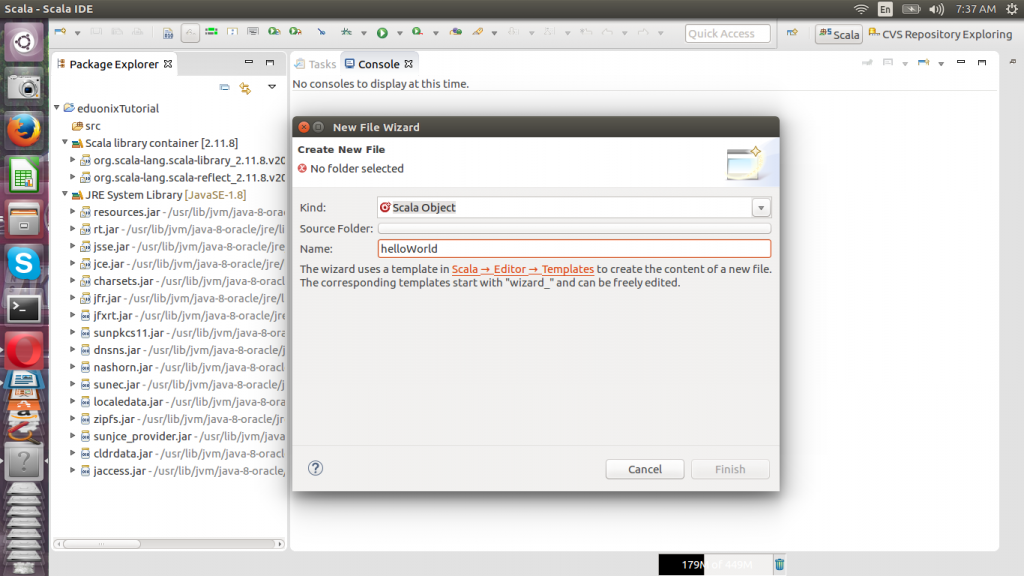
To create the Hello World program click of file menu, new then Scala object. Give it a name, specify a source folder and click finish
Once the object has been created add the code below to create a main method and print out the word Hello World. Save and run the application as a scala program. The output will be printed
def main(args: Array[String]): Unit = {
println("Hello, world!")
}

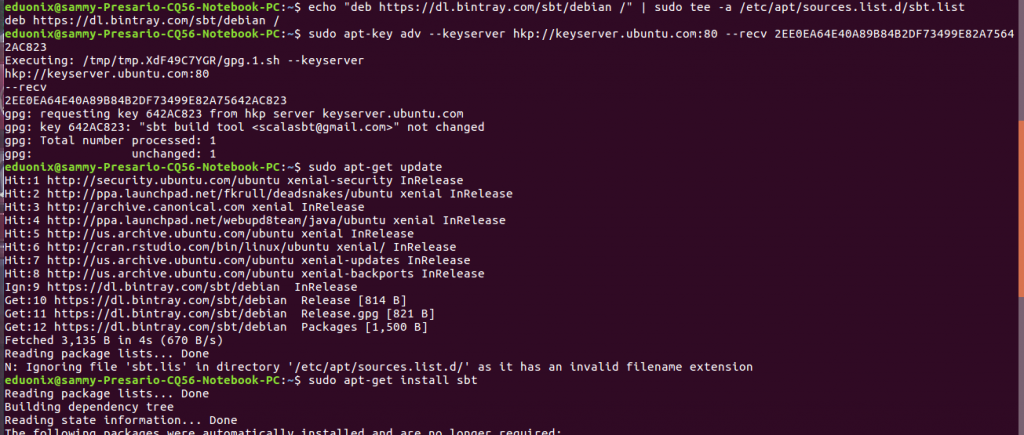
For Scala projects you can use Maven or sbt as your build system. The standard way to build projects in Scala is sbt. Some activities possible with this tool are compilation of source code, execution of tests, running and packaging code. It is possible to import both Maven and sbt projects and use them for Scala development in Eclipse. To import sbt projects you need to create sbt project and install sbteclipse. To install sbt on ubuntu use the commands shown below
echo "deb https://dl.bintray.com/sbt/debian /" | sudo tee -a /etc/apt/sources.list.d/sbt.list
sudo apt-key adv --keyserver hkp://keyserver.ubuntu.com:80 --recv 2EE0EA64E40A89B84B2DF73499E82A75642AC823
sudo apt-get update
sudo apt-get install sbt
The procedure of importing is to begin with a sbt project, add plugin to project definition file, use sbt to execute the eclipse command to create eclipse files then use the import wizard provided by eclipse. To install sbteclipse plugin
Download a dummy Scala project from http://scalatutorials.com/assets/files/scala-simple-sbt.zip. Open build.sbt and add the line below. To use a global definition file open the file using this command and add the line highlighted in green sudo gedit ~/.sbt/plugins/build.sbt
addSbtPlugin("com.typesafe.sbteclipse" % "sbteclipse-plugin" % "4.0.0")

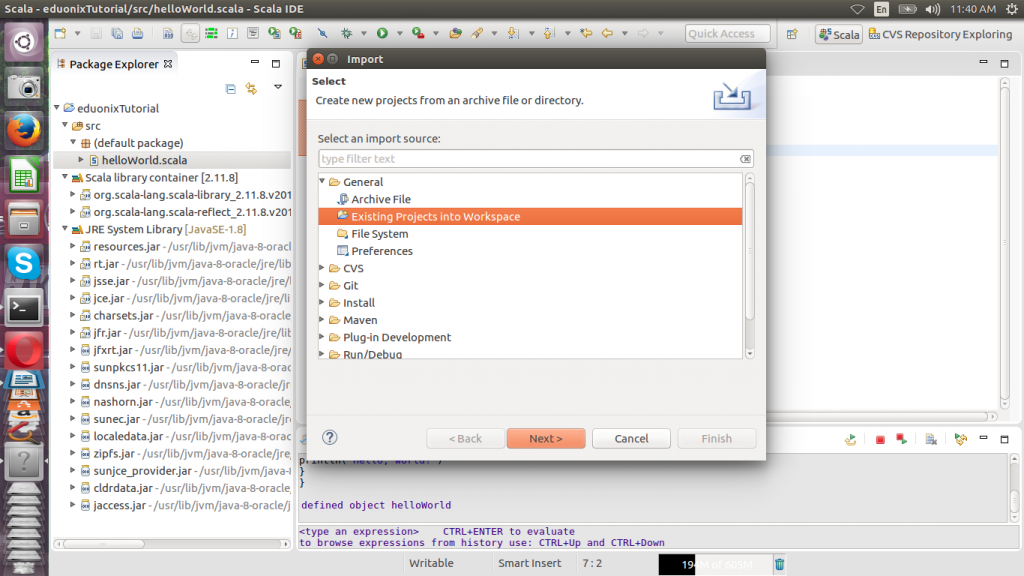
While in the project directory run sbt and use the eclipse command to create eclipse files. From eclipse click on file, import then existing projects into workspace and specify the directory containing the project.
This tutorial demonstrated available alternatives to set up a Scala development environment. Creating and running a basic hello world program was demonstrated. Installing sbt and JDK was also demonstrated. Adding global and project specific definitions for eclipse plugin was demonstrated. Finally creating a sbt project and importing it into Eclipse was discussed.

