

Due to the short life of containers, developers are faced with a huge challenge when migrating their applications from development to production environment. When a container dies or crashes any data associated with it is lost. To solve this problem of data loss, we need to use persistent disks (PD) which can also be referred as volumes. When we have a persistent volume that is external to a container we are able to maintain data in the event we have a container outage. Persistent volumes present an important advantage when working with a pod because we are able to share data between containers that exist in a common application stack and pod.
Before discussing the different ways in which persistent storage is implemented, it is important to understand the characteristics of persistent volumes. The first characteristic is the capacity of a persistent volume. To specify the capacity of a persistent volume, you use the capacity volume. As of this writing, capacity is the only attribute that can be set but there are plans to enable specification of other attributes like IOPS and throughput. The second characteristic of persistent volume is the access mode. The different types of persistent storage solutions have their different ways in which they can be accessed. The access modes are readwriteonce, readonlymany, and readwritemany.
In the first access mode, only one node can access the volume in read-write. In the second access mode, the volume can be accessed by multiple nodes in read mode. In the third access mode, multiple nodes can access the persistent volume in read-write. When using the command line interface the access modes are the same. However, it is important to note that even if a persistent volume has multiple access modes only one mode can be used at a time. A complete list of the different access modes supported by providers is available from the Kubernetes documentation here https://kubernetes.io/docs/user-guide/persistent-volumes/.
Docker natively supports the use of persistent volumes and the support for persistent volumes is even better in Kubernetes. In Kubernetes, volumes are linked to pods and the lifetime of volumes begins and ends with the lifetime of a pod. Another benefit of pods is that a pod can be linked to many volumes of different type. In the next section, we will discuss some of the types of volumes that can be linked to pods.
Temporary disks are a very simple way to implement persistence in the event a container crashes. Temporary disks are implemented using the emptydir volume. Temporary disks can be implemented on the storage volumes where the node is running or on RAM for improved performance. It is important to note that even though temporary disks offer some improvement in persistence, in the event a pod is removed then data loss happens. You should also note in the event of a reboot, any data you have stored on a RAM disk type, will be lost. A temporary disk solution would be appropriate when you need some temporary processing storage, after which the data will be sent to another container. Implementing a temporary disk is done by specifying a yaml file. An example of a yaml file is shown below.
apiVersion: v1
kind: Pod
metadata:
  name: test-pd
spec:
  containers:
  - image: gcr.io/google_containers/test-webserver
    name: test-container
    volumeMounts:
    - mountPath: /cache
      name: cache-volume
  volumes:
  - name: cache-volume
    emptyDir: {}
After specifying a yaml file, we need to use the execute and create commands to ensure the temporary volumes are created.
In the previous section, we discussed how temporary disks can be used for temporary data processing. In the next section, we will discuss solutions for persistent storage.
Use of cloud infrastructure has become an established business practice. Kubernetes offers native support for GCE persistent volume and AWS Elastic Block Store which are the solutions provided by Google and Amazon respectively. We will begin by demonstrating how to use GCE persistent volume then move to AWS Elastic Block Store.
The first step is to login to your GCE console. After logging in, click on compute then click on disks and then create a disk.
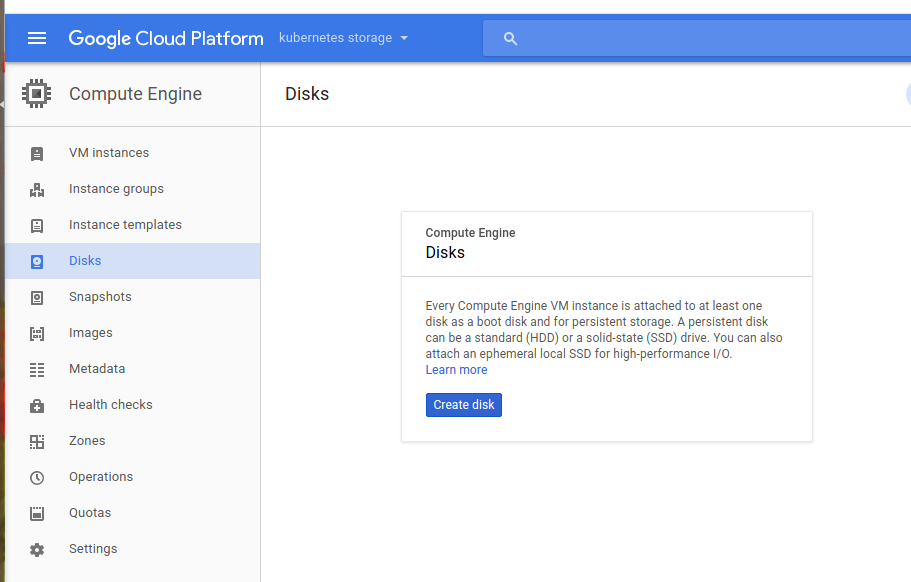
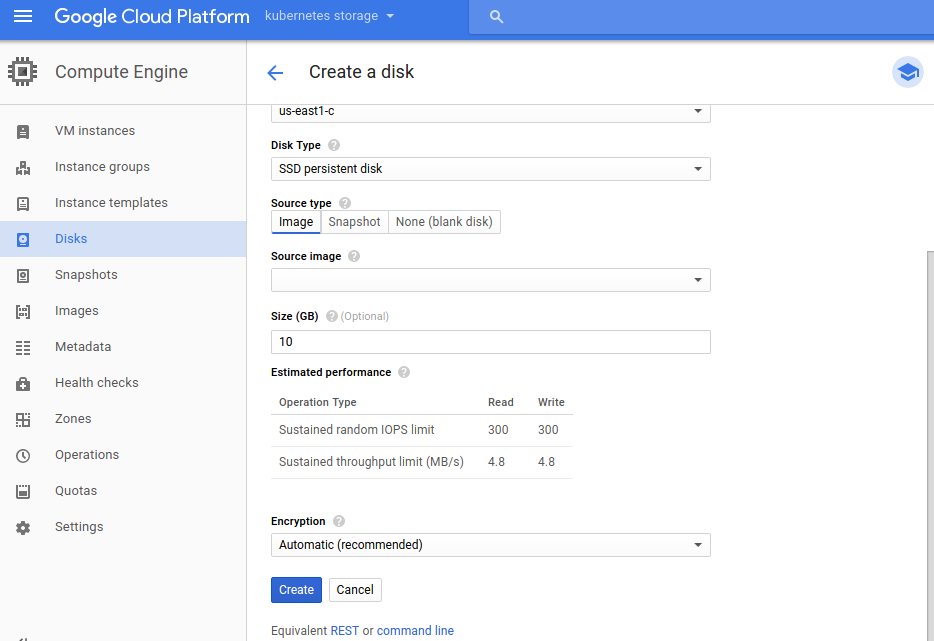
You will then be prompted to provide the disk parameters such as the disk name, disk description, the zone (note the zone should be the same as where your cluster nodes are), disk type, size, type of disk image (this is equivalent to the operating system you would like to use) and encryption. Provide the parameters and click on create.
Persistent volumes in GCE have the advantage of being mounted on multiple nodes but it can only be used in read mode. To further demonstrate the use of GCE, let us create a pod. Save the specification shown below into a yaml file.
apiVersion:	v1
kind:	Pod
metadata:
name:	test-gcespec:
containers:
-	image:	nginx:latest
	ports:
-	containerPort:	80
	name:	test-gce
volumeMounts:
 -	mountPath:	/usr/share/nginx/html
	name:	gce-pd
volumes:
-	name:	gce-pd
	gcePersistentDisk:
	pdName:	mysite-volume-1
	fsType:	ext4
AWS Elastic Block Store is used in a similar way to GCE. However with Elastic Block Store only one volume can be mounted to one instance during a certain period.
Two of the other persistent storage solutions that can be used are Network File Share (NFS) and gitrepo.
In this post, we noted the importance of a developer using persistent storage to avoid a situation where data loss happens when a container dies or crashes. We discussed characteristics of persistent volumes. We also discussed how temporary disks can be used and how GCE and Elastic Block store cloud solutions can be used. Finally, we talked about NFS and gitrepo as two other solutions that can be used to implement persistent storage.

