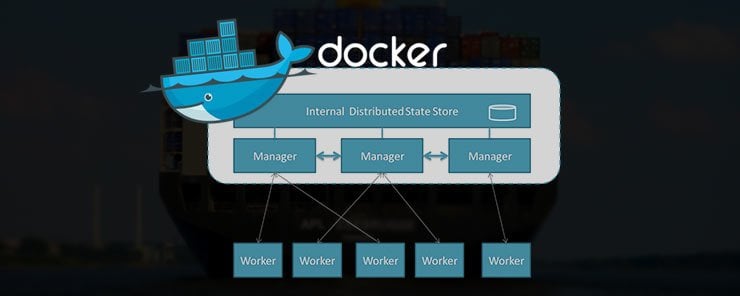
Docker swarm is the older solution for Docker’s cluster management. Docker swarm provides the tools to specify discovery services, manage containers and access the Docker engine via an API. In 2016, Swarmkit was released by the Docker development team as the new solution for cluster management. The Docker development team has not deprecated Docker swarm but it recommends the Docker swarm mode which relies on Swarmkit as the best approach for cluster management. The swarm name appears in both Docker swarm and Docker swarm mode, which are two different things. Here are the differences displayed in a tabular format:
| Docker swarm | Docker swarm mode |
| It needs to use an external KV store like consul or etcd | It does not require any external store |
| It is separate from the Docker engine therefore you can use it like an ordinary container | It exists within the Docker engine |
| It does not have a service model | It has a service model that offers capabilities such as load balancing, scaling and service discovery |
| It has machine and compose integration | It lacks machine and compose integration as of release 1.12, but they are planned for in future releases |
| It lacks secure communication | It provides secure communication |
From the comparison above, the benefits of Docker swarm mode over Docker swarm are clear.
Some of the features provided by Docker swarm mode are listed below:
A raft consensus algorithm is available to provide coordination and its decisions are proof from a single failure point.
There is no further effort required to make the node communication secure. It is already implemented. TLS is used to manage authentication, authorization and encryption. The issuing of certificates is automatic.
Swarmkit simplifies operation and reduces dependencies for example no external database is required.
In the Docker swarm tutorial, we discussed several concepts such as worker and manger nodes. Beginning with Docker release 1.12 new concepts have been introduced such as services. A service is a way of logically defining a swarm component. The Docker container and commands are held in a task. A task can be considered the smallest unit available for swarm scheduling.
To use the Docker Swarmkit, we need to install docker-machine and virtualbox on ubuntu. The section below shows how to set up the two.
On ubuntu, you need to install docker machine using the command below which downloads and extracts docker machine
curl -L `uname -s`-`uname -m` >/usr/local/bin/docker-machine && \
chmod +x /usr/local/bin/docker-machine

Check the docker-machine version you are running to confirm that the installation was successful.
docker-machine version
![]()
We also need to install Virtualbox using the command below
sudo sh -c "echo 'deb http://download.virtualbox.org/virtualbox/debian '$(lsb_release -cs)' contrib non-free' > /etc/apt/sources.list.d/virtualbox.list" && wget -q http://download.virtualbox.org/virtualbox/debian/oracle_vbox.asc -O- | sudo apt-key add - && sudo apt-get update && sudo apt-get install virtualbox-5.0
To demonstrate how to set up a swarm cluster, we will begin by creating five nodes that will make up our cluster. The commands below show how to create the nodes.
sudo docker-machine create -d virtualbox node1
sudo docker-machine create -d virtualbox node2
sudo docker-machine create -d virtualbox node3
sudo docker-machine create -d virtualbox node4
sudo docker-machine create -d virtualbox node5
After creating the nodes, we can check the operation was successful by returning a list using the command below.
sudo docker-machine ls
After creating our five nodes, we can begin by tunneling via ssh into the first node and checking that Docker is installed. The commands below accomplish that.
sudo docker-machine ssh node1
sudo docker info

The virtual box nodes have a lightweight Linux and Docker but docker-compose is not installed. This is not a big challenge because an image is available to set up docker-compose as an alternative to directly installing docker-compose. The command below installs docker-compose.
sudo docker pull docker/compose:1.8.0

Beginning with Docker version 1.12, you can use the classical or swarm mode. Swarm mode is the new way that enables use of the swarm kit while the classical mode provides a way of running the old Docker swarm. On node 1, we use the command below to start a swarm.
Sudo docker swarm init --advertise-addr [ip-address]
In the command above, we need to substitute the ip adress of node 1.
After creating a swarm we are ready to join worker and manager nodes. The commands below are used to join worker and manager nodes respectively. Once executed, they will return the command to perform the join.
docker swarm join-token worker
docker swarm join-token manager
To create the manager node, open another terminal, tunnel via ssh and execute the manager command. This process needs to be repeated for the remaining nodes.
Working with Docker requires a registry. Depending on your needs you can store public or private images on Docker Hub. When Docker Hub does not meet your needs you can run a private registry.
Earlier we noted that Swarmkit has a model that offers capabilities such as scaling and load balancing which are not available in Docker swarm. An example of creating a service is shown below.
docker service create --name Web --publish 80:80 --replicas=3 nginx:latest
The command above will create three instances of Nginx.
Scaling up and down with services becomes very easy. The commands below show how we can scale up by 5 or scale down by 2 instances.
docker service update Web --replicas 5
docker service update Web --replicas 2
In this tutorial, we the introduced Docker Swarmkit as the new way of running a cluster. We discussed the differences between Docker Swarmkit and Docker Swarm. We noted that Swarmkit is the recommended approach but Docker Swarm has not yet been deprecated. We discussed how to install docker-machine, virtualbox and docker-compose. Finally, we explained how to initialize a cluster and connect the different nodes.


