

SSH is the secure shell protocol used to access the remote Linux system. It is often used by the system administrator to manage the remote system from the terminal. So securing your SSH server is essential for any system administrator. It is a great idea to add another security layer to the SSH that’s called two factor authentication.
Two factor authentication is a method of confirming your security identity using the authentication method. There are multiple types of two factor authentication devices available. Here, we will use Google Authenticator’s time-based, one-time password authentication system to protect the SSH server.
In this tutorial, we will show you step by step instructions on setting up two factor authentication on the SSH server.
Prerequisite
- A server running Ubuntu 20.04 with OpenSSH installed.
- A Google Authenticator app installed on your smartphone or tablet.
Getting Started
Before starting, update your system to the latest version using the following command:
apt-get update -y
Next, verify the SSH server is installed and running with the following command:
systemctl status ssh
You should get the following output:
ssh.service - OpenBSD Secure Shell server

     Loaded: loaded (/lib/systemd/system/ssh.service; enabled; vendor preset: enabled)

     Active: active (running) since Sat 2021-02-20 04:55:03 UTC; 51s ago

       Docs: man:sshd(8)

             man:sshd_config(5)

    Process: 608 ExecStartPre=/usr/sbin/sshd -t (code=exited, status=0/SUCCESS)

   Main PID: 609 (sshd)

      Tasks: 1 (limit: 2353)

     Memory: 3.7M

     CGroup: /system.slice/ssh.service

             └─609 sshd: /usr/sbin/sshd -D [listener] 0 of 10-100 startups


Feb 20 04:55:03 ubuntu systemd[1]: Starting OpenBSD Secure Shell server...

Feb 20 04:55:03 ubuntu sshd[609]: Server listening on 0.0.0.0 port 22.

Feb 20 04:55:03 ubuntu sshd[609]: Server listening on :: port 22.

Feb 20 04:55:03 ubuntu systemd[1]: Started OpenBSD Secure Shell server.

Feb 20 04:55:47 ubuntu sshd[628]: Accepted password for root from 106.213.218.178 port 61152 ssh2

Feb 20 04:55:47 ubuntu sshd[628]: pam_unix(sshd:session): session opened for user root by (uid=0)
At this point, the SSH server is installed and running in your system. You can now proceed to the next step.
Install Google Authenticator Package
First, you will need to install the Google Authenticator PAM module in your SSH server. By default, this module it included in the Ubuntu default repository. You can install it by just running the following command:
apt-get install libpam-google-authenticator -y
Once the package is installed successfully, you can proceed to the next step.
Configure Google Authenticator
Next, open your terminal and run the google-authenticator as shown below:
google-authenticator
You will be asked to authentication tokens to be time-based as shown below:
Do you want authentication tokens to be time-based (y/n) y

Warning: pasting the following URL into your browser exposes the OTP secret to Google:

  https://www.google.com/chart?chs=200x200&chld=M|0&cht=qr&chl=otpauth://totp/root@ubuntu%3Fsecret%3DEX2K33D3T3FZ2SQ2LX66QZ3PSQ%26issuer%3Dubuntu
Press Y and hit Enter. You should see the QR code on the terminal screen: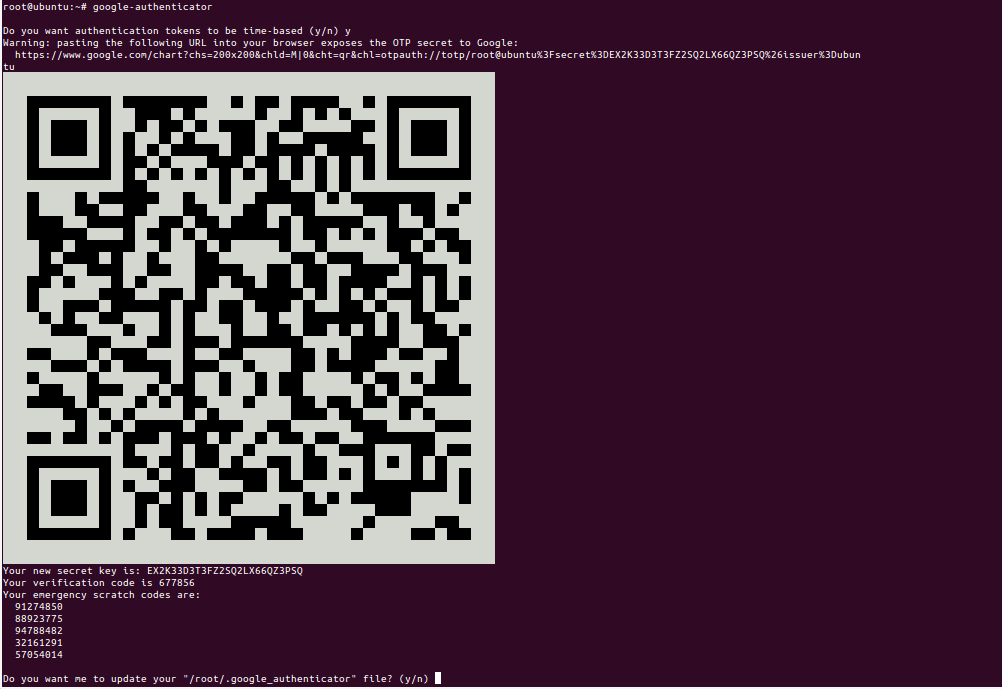 Now, open the Google Authenticator app on your mobile phone and scan the QR code. You should get the six-digit code on your mobile screen:
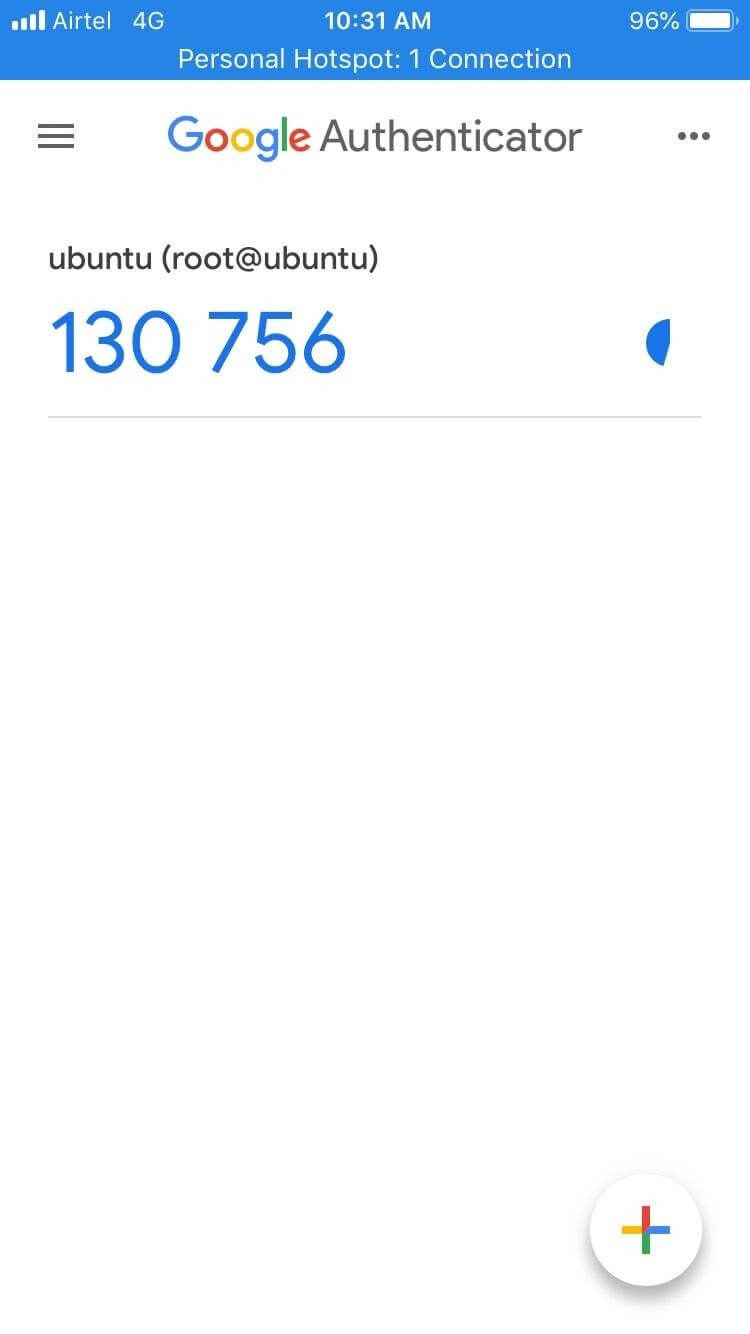 The above code will be valid for 30 seconds after that next code will be generated automatically.
Next, answer all questions as shown below to configure the Google authenticator:
Your new secret key is: EX2K33D3T3FZ2SQ2LX66QZ3PSQ

Your verification code is 677856

Your emergency scratch codes are:

  91274850

  88923775

  94788482

  32161291

  57054014


Do you want me to update your "/root/.google_authenticator" file? (y/n) y


Do you want to disallow multiple uses of the same authentication

token? This restricts you to one login about every 30s, but it increases

your chances to notice or even prevent man-in-the-middle attacks (y/n) y


By default, a new token is generated every 30 seconds by the mobile app.

In order to compensate for possible time-skew between the client and the server,

we allow an extra token before and after the current time. This allows for a

time skew of up to 30 seconds between authentication server and client. If you

experience problems with poor time synchronization, you can increase the window

from its default size of 3 permitted codes (one previous code, the current

code, the next code) to 17 permitted codes (the 8 previous codes, the current

code, and the 8 next codes). This will permit for a time skew of up to 4 minutes

between client and server.

Do you want to do so? (y/n) y


If the computer that you are logging into isn't hardened against brute-force

login attempts, you can enable rate-limiting for the authentication module.

By default, this limits attackers to no more than 3 login attempts every 30s.

Do you want to enable rate-limiting? (y/n) y
Enable Google Authenticator on SSH
Next, you will need to enable the Google authenticator on the SSH server. You can do it by editing the SSH default configuration file:
nano /etc/ssh/sshd_config
Change the following lines:
UsePAM yes

 ChallengeResponseAuthentication yes
Save and close the file when you are finished. Then, restart the SSH service to apply the configuration changes:
systemctl restart ssh
Next, you will also need to define the Google authenticator in /etc/pam.d/sshd file:
nano /etc/pam.d/sshd
Add the following line below the line “@include common-auth”:
auth required pam_google_authenticator.so
Verify SSH Two Factor Authentication
At this point, your SSH server is secured with two factor authentication. You can now test it from the remote Linux system.
On the remote Linux system, open your terminal and connect to your SSH server with the following command:
ssh root@your-ssh-server-ip
You will be asked to provide system password and Google authenticator code generated in the mobile phone as shown below:
Password:

Verification code:
Provide your SSH server root password, and the six-digit code shown in your mobile phone to connect to the SSH server. Once you are connected, you should get the following output:
Welcome to Ubuntu 20.04 LTS (GNU/Linux 5.4.0-29-generic x86_64)

 * Documentation:  https://help.ubuntu.com

 * Management:     https://landscape.canonical.com

 * Support:        https://ubuntu.com/advantage

Last login: Sat Feb 20 04:55:48 2021 from your-ssh-server-ip
Conclusion
In the above guide, you learned how to protect your SSH server with two factor authentication. Your server is now protected with an additional layer of security.
Also Read: Best JavaScript IDEs and Code Editors To Use In 2021

