The Private Group
When a user is added in your Red hat Linux system, a private group having the same name as the user is automatically created, with only one member in it: the user just added.
Consequently, we could expect a new group has been created with name omer, which is the name of the user we have created in the previous article:

As you see: a group with name omer has been added.
If you refer to the /etc/passwd file:

You should notice the 501 in the 4th field. This is the group ID of the primary (I said primary not private) group for that user. In this case, the user omer has been created with:
-
UID 501.
-
A private group with the same name omer added automatically.
-
Being the only member of that private group.
-
Has this new private group set as its primary group.
|
Note: – Don’t confuse primary group with private group. They are different terms. We will discuss primary groups shortly. |
Using the GUI Tool
To start the system-config-users GUI tool, go to the System menu Administration Users and Groups.
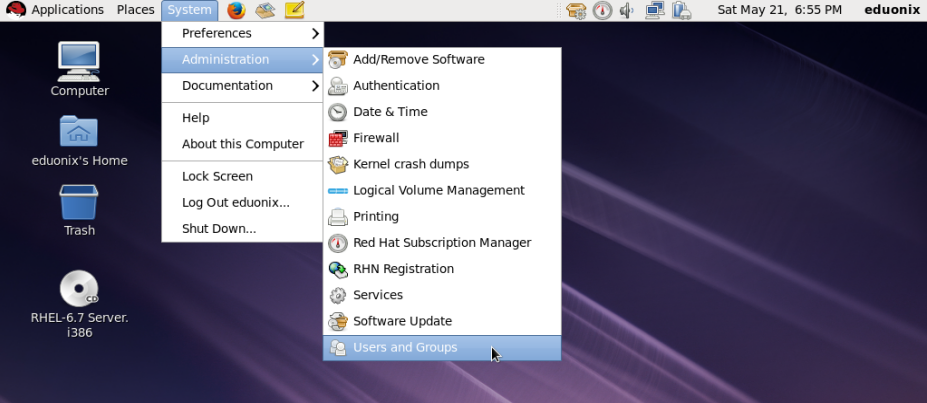
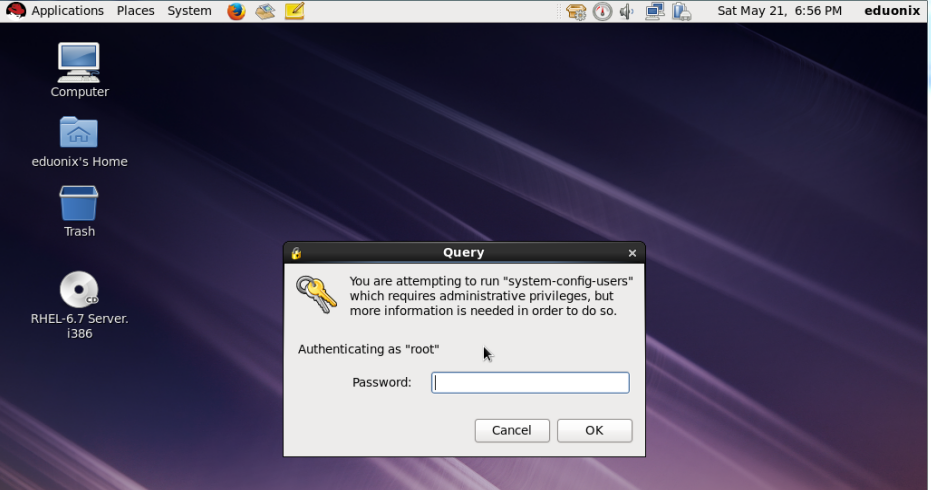
You will be asked to type the root password to authenticate:
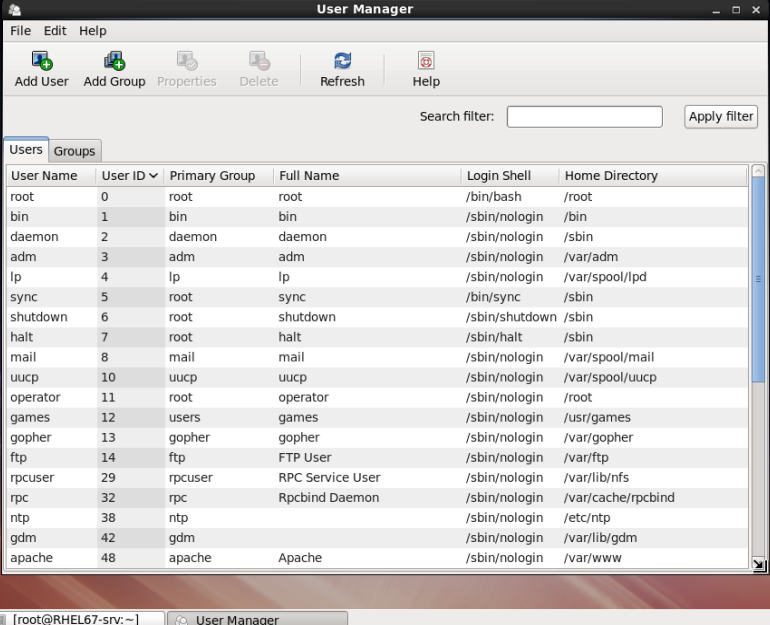
The User Manager application window is open:
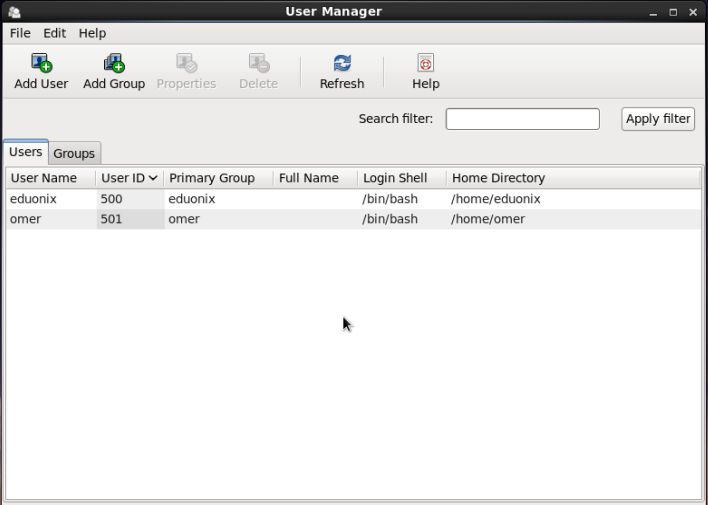
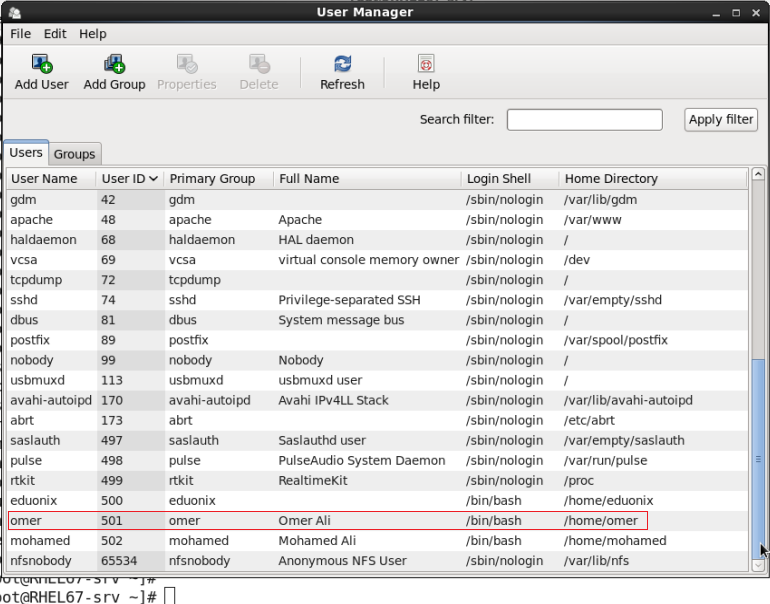
There are two main tabs: Users and Groups. The Users tab shows by default the user-created accounts only. In our case, two user accounts shown: eduonix and omer.
Next to each user displayed, the basic information of the user are listed: UID, Primary Group, Full Name, Home Directory, and the startup program.

To display all users including system users, click the Edit menu Preferences.
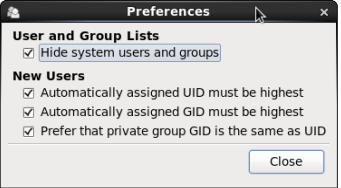
In the open dialog, uncheck the “Hide system users and groups” check box. Now, all existing users should be displayed:
Adding New Users
To create a new user, click the Add User button in the toolbar.

The Add New User dialog is open:
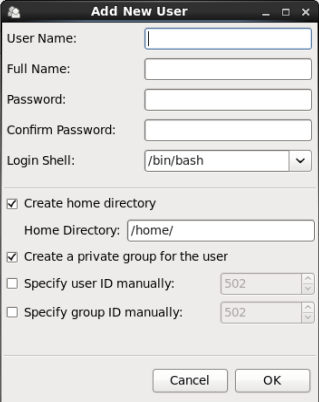
Fill in the dialog as follows:
-
In the User Name textbox, type mohamed.
-
In the Full Name textbox, type Mohamed Ali.
-
In the Password textbox, type a password and confirm it in the Confirm Password textbox.
-
Leave the remaining textboxes as they are to accept the default settings.
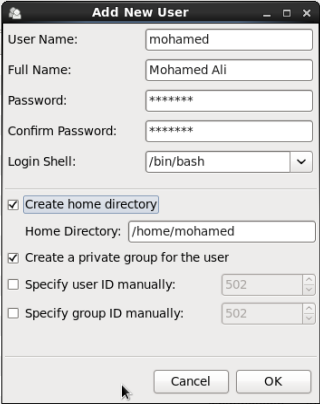
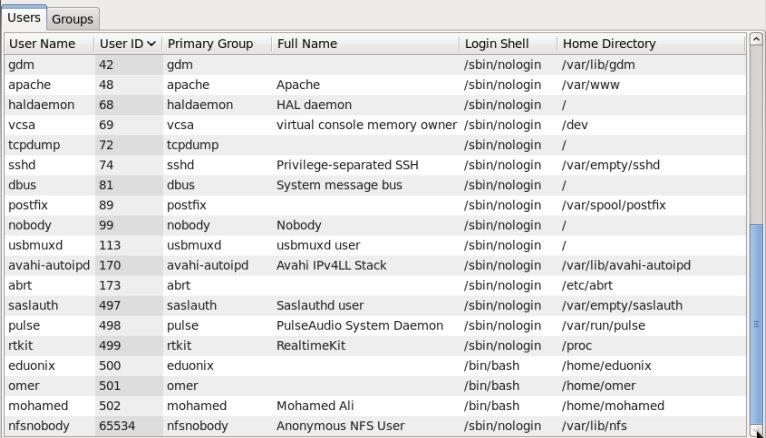
When finished, click OK. The user is created and listed in the users’ list with UID 502.
As you may guess, what we have did using the User Manager tool should be reflected in the /etc/passwd, /etc/shadow, and /etc/group files:


Modifying Users
As we have already opened the User Manager, let’s see how to edit an existing user’s attributes using the GUI tool. To modify an existing user’s properties, select the user, then click the Properties button in the toolbar.
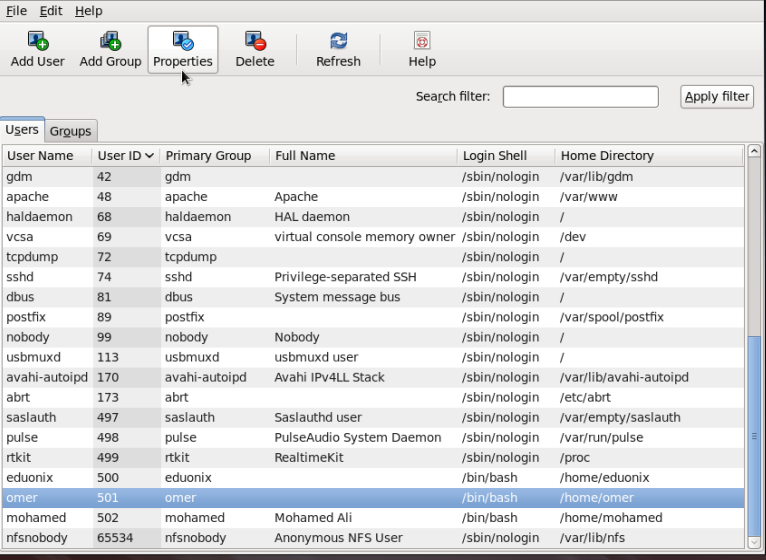
This will open the User Properties dialog box.
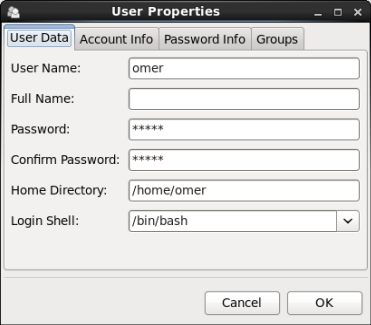
As you could notice, there are four tabs with names: User Data, Account Info, Password Info, and Groups. The User Data tab displays the textboxes for editing the basic user properties, and changing its password as well. From this tab the administrator could:
-
Change the username itself.
-
Edit the Full name property for this account.
-
Change the user’s password.
-
Change the user’s home directory.
-
Select another login shell from the dropdown box.
For example, change the username to Amr instead of omer, and edit the Full Name field to be Amr Ibrahim, and leave the remaining properties as they are:
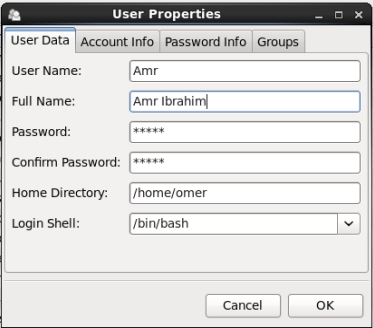
Click OK to apply the changes.
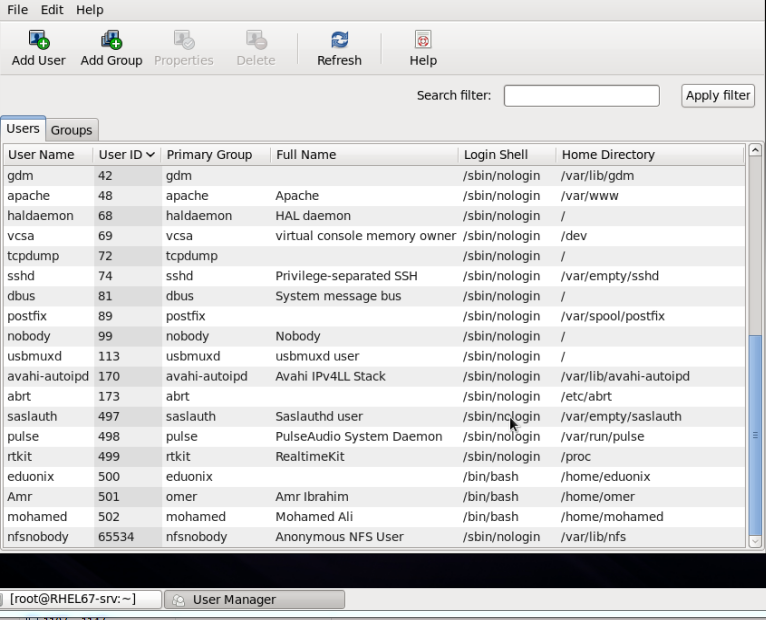
As you see, the username has been changed to Amr, and a full name attribute has been set to Amr Ibrahim. On the other hand, the private group is still omer, and so the home directory /home/omer.
The change this time affects the /etc/passwd and /etc/shadow files:

Modifying Users using CLI
To modify a user account, use the usermod command.
Syntax
usermod [OPTIONs] USERNAME
Where the OPTIONs could be any one or combination of the following:
|
-c COMMENT |
sets or changes the full name attribute. |
|
-d HOME_DIR |
modifies the home directory of the user to HOME_DIR. |
|
-l NEWUSERNAME |
modifies the username to NEWUSERNAME. |
|
-L |
locks the user’s password. |
|
-s SHELL |
modifies the startup shell for this user. |
|
-u NEWUID |
modifies the UID of this user. |
|
-U |
unlocks the user. |
Example
To change the username Amr back to omer, and set the full name attribute for it:
![]()
If you check the contents of the /etc/passwd file, you should see the change:

This also should be reflected in the GUI:
Example
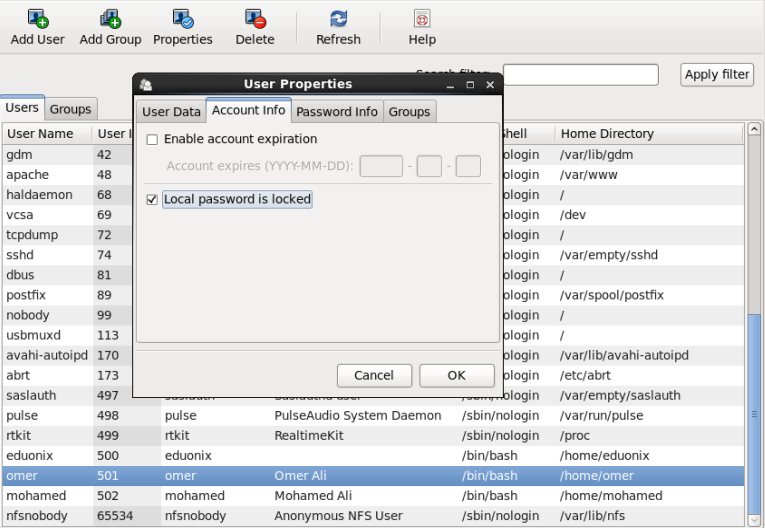
Your colleague Omer will be on a scholarship for 3 months. Security rules recommend that the user account for an employee who will be on a long vacation or training course should be disabled (locked). So, your manager asked you to lock the password for omer’s account.
To achieve this using the GUI tool, select the user and click the Properties button. Select the Account Info tab, then check the “Local password is locked”. When finished, click OK.
If you are going to do it using the usermod command, use the following command:
![]()
In either method, the account will be locked, and the line for this user in /etc/shadow file will be as follows:

Notice the exclamation mark at the beginning of the encrypted hash. This means the user couldn’t login to the system.
Example
Your colleague is back, and he wants to login to the system normally. You need to unlock his password. To do, use the usermod command with –U option.
![]()
Now, the shadow file looks like this:

Note that the exclamation has disappeared.
Summary
-
When new user account is created, a private group with the same name is automatically created.
-
To modify a user, use either the usermod command or the User Manager tool.
In the next article, we will continue with Users and Groups Administration. We will see how to delete a user account, then start talking about groups. See you there.


