
In earlier articles, we demonstrated how to use Ruby scripting and the shell to provision a Vagrant environment. Although scripting and the shell can be used, configurations tools present advantages to the developer. Configuration tools that can be used with Vagrant include Chef, Ansible, Salt and Puppet. The different configuration tools offer developers the flexibility to create scripts that are reusable and they can be deployed on different platforms. In this article, we will focus on demonstrating how we can use Chef to provision an environment. When making a decision on the provisioning tool, you will use you need to consider availability of development skills and the environment you will be managing.
Before we focus on the Chef tool, let us discuss some differences that exist among provisioning tools. The key difference in how the different provisioning tools lies in the agent infrastructure. Among the tools Chef and Puppet will use software existing on the node to manage its tasks. Ansible will use software existing on a host to remotely communicate with a VM so you need to install software on a host instead of a VM.
The key building block in a Chef configuration is a recipe which specifies system resources. The Chef client will then translate a recipe into system resources that can be configured. There are two different ways in which a Chef recipe can be used. The first approach is using Chef-solo. The second approach is using a centralized Chef server to distribute recipes to nodes.
In Chef, there are several terminologies that are used. A Chef server is the central repository for recipes, cookbooks, and definitions that will be applied on nodes. A server is responsible for taking care of node and workstation connection and serving data to clients. A Chef node is a physical or virtualized environment which together form configuration targets. The nodes have a client that is used to communicate with a server. The client handles data access from the server A Chef workstation is the environment where creation and editing of configuration files, which are then moved to the Chef server for deployment on nodes. On a workstation, there is a tool referred to as knife which is an entry to the workstation that is better than using SSH. Chef-repo is a version control where configurations and definition are committed.
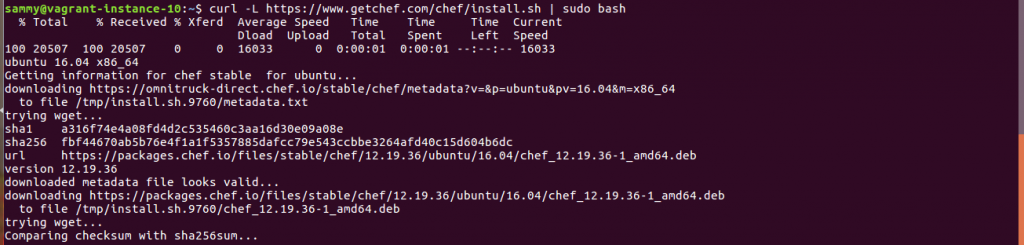
We will begin by demonstrating how we can use Chef-solo for provisioning. Before using Chef-solo, we need to install a client application. The client can be installed as part of a Vagrant box or by enabling Vagrant to handle the client set up. To simplify client installation, a tool called a Chef-Omnibus is available. When the command below is executed, it will install the Chef client on the target machine.
curl -L https://www.getchef.com/chef/install.sh | sudo bash
On a Vagrant environment, a vagrant-omnibus plugin is available and it is installed using the command shown below.
vagrant plugin install vagrant-omnibus

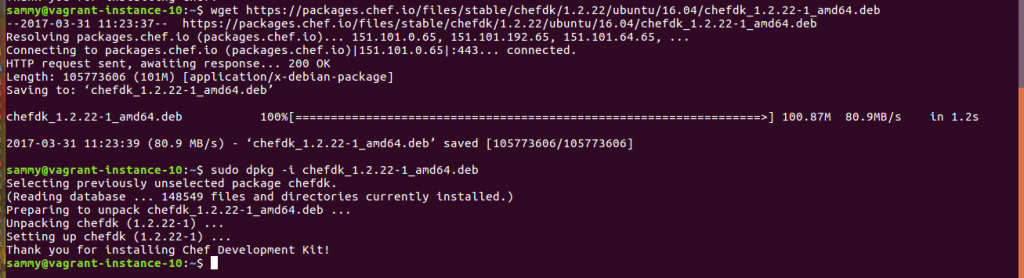
We also need to install Chef development tools on our host and on our guests. The commands below will install Chef development tools:
wget https://packages.chef.io/files/stable/chefdk/1.2.22/ubuntu/16.04/chefdk_1.2.22-1_amd64.deb

sudo dpkg -i chefdk_1.2.22-1_amd64.deb
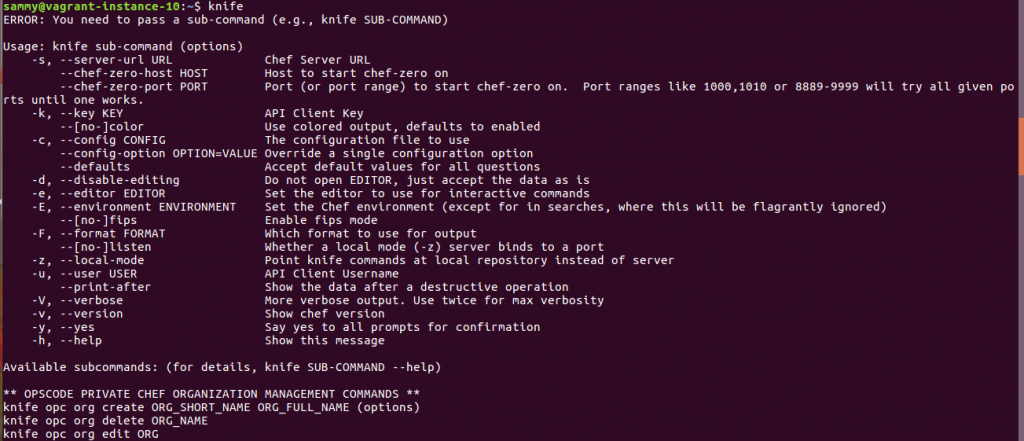
After installing Chef tools, knife will be available at the terminal. If installation was successful running knife at the terminal, it will show you available commands.
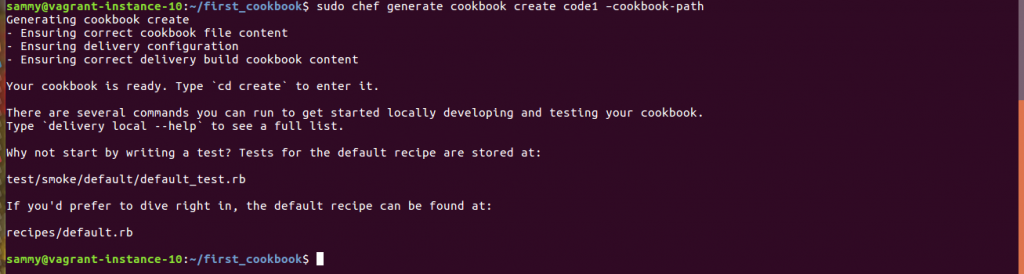
We will now demonstrate basic use of knife. Let us begin by creating a directory and add a cookbook in the directory using the commands below. We will place our code in the code1 directory created using knife.
mkdir  first_cookbook

cd first_cookbook

sudo chef generate cookbook create code1 –cookbook-path
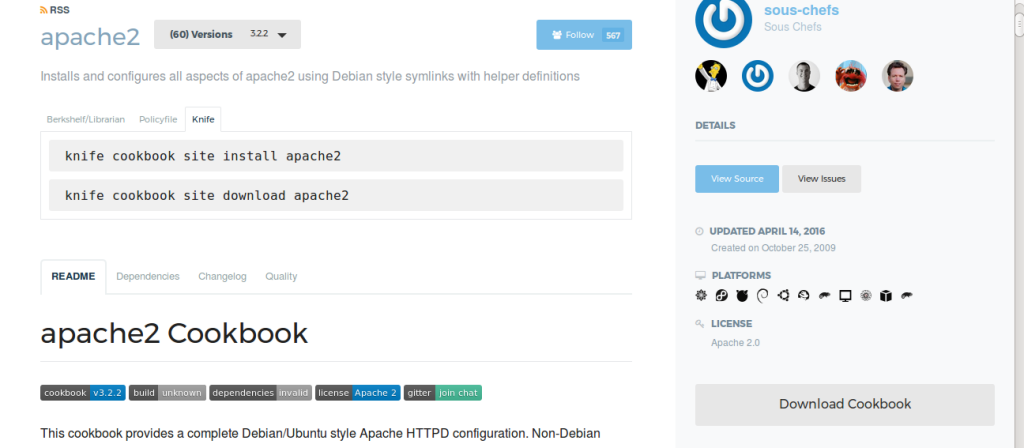
Cookbooks are hosted on the Chef supermarket here https://supermarket.chef.io/, from where you can browse and search. Search for apache2 cookbook and follow the link to get instructions on how you can use the cookbook with Berkshelf/Librarian, Policyfile and knife. We would like to use knife, so click on knife tab to see the provided commands.
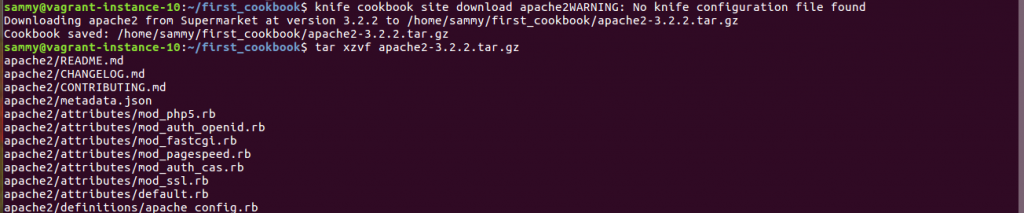
Let us download and extract the file using the commands below.
knife cookbook site download apache2

tar xzvf apache2-2.0.0.tar.gz
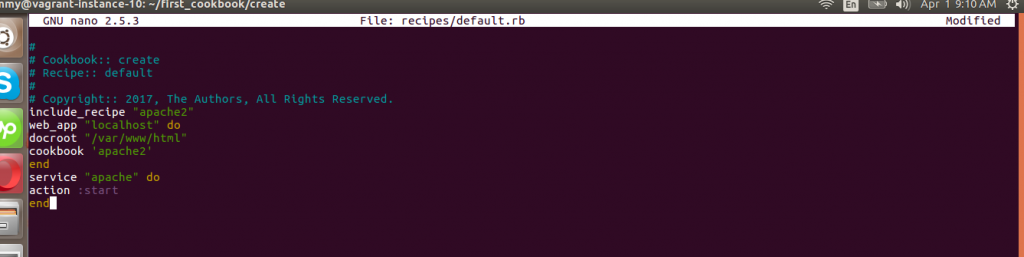
Click on the dependencies tab to check if the cookbook has any dependencies. The cookbook of interest has no dependencies, so we can go to the next step. Earlier, we created a default recipe in code1 directory, so open it using this command nano recipes/default.rb and add the lines shown below and save the file.
include_recipe "apache2"
web_app "localhost" do
docroot "/home/a4548705/fb958e2be5.nxcli.io/html"
cookbook 'apache2'
end
service "apache" do
action :start
end
Navigate to the directory containing your Vagrantfile and execute the vagrant up command. Provisioner status and output will then be displayed.
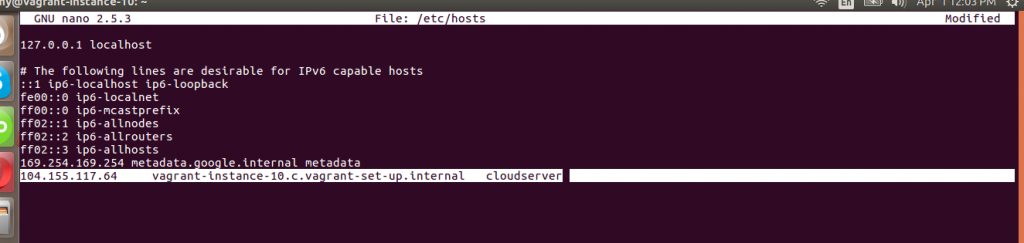
The second option that we can use to provision Vagrant environments is Chef Server. Before, we can begin server set up we need to configure a domain name that resolves to Chef Server. To do this you need to open /etc/hosts using this command sudo nano /etc/hosts and add the IP address that resolves to Chef server. You need to specify the IP address of your sever, your preferred name to connect and a short name. A sample entry is shown below
104.155.117.64 vagrant-instance-10.c.vagrant-set-up.internal cloudserver
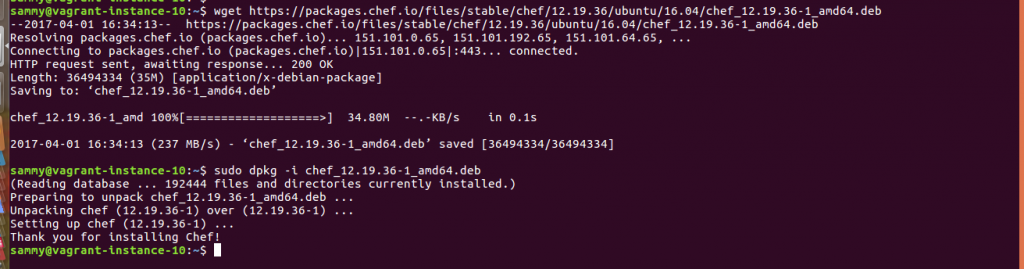
Navigate to this address https://downloads.chef.io/chef and download and install a server version that is appropriate to your environment.
wget https://packages.chef.io/files/stable/chef/12.19.36/ubuntu/16.04/chef_12.19.36-1_amd64.deb

sudo dpkg -i chef_12.19.36-1_amd64.deb
The server provides a web interface, so if there is no browser installed you need to install one. Navigate to to access the interface. You need to substitute your IP address.
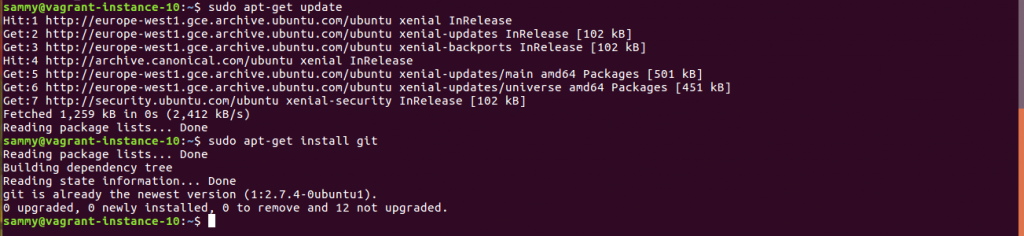
To set set up a workstation, we need to begin by installing git using the commands shown below
sudo apt-get update

sudo apt-get install git
To install a client, we use the command shown below
curl -L https://www.opscode.com/chef/install.sh | sudo bash
At this stage, our client is installed but not correctly configured. In the second part of this tutorial, we will demonstrate how to configure and write cookbooks.
In this article, we introduced Chef as one of the tools available for provisioning Vagrant environments. We discussed the different Chef components. We mentioned Chef can be set up in a single machine or in a client-server architecture. Finally, we demonstrated how to set up Chef in the two different architectures. In subsequent tutorials, we will rely on concepts covered here to demonstrate how to write recipes.

