

Reducing a Volume Group (Cont.)
We stopped the last time while discussing the case when we need to replace a malfunctioning physical disk that is part of LVM structure. A physical disk in an LVM structure is configured as physical volume, which is made member of a volume group, from which one or more logical volume are allocated logical extents. Upon the logical volume, a file system is built. The file system is mounted on a directory that links it to the file system structure. For a physical disk to be removed or replaced safely, it mustn’t be member of any volume group. to remove it from a volume group safely, without losing data, it must be empty, having no physical extents allocated to any logical volume.
Consider the disk /dev/sdb has problems. Your hardware support provider told you that the disk needs to be replaced as soon as possible. /dev/sdb works as a physical volume in the vgdata volume group.
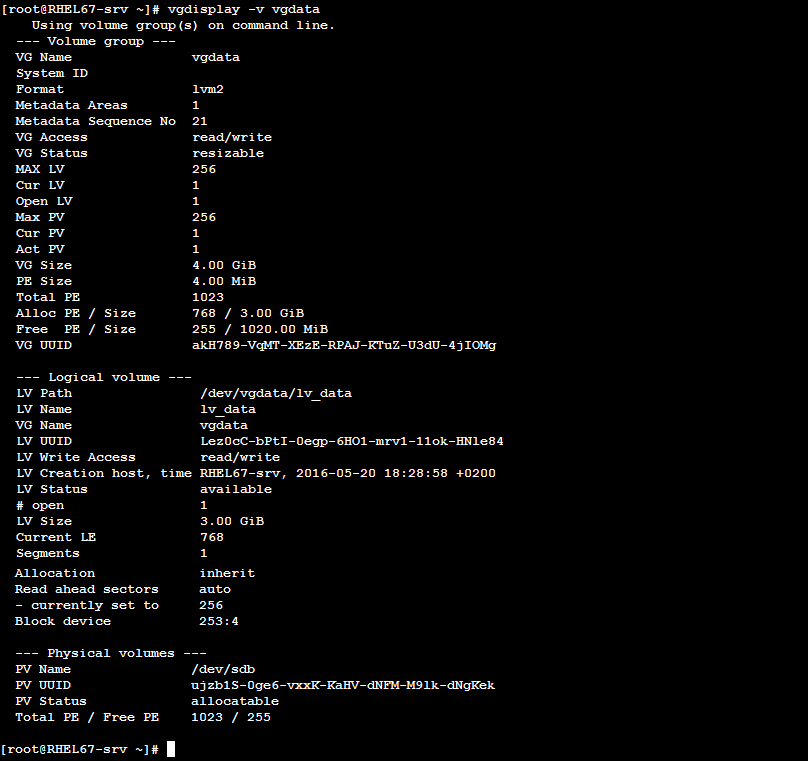
From the verbose output of the vgdisplay command, we could realize that vgdata contains only one physical volume /dev/sdb. So, how could we perform such replacement?
Here is the full procedure:
- Add the physical volume /dev/sdc which is 6 GB size to the volume group:
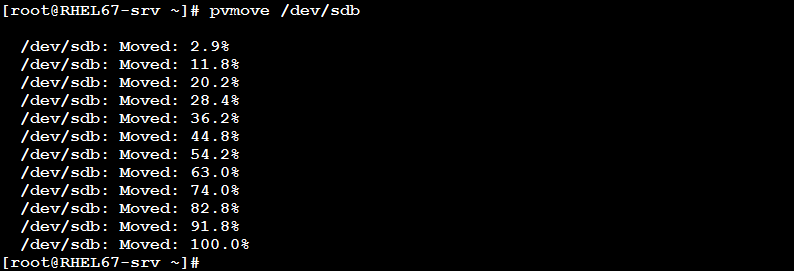
- To take /dev/sdb out of the volume group, it should not contain any allocated extents. To do so, we will migrate all physical extents from /dev/sdb to the new physical volume /dev/sdc. This is done using the command pvmove. The command will show the progress of the migration operation in percentage.
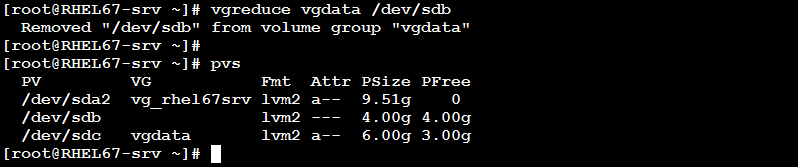
- Verify that /dev/sdb is now empty using the pvs command.
- Now, /dev/sdb could be taken out of vgdata. Use the command vgreduce.
- Perform the hardware replacement. When the operation is done, detect the new disk, use the pvcreate command to configure it as physical volume, add it to the vgdata volume group.


That is it!!
Deactivating a Volume Group
There will be some cases wherein you need to de-activate a volume group. When you deactivate a volume group, it is disabled; i.e. it become unavailable. This is a necessary step if for example you are going to failover from a production server in the main site to the corresponding server in the DR site (given that you have a continuous replication between LUNs – disks – in both sites). There is another case that we will see shortly.
Before deactivating a volume group, any mounted file system from this volume group must be un-mounted first. So, to deactivate the vgdata volume group, we need to execute the following steps:
- un-mount /data
- Deactivate the volume group using the vgchange command
- Un-mount any mounted file systems built on this volume group.
- Deactivate the volume group using the vgchange command. (this is the second case I told you about)
- Export the volume group using the vgexport command:
- Now, disconnect the disks and transfer them to the other server.
- On the second server, use the pvscan command to scan all disks for physical volumes.
- When found, import the volume group. This task uses the vgimport command:
- Now, activate the imported volume group:
- To take a physical volume out of a volume group, the vgreduce command is used.
- The pvmove command migrates physical extents from a physical volume to other one or more physical volumes in the same volume group.
- A volume group could be deactivated (made unavailable) using the command vgchange with –a n
- To activate a disabled volume group, the same command vgchange is used, but with –a y
- A volume could be removed from the system using the vgremove
- A large volume group could be splitt into two smaller volume groups: the original plus a new one, using the vgsplit
- A volume group could be merged into another using the command vgmerge.
- A volume group could be exported from a system, transferred to another system, and then imported on the new system. The commands used are vgexport and vgimport.
![]()

Activating a Volume Group
A deactivated volume group will need to be activated to use its logical volumes. For example, to mount /data that exists in vgdata (that was deactivated above), we need to activate it first:

Now, the file system could be mounted normally.
Deleting a Volume Group
When a volume group is no longer needed, go ahead and remove it. To remove a volume group, use the command vgremove.

Splitting a Volume Group
A big volume group with two or more physical volumes could be split into two smaller volume groups: one having the original name, and a new one. Each volume group will have its own physical volumes. Note that a physical volume can’t belong to more than one volume group.
To split a volume group, use the vgsplit command.
Syntax
vgsplit OLDVOLGROUP NEWVOLGROUP PhysicalVolumePath [PhysicalVolumePath ...]
Consider the volume group vgdata that consists of two physical volumes /dev/sdb and /dev/sdc.

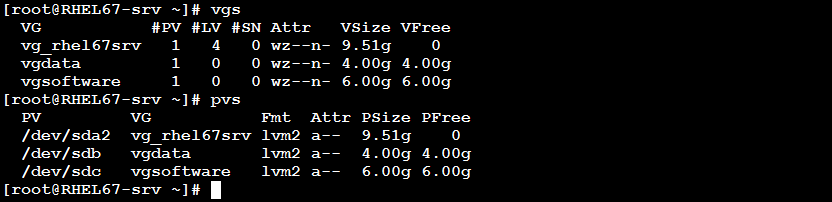
We will split it now into vgdata and vgsoftware:

Now, the current volume groups are:
Merging Volume Groups
The opposite of the previous case; two small volume groups will be merged into one bigger volume group. The command that achieves this task is vgmerge.
Syntax
vgmerge DestinationVolumeGroupName SourceVolumeGroupName
Starting with two volume groups vgdata and vgsoftware:

We will merge vgsoftware in vgdata. The result will be one bigger volume group vgdata.

Now, we have:

Exporting and Importing a Volume Group
Sometimes, you will need to transfer a volume group from one server to another. To transfer a volume group, all underlying physical volumes should be also moved; i.e. disconnected from the first server, then connected to the other. This is common when working with SAN storage LUNs (disks). The transfer procedure is as follows:


You could now mount the file systems on server2 and use them.
Summary
In the next article, we will talk about Paging (Virtual Memory); so, don’t miss that!!

