

Some popular public cloud infrastructure that provide support for Vagrant are Amazon EC2, Google Cloud and Digital Ocean. In this tutorial, we will focus on demonstrating how you can use Vagrant in the cloud. The use of Vagrant has an adequate justification because it helps simplify the process of setting up environments for testing, development and deployment among other needs. Using cloud infrastructure has the advantage of simplicity and speed in creating instances. Another advantage of using the cloud is the consistency of the work flow it provides.
To get started with EC2 you first need to register with Amazon, which you can do so on this following this link https://aws.amazon.com/ec2/. You will need to provide valid billing information but you can use the free tier instances for up to a year.
Before you can use Vagrant to provision environments on Amazon EC2, you need to install the AWS plugin using the command shown below.
vagrant plugin install vagrant-aws

On Amazon EC2 most Vagrant boxes are not supported. The simple solution to this challenge is loading a supported dummy box and overriding the spun image in the Vagrantfile. The command shown below is used to load the dummy box
vagrant box add dummy https://github.com/mitchellh/vagrant-aws/raw/master/dummy.box

Create a directory that will hold our project and initialize it.
mkdir amazon_project
cd amazon_project
vagrant init

There are several pieces of information that you need to provide to help in customizing your instance. This information varies depending on your needs. Generic information that has to be provided for almost every instance is listed below.
• The SSH keypair you will use to connect to EC2
• The region you would like your instance located
• The AMI ID
• The security group of your instance
• The username for accessing instances
• The location of private key file
Consider the Vagrantfile shown below. On line 2, we are specifying we would like to use the dummy box. On line 3, we are specifying the provider configuration. On line 4 and 5, we are providing the information that will be used for authentication. You need to substitute the values with values obtained from your EC2 account. To obtain the authentication information, you need to login to your EC2 account, create it and save it to your local machine. On line 6, we are providing the name of the SSH keypair that will be used. On lines 7,8 and 9 we are specifying the region, ID and security group respectively. On lines 10 and 11 we are specifying the username and location of private key
Vagrant.configure('2') do |config|
  config.vm.box = 'aws-dummy'
  config.vm.provider 'aws' do |aws, override|
    aws.access_key_id = ENV['AWS_ACCESS_KEY_ID']
    aws.secret_access_key = ENV['AWS_SECRET_ACCESS_KEY']
    aws.keypair_name = 'ssh-keypair-name'
    aws.region = 'us-west-2'
    aws.ami = 'ami-20be7540'
    aws.security_groups = ['default']
    override.ssh.username = 'ubuntu'
    override.ssh.private_key_path = '~/.ssh/ssh-keypair-file'
  end
end
After you are satisfied with your environment, set up save your Vagrantfile and use the command below to deploy it.
vagrant up --provider=aws
To get started with Digital Ocean, navigate to this link https://www.digitalocean.com/ and sign up. Just like with Amazon EC2 you will need to provide a valid billing method in form of a credit card or Paypal.
Before we can use Vagrant to deploy on Digital Ocean, we need to install the vagrant integration plugin using the command shown below:
vagrant plugin install vagrant-digitalocean

After installing the plugin, we add a Digital Ocean box using the command below
vagrant box add digital_ocean https://github.com/smdahlen/vagrant-digitalocean/raw/master/box/digital_ocean.box

To enable the plugin communicate with Digital Ocean some configuration is required. The API handles communication so you need to login to your Digital Ocean account and create an API key. The API key and your client ID will be needed for configuration.
To create an API key, login to your Digital Ocean account, click on API then generate a new token and provide a name for the token.
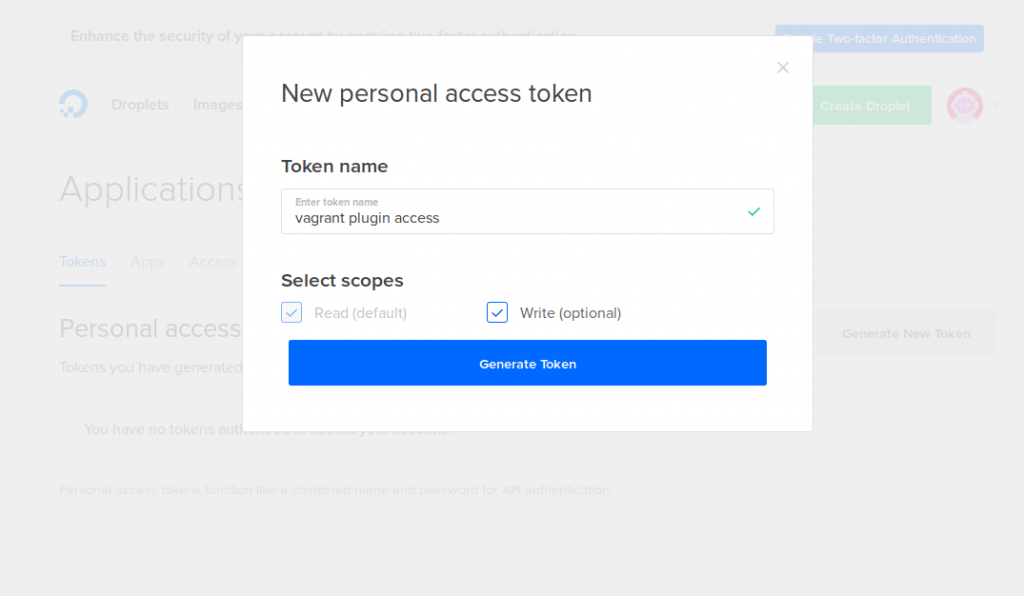
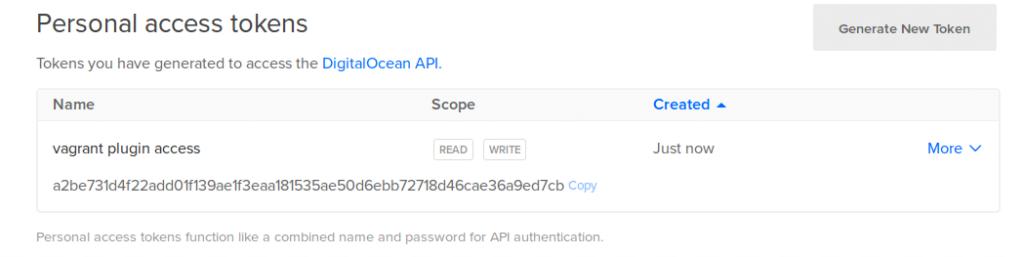
We will use the generated token for API authentication. The token generated is shown below:
Create a directory that will hold our demonstration project and initialize it.
mkdir digitalocean
cd digitalocean
vagrant init

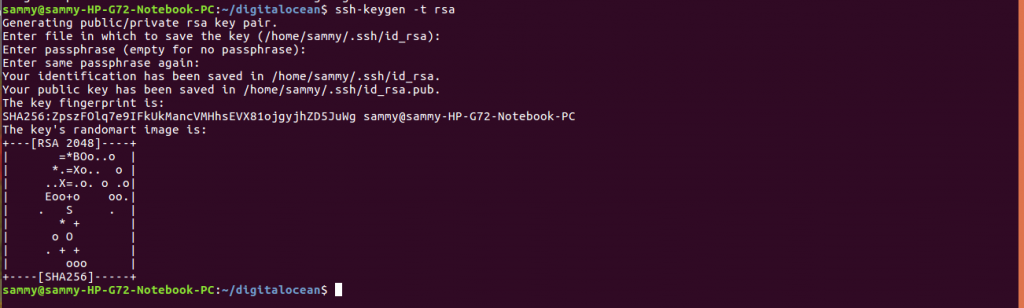
Before working on the Vagrantfile, let us create an SSH key pair because we will need to provide a key in our Vagrantfile.
ssh-keygen -t rsa
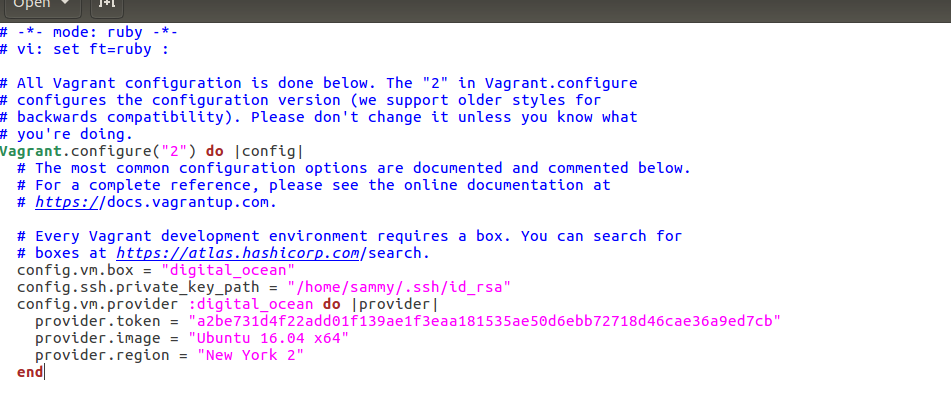
Open the Vagrantfile using your preferred text editor so that we can edit it. Change the config.vm.box entry from base to digital_ocean. In the second line, we are specifying the path to the file holding our SSH key. The fifth line specifies the access token. The next two lines specify the server we would like to use and the region of preference. Other settings can be included to customize your environment.
  config.vm.box = "digital_ocean"
  config.ssh.private_key_path = "/home/sammy/.ssh/id_rsa"
  config.vm.provider :digital_ocean do |provider|
    provider.token = "a2be731d4f22add01f139ae1f3eaa181535ae50d6ebb72718d46cae36a9ed7cb"
    provider.image = "Ubuntu 16.04.2 x64"
    provider.region = "New York 2"
  end
After including all your settings save the Vagrantfile and deploy your environment using the command below:
vagrant up –provider=digital_ocean
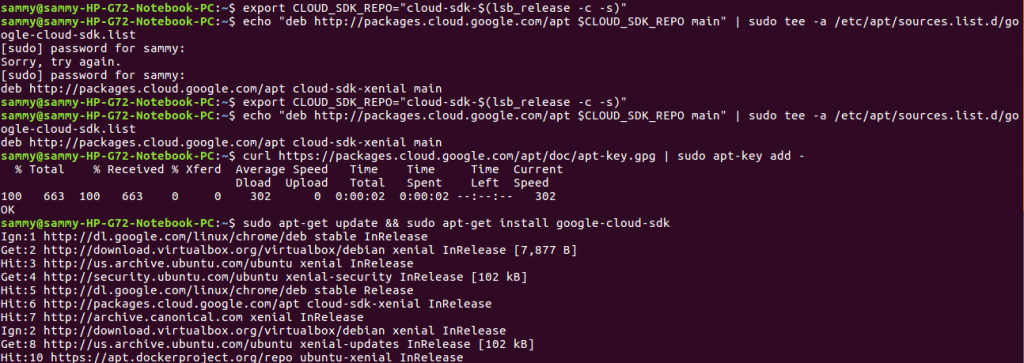
To provision environments on the Google Cloud, you first need to install Google Cloud SDK or the gcloud command. The gcloud command is a subset of the SDK and it provides a command line interface to manage your cloud. The SDK is installed using the commands below:
export CLOUD_SDK_REPO="cloud-sdk-$(lsb_release -c -s)"
echo "deb http://packages.cloud.google.com/apt $CLOUD_SDK_REPO main" | sudo tee -a /etc/apt/sources.list.d/google-cloud-sdk.list
curl https://packages.cloud.google.com/apt/doc/apt-key.gpg | sudo apt-key add -
sudo apt-get update && sudo apt-get install google-cloud-sdk
We need to install the google-plugin using the command below:
vagrant plugin install vagrant-google
![]()
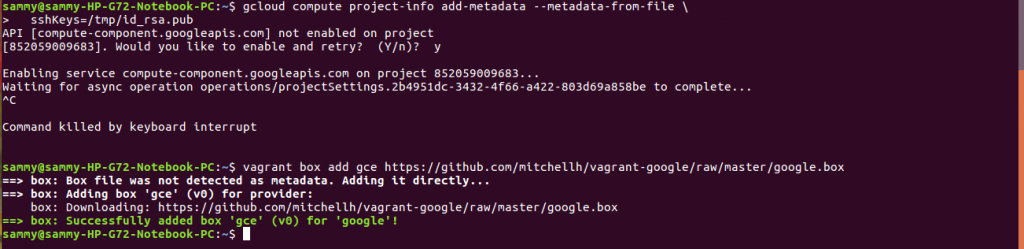
To enable SSH a public key needs to be included in provisioned instance. To set project level SSH, use the command below:
gcloud compute project-info add-metadata --metadata-from-file \
  sshKeys=/tmp/id_rsa.pub
To add the box specific to Google, we use the command below:
vagrant box add gce https://github.com/mitchellh/vagrant-google/raw/master/google.box
Create a directory and initialize it. We will then add our configuration options to the Vagrantfile. Consider the Vagrantfile shown below having some options. Comments have been used to explain what is happening.
Vagrant.configure("2") do |config|
  config.vm.box = "gce"
  config.vm.provider :google do |google, override|
    google.google_project_id = "PROJECT_ID"
    google.google_client_email = "[email protected]"
    google.google_json_key_location = "~/path/to/gcloud.json"
    # Provide an instance name
    google.name = "devel"
    # Specify the zone where your instance will be located
    google.zone = "asia-east1-c"
    # Specify the machine type you would like to use
    google.machine_type = "n1-standard-2"
    # Specify the image that will be used
    google.image = "ubuntu-1404-trusty-v20150901a"
    #provide the SSH user name and location of private key
    override.ssh.username = "chao"
    override.ssh.private_key_path = "~/.ssh/id_rsa"
  end
end
Once you have included all the configuration options, save your Vagrantfile and use the command below to deploy it.
vagrant up –provider=google
In this article, we demonstrated how to use the Vagrant on Digital Ocean, Google Cloud and Amazon EC2. We demonstrated how to install provider-specific plugins. We also demonstrated how to load boxes specific to each provider. Finally, we demonstrated how to add configuration options to customize an environment.

