
In the last article we had learn how to set up a Vagrant environment article, we demonstrated how to install and configure a Vagrant environment. In this article, we will aim to demonstrate executing basic shell commands, running shell scripts contained in a Vagrant file and using external scripts to provision.
Using a Vagrant file to create an operating system is a very basic way of using Vagrant. To benefit from the powerful features, we can use it to specify operating parameters and environments in a way that promotes repeatability. The simplest approach to provisioning is executing commands at the provided terminals, for example bash and sh that are part of Linux distributions. Each approach that is used for installation and software configuration is known as a provisioner.
We will begin by discussing the shell provisioner. Using the shell to provision is appropriate for two types of users. The first group of users are those who would not like to spend much time setting up an environment. The second group of users is who have not mastered the use of tools such as Chef or Puppet. When using the shell provisioner you can either use inline or path option. In the inline option, you include the commands to be executed while in the path option you specify a shell script path that will be uploaded and executed. You can specify a local or remote path.
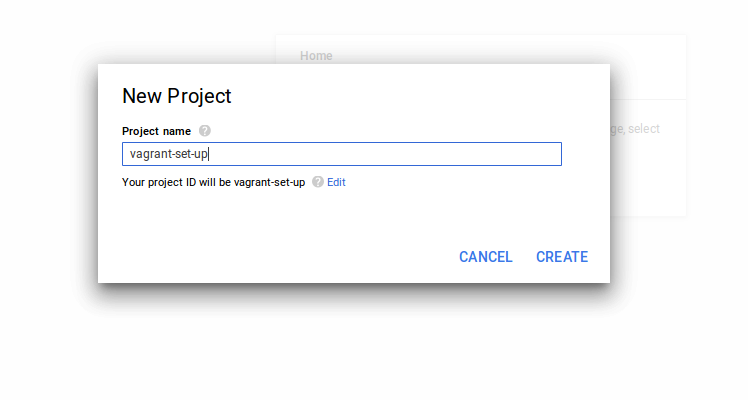
In the learn how to set up a Vagrant development environment, we demonstrated how to set up a local environment. In this article, we will demonstrate how to set up Vagrant on a Google compute engine (GCE) and use the cloud set up.
Login to your GCE console here https://cloud.google.com/ and create a project and note down project ID. If you have not enabled Google Compute Engine API navigate to API manager, then library, search for the API and enable it.
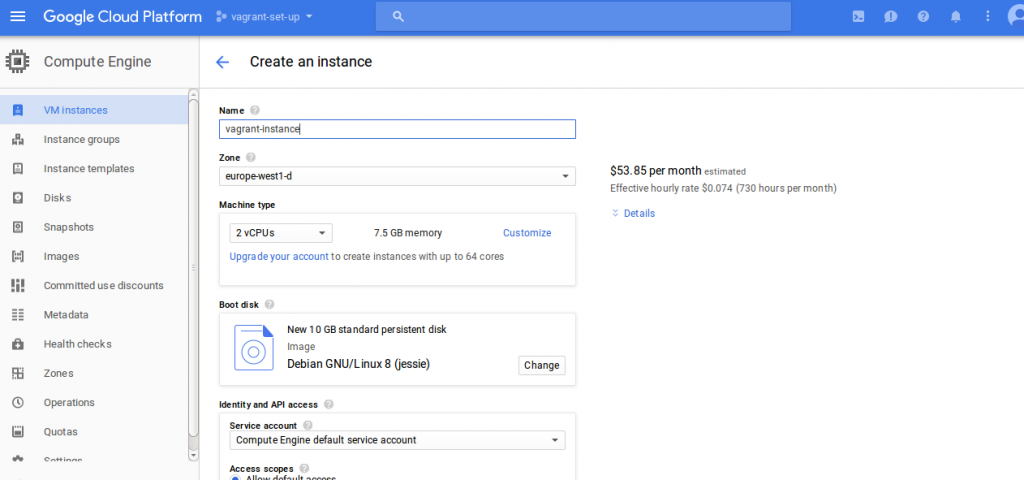
After creating your project, create an instance that fits your needs
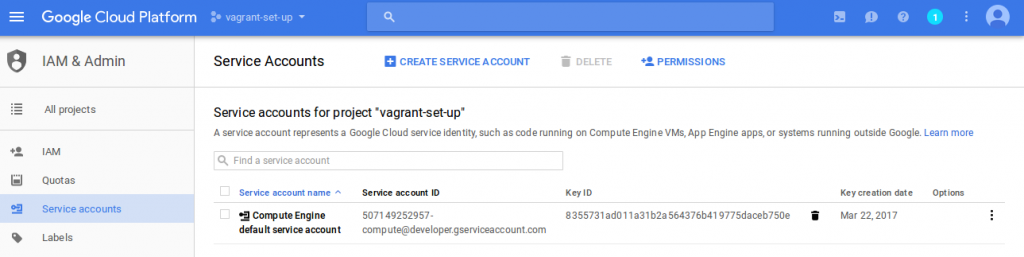
Navigate to credentials subsection found under API manager and create a service account key. We will use the key for authorization of API requests. Download and save the key.
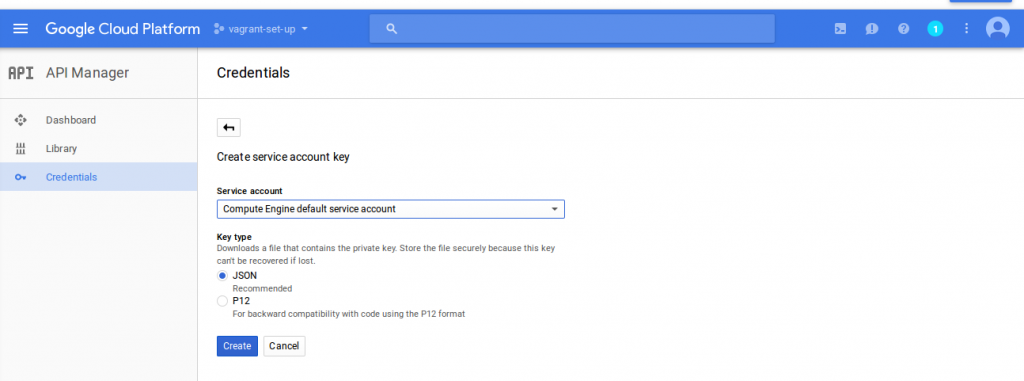
After creating your key, click on the manage services account and copy the service account ID which ends in gserviceaccount.com. We will need the key and ID to properly configure our Google plugin.
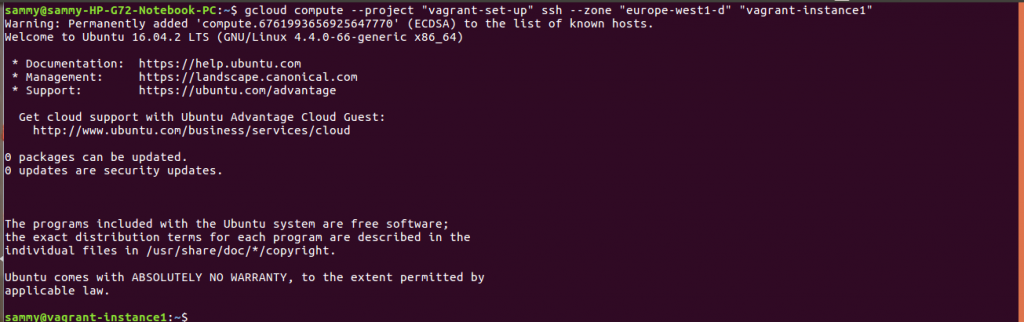
To connect to our instance, we will use SSH so we need to create key pairs. For simplicity, we will use gcloud command tool and specify the name of the instance we would like to connect to. To get the command to connect to your instance, on your instance click on SSH then view gcloud command.
gcloud compute --project "vagrant-set-up" ssh --zone "europe-west1-d" "vagrant-instance"
Before we can install Vagrant on our instance, we need to ensure our packages are up to date and we have installed Virtualbox and dpkg. The commands below are used to satisfy these prerequisites.
sudo apt-get update

sudo apt-get install dpkg-dev virtualbox-dkms
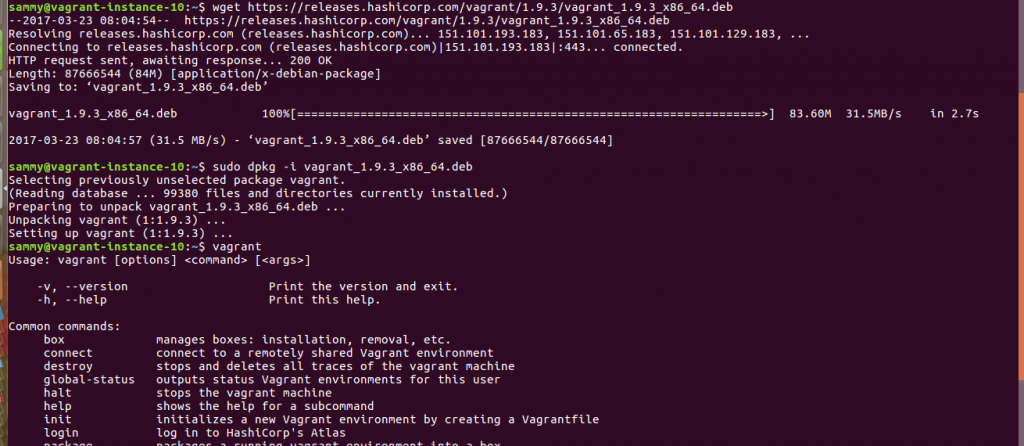
To install vagrant on our instance, we use the commands below. After installing, execute the vagrant command to confirm installation was successful
wget https://releases.hashicorp.com/vagrant/1.9.3/vagrant_1.9.3_x86_64.deb
sudo dpkg -i vagrant_1.9.3_x86_64.deb
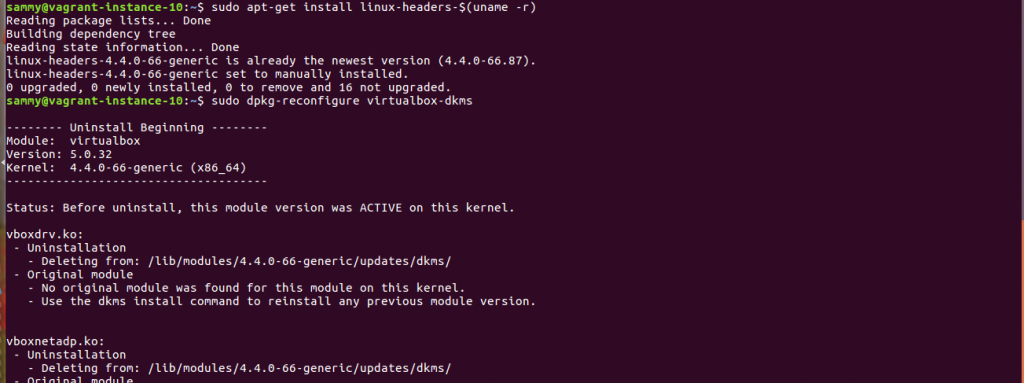
To complete our set up, we need to install missing kernel headers and reconfigure DKMS
We are now ready to add boxes that we can use in our environments. To add precise32 box, we use the command below.
vagrant box add precise32 http://files.vagrantup.com/precise32.box

We need to create a vagrant environment. Create a directory, navigate into it and initialize it.
mkdir first_vagrant

cd first_vagrant

vagrant init

The initialization process will place a vagrantfile in our directory that we can edit to customize our environment. For example, let us use the box we added earlier. Open Vagrant file using this command nano Vagrantfile and change box configuration to what is shown below then save.
config.vm.box = "precise32"

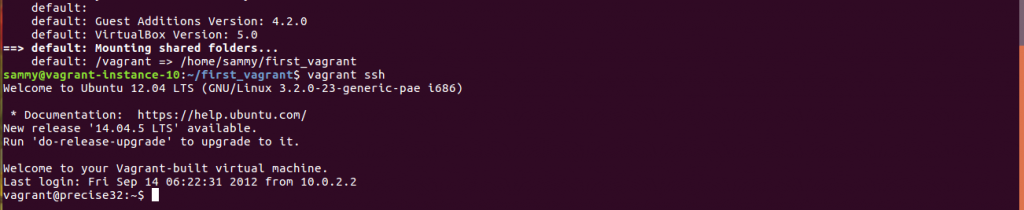
After customizing your environment via vagrantfile, you can deploy the environment and SSH into it.
vagrant up
vagrant ssh
Let us provision an environment running an ubuntu box and using inline provisioning. Add the ubuntu box using the command below.
vagrant box add ubuntu/xenial64

Let us create a directory on our guest environment and add a vagrant file with the contents below. Comments help you understand the vagrant file.
#Specify the API
Vagrant.configure("2") do |config|
end
#Specify the base box that will be used
config.vm.box = "ubuntu/xenial64"
Specify virtualbox configurations
config.vm.provider "virtualbox" do |v|
    v.name = "SitePoint Test Vagrant"
    v.customize ["modifyvm", :id, "--memory", "1024"]
end
#Specify we would like to use shell provisioning and the file that contains install instructions

config.vm.provision "shell" do |s|
    s.path "provision/setup.sh"
end
Create provision/install.ssh and add the contents below that will install required software on our guest machines
#Add base packages

echo "Installing Git"
    apt-get install git -y > /dev/null

    echo "Installing Nginx"
    apt-get install nginx -y > /dev/null

#Update packages and install PHP and dependencies

echo "Updating PHP repository"
    apt-get install python-software-properties build-essential -y > /dev/null
    add-apt-repository ppa:ondrej/php5 -y > /dev/null
    apt-get update > /dev/null

echo "Installing PHP"
    apt-get install php5-common php5-dev php5-cli php5-fpm -y > /dev/null

    echo "Installing PHP extensions"
    apt-get install curl php5-curl php5-gd php5-mcrypt php5-mysql -y > /dev/null
#Install Mysql

apt-get install mysql-server -y > /dev/null
In this post, we noted how provisioning in Vagrant is very flexible. You can use Shell provisioning or an external tool such as Puppet. We demonstrated how to set up a cloud environment. Finally, we demonstrated how we can use shell and external scripting.

