
Swap (Paging) Space
Swap, Paging space, auxiliary memory, and virtual memory, all are different names for the same thing: a portion of the hard drive that could be used as a temporary storage when the real memory is full. As you know, for a program to run, it is loaded first in memory. All computations done by the computer processor are done and stored in memory. Imagine more programs are running; i.e. loaded in memory. At some point, the computer RAM will get full. This means the physical (real) memory couldn’t accept new programs; consequently, no other programs could be run at this time. To solve this situation, a special kernel daemon called kswapd monitors the memory utilization. When the physical memory runs out of free pages, the kswapd daemon transfers a number of inactive memory pages from RAM to the swap space, freeing some memory for new processes. As the hard disk is much slower than the computer memory, the paging space (virtual memory) can’t be considered a replace to the physical memory.
Note: –
If your system starts to get frequently into the situation of full memory, and for considerably long times, you must think of installing additional physical memory. Another solution is to review the list of applications running on that server, and migrate some of them to another server having less load.
Usually, swap spaces are created to be one and half times the physical memory. So, for a system with 2 GB of RAM, the paging space should be 3 GB size. During the operating system installation process, a swap space is configured for you.
Adding Swap Devices
A swap space could be created on a logical volume. Instead of creating a file system on the logical volume (using the mkfs command and its derivatives), a swap space could be created using the mkswap command.
Syntax
mkswap /dev/name
Example
Create an additional swap space of 500 MB size.
OK, so simple!!
First, create a logical volume of the same size.

Now, sets up a Linux swap area on that logical volume:

Activating Swap Space
– What?! Does swap space also require mounting?!
Yes, sort of…
For a newly-created swap space to work, it needs to be enabled first. This is done using the swapon command:
![]()
Now, use the same command with –s option to display the available swap spaces on your system:

– Oh… I expect you to say also we need to create a line in /etc/fstab for this new swap space!!
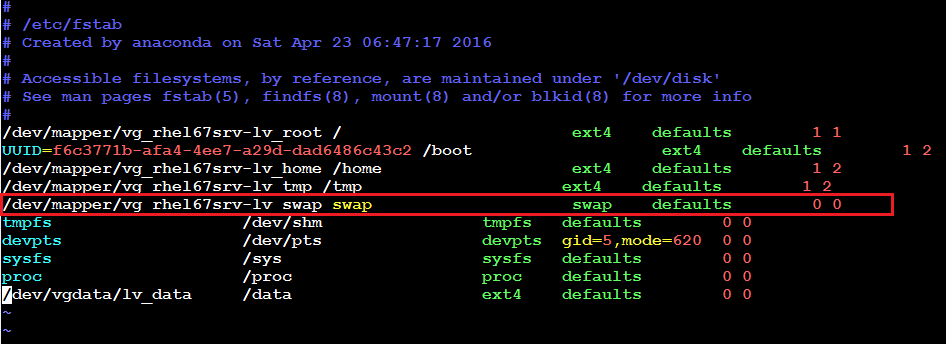
Actually… yes. If you have a look at the /etc/fstab file in your machine, you will notice there is a line for the swap device created during the operating system installation.
So, add a line for this new swap device:
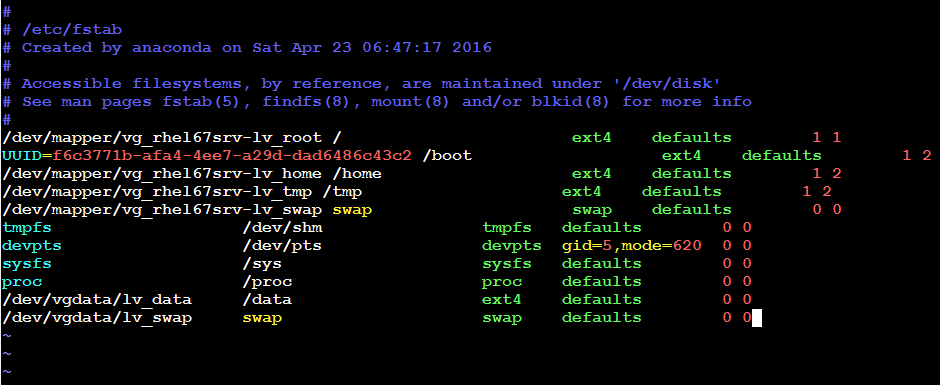
Save and exit the file. Now, this swap space will be enabled automatically each time your server is rebooted.
Deactivating and Removing Swap Space
If there is a way to create a swap space, there should be another to remove it. Similarly, there should be a way to disable (deactivate) a previously-enabled swap area. While the work procedure goes like create swap space, then enable it, the procedure on removal works in the reverse order: disable, then remove.
To deactivate a swap space, use the command swapoff.
Syntax
To disable all swap devices:
swapoff -a
To disable a specific device:
swapoff SWAPDEVICEFILE
OK, so to deactivate the new swap area we created in the last article:
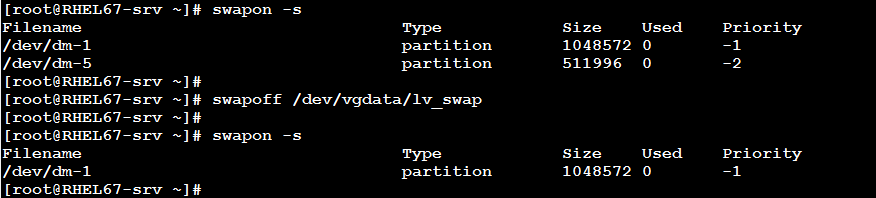
Now, remove the /dev/vgdata/lv_swap logical volume safely:

Note: –
Don’t forget to remove the line for that swap device from the /etc/fstab file.
Creating Swap Space using Basic Partitions
Swap spaces work not only on logical volumes, but could be set up on basic partitions as well. To create a swap area with 500 MB size on a basic partition, execute the following steps:
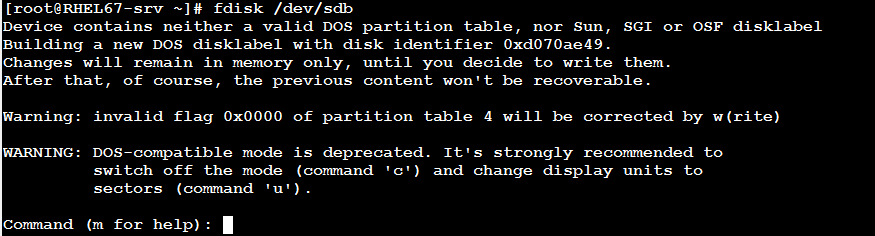
- Use the fdisk command to configure partitions on /dev/sdb:
- Type n and press Enter to create new partition:

- Now, enter p to specify it as primary partition:
- Enter 1 as the partition number.

- Press Enter to accept the default value 1 for the first cylinder.

- Specify the size in Megabytes:

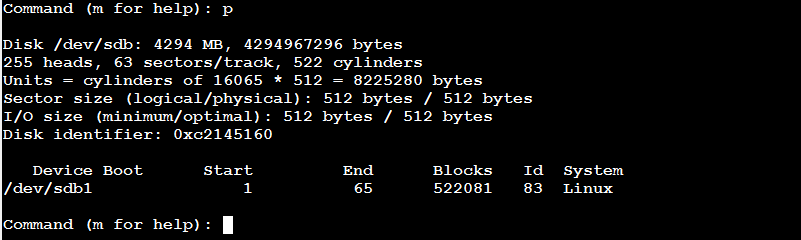
- Enter p to print the current partition table:
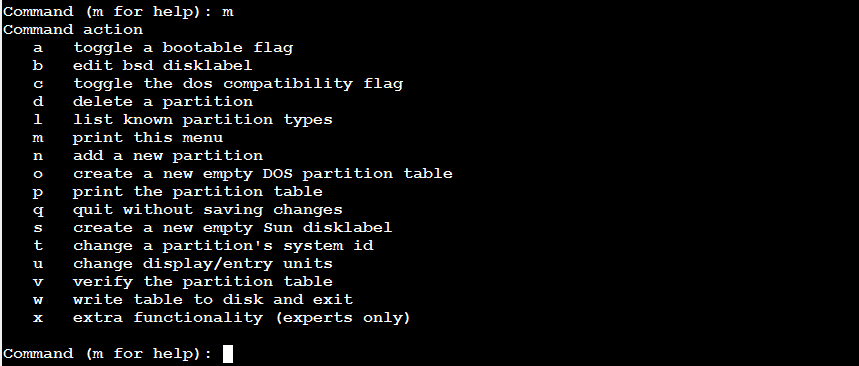
- Enter m to obtain help:
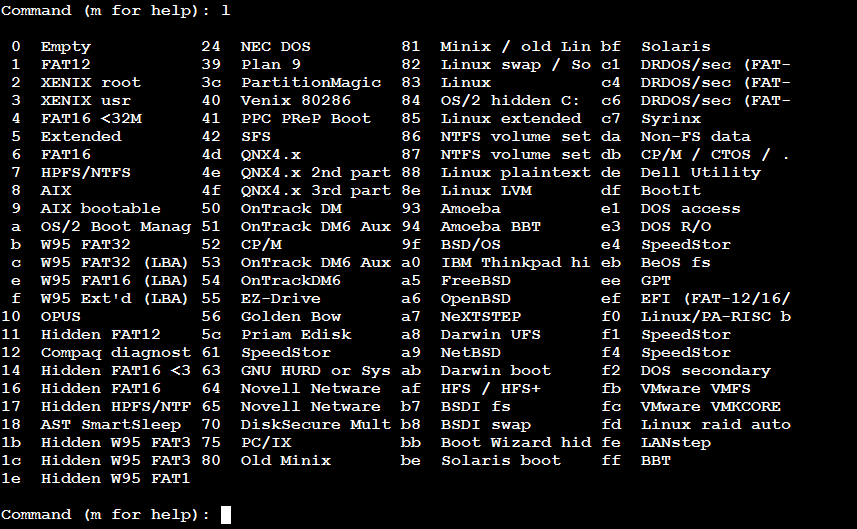
- Enter l (small L) to list the partition types.

This will display the following table:
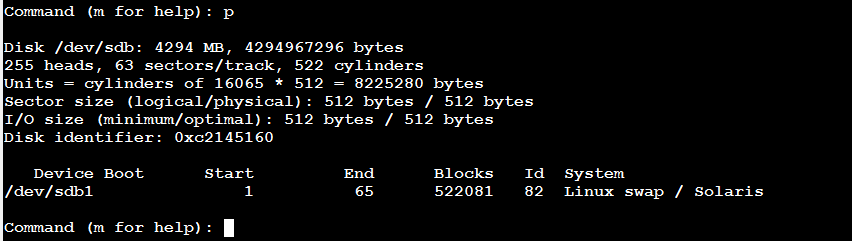
- Now, enter t to change the partition’s system id:

- If you print the partition table, you will see the change in the partition type:
- Enter w to save the changes to the partition table.

- Now, use the mkswap command to set up a swap area on /dev/sdb1:

- Use the swapon command to enable the new swap device:

- Add an entry for that swap device in the /etc/fstab file.
That is it!!!
Summary
In this article, we have introduced and discussed the topic of virtual memory.
- Paging space is used when physical memory is full to relocate some of the inactive memory pages to part of the hard disk, freeing some memory pages for new processes.
- To set up a Linux swap area, use the mkswap
- The swapon command enables a swap device for use.
- For a swap device to be enabled automatically after reboots, it must have an entry in the /etc/fstab file.
- Swap spaces could be set up both on logical volumes and on basic partitions using the same command mkswap.
- The command swapoff disables a swap space.
By this discussion, we have reached the end of our journey with system storage: using Basic Partitions, and LVM. I hope you find this series useful.
See you in the next article.

