

VueJS is an open-source JavaScript library that is used to build progressive and dynamic user interfaces. It has been designed to highly adaptable making it perfect for working with any other JavaScript libraries and also in any frameworks. VueJS provides APIs for building applications by using components with CSS, that will make requests from the frontend. Vue has popularly used for building applications in Laravel.
In this article, we will learn how to create a contact form by using Vue JS in laravel. Before we start building the application, we will first have to install a few applications.
In order to install XAMPP, you need to go to go to the Apache website and start Apache & MySql services. https://www.apachefriends.org/index.html
2) After you finish the previous steps, you will also need to download a few other software including GetComposer, Cmder, Atom and also NodeJS.
Create Application: –
Now we can get started building the application. To create a Laravel project, open cmder and go to xampp C:\xampp\htdocs location and run the given command to create project. Your Laravel project with a name contactstore will be created.
composer create-project laravel/laravel contactstore
Go to the C:\xampp\apache\conf\extra location and open file httpd-vhosts.conf and add the code that is given below:
<VirtualHost *:80>
    DocumentRoot "C:/xampp/htdocs/album/public"
    ServerName contactstore.dev
</VirtualHost>
Also, open notepad as administratoraddministrator and open the C:\Windows\System32\drivers\etc location, in the etc folder and add the given code and save it.
127.0.0.1       localhost
127.0.0.1  contactstore.dev
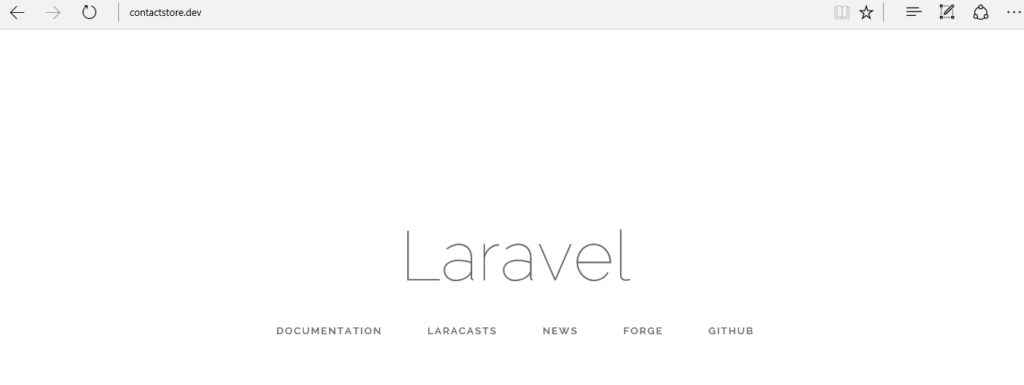
Go to the browser and type http://contactstore.dev to run the Laravel project. You will see that the laravel project is running on localhost as given below:
Open the project in “Atom” editor. Run “npm install” to install all dependancies. We are using the node module in the project because NPM contains some tools for working in various front-end applications. So, it’s very useful to grab some packages from it.
Create “database.sqlite” inside the database folder. In this project, we are working with the SQLite database. Now, in your “env” file add below code.
APP_NAME=ContactStore
APP_ENV=local
APP_KEY=base64:deiNr3E9ZIN/JdJ7f8yWiEPpwhF1ehm4By5S8jqoBnQ=
APP_DEBUG=true
APP_URL=http://localhost

LOG_CHANNEL=stack

DB_CONNECTION=sqlite


BROADCAST_DRIVER=log
CACHE_DRIVER=file
SESSION_DRIVER=file
SESSION_LIFETIME=120
QUEUE_DRIVER=sync

REDIS_HOST=127.0.0.1
REDIS_PASSWORD=null
REDIS_PORT=6379

MAIL_DRIVER=smtp
MAIL_HOST=smtp.mailtrap.io
MAIL_PORT=2525
MAIL_USERNAME=null
MAIL_PASSWORD=null
MAIL_ENCRYPTION=null

PUSHER_APP_ID=
PUSHER_APP_KEY=
PUSHER_APP_SECRET=
PUSHER_APP_CLUSTER=mt1

MIX_PUSHER_APP_KEY="${PUSHER_APP_KEY}"
MIX_PUSHER_APP_CLUSTER="${PUSHER_APP_CLUSTER}"
Go to the “C:\xampp\htdocs\contactstore\config” location, you will see the database.php file.
In the database.php file, laravel will check if db_connection exists in the .env file. If its exists, Laravel will use the values from .env file and if it doesn’t laravel will use value in the database.php file. Go to the .env file and change the DB_CONNECTION and the DB_DATABASE values to the ones given below.
'default' => env('DB_CONNECTION', 'sqlite'),
Create Contact model:
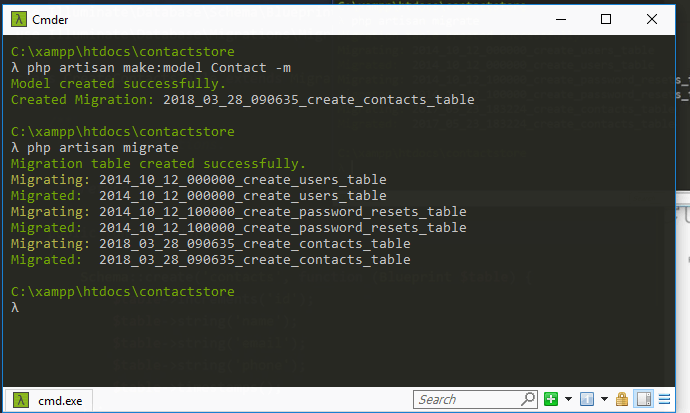
Create a contact model by using the command give below
php artisan make:model Contact -m
In your “C:\xampp\htdocs\contactstore\database\migrations”
file you will see the contact table created after the run above command. Open the contact table and add the below code and save your file.
<?php

use Illuminate\Support\Facades\Schema;
use Illuminate\Database\Schema\Blueprint;
use Illuminate\Database\Migrations\Migration;

class CreateContactsTable extends Migration
{
    /**
     * Run the migrations.
     *
     * @return void
     */
    public function up()
    {
      Schema::create('contacts', function (Blueprint $table) {
          $table->increments('id');
          $table->string('name');
          $table->string('email');
          $table->string('phone');
          $table->timestamps();
        });
    }

    /**
     * Reverse the migrations.
     *
     * @return void
     */
    public function down()
    {
        Schema::dropIfExists('contacts');
    }
}
Run the “php artisan migrate” command to create a table, this will help you create tables in your local machines and is supported in the Laravel framework. You can see the databse.sqlite file is created, which is holding the data so we can access it.
Please check the screenshot to help you to understand the migration process.
Create Backend routes:
Lets add backend routes in your “C:\xampp\htdocs\contactstore\routes” folder. Open api.php file and add the below code:
<?php

use Illuminate\Http\Request;
use App\Contact;

Route::group(['middleware' => 'api'], function(){
  // Fetch Contacts
  Route::get('contacts', function(){
    return Contact::latest()->orderBy('created_at', 'desc')->get();
  });

  // Get Single Contact
  Route::get('contact/{id}', function($id){
    return Contact::findOrFail($id);
  });

  // Add Contact
  Route::post('contact/store', function(Request $request){
    return Contact::create(['name' => $request->input(['name']), 'email' => $request->input(['email']), 'phone' => $request->input(['phone'])]);
  });

  // Update Contact
  Route::patch('contact/{id}', function(Request $request, $id){
    Contact::findOrFail($id)->update(['name' => $request->input(['name']), 'email' => $request->input(['email']), 'phone' => $request->input(['phone'])]);
  });

  // Delete Contact
  Route::delete('contact/{id}', function($id){
    return Contact::destroy($id);
  });
});

Route::middleware('auth:api')->get('/user', function (Request $request) {
    return $request->user();
});
Creating a Vue.js Component
Run “npm run watch” command which will continue running in the terminal and will watch files for any changes. They automatically recompile your assets when it sees changes in your “C:\xampp\htdocs\contactstore\resources\assets\js\components” location. You will also see the example.vue file create contacts.vue file in same location.
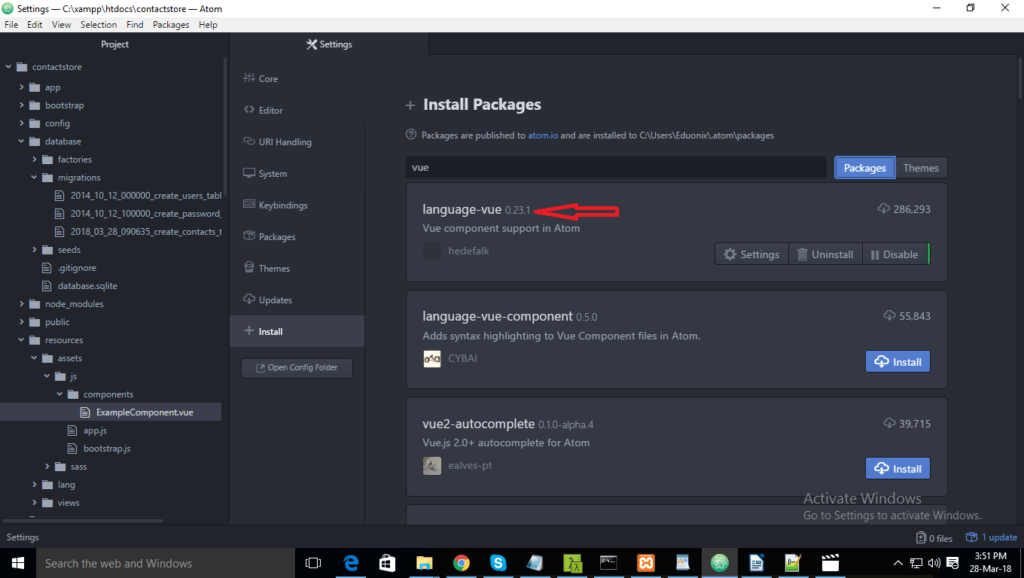
In the atom editor, go to the settings and install language-vue
You have created the “contacts.vue “file in the location “C:\xampp\htdocs\contactstore\resources\assets\js\components”. Open the “contacts.vue”file and add code below to create a form.
<template>
  <div>
    <h1>Contacts</h1>
    <form action="#" @submit.prevent="edit ? updateContact(contact.id) : createContact()">
      <div class="form-group">
        <label>Name</label>
        <input v-model="contact.name" type="text" name="name" class="form-control">
      </div>
      <div class="form-group">
        <label>Email</label>
        <input v-model="contact.email" type="text" name="email" class="form-control">
      </div>
      <div class="form-group">
        <label>Phone</label>
        <input v-model="contact.phone" type="text" name="phone" class="form-control">
      </div>
      <div class="form-group">
        <button v-show="!edit" type="submit" class="btn btn-primary">New Contact</button>
        <button v-show="edit" type="submit" class="btn btn-primary">Update Contact</button>
      </div>
    </form>
  </div>
</template>

<script>
  export default {
    data: function(){
      return {
        edit:true,
        list:[],
        contact:{
          id:'',
          name:'',
          email:'',
          phone:''
        }
      }
    },
    mounted: function(){
      console.log('Contacts Component Loaded...');
    },
    methods: {
      createContact: function(){
        console.log('Creating contact...');
        return;
      },
      updateContact: function(id){
        console.log('Updating contact '+id+'...');
        return;
      }
    }
  }
</script>
Open the app.js file from the following location
“C:\xampp\htdocs\contactstore\resources\assets\js and add the below code:
require('./bootstrap');

window.Vue = require('vue');


Vue.component('contacts', require('./components/Contacts.vue'));

const app = new Vue({
    el: '#app'
});
Open the “welcome.blade.php” file from location “C:\xampp\htdocs\contactstore\resources\views” and add the following code:
<!DOCTYPE html>
<html>
  <head>
    <meta charset="utf-8">
    <meta name="csrf-token" content="{{csrf_token()}}">
    <title>ContactStore</title>
    <link rel="stylesheet" href="/css/app.css">
  </head>
  <body>
    <div class="container">
      <div id="app">
        <contacts></contacts>
      </div>
    </div>

    <script src="/js/app.js"></script>
  </body>
</html>
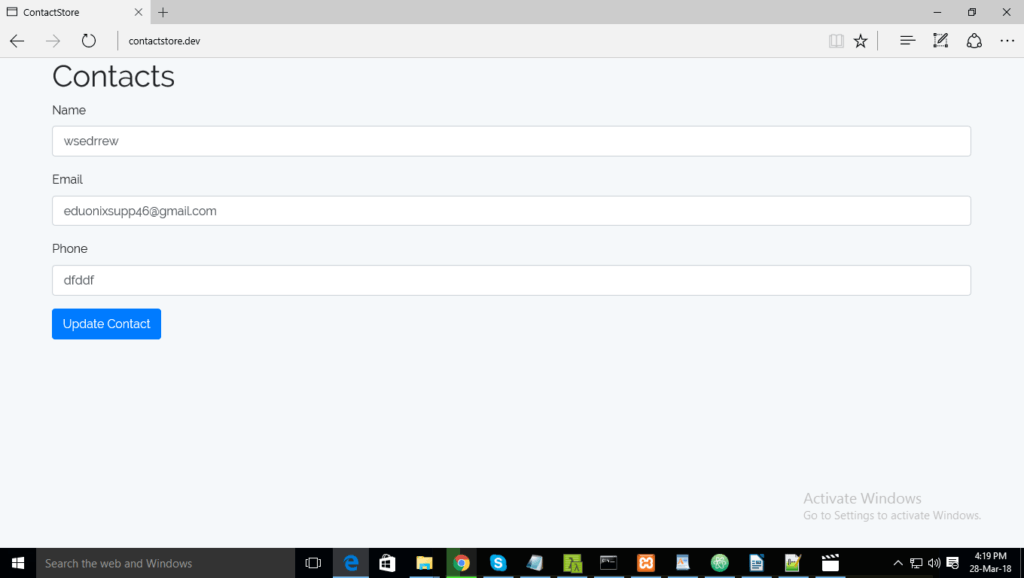
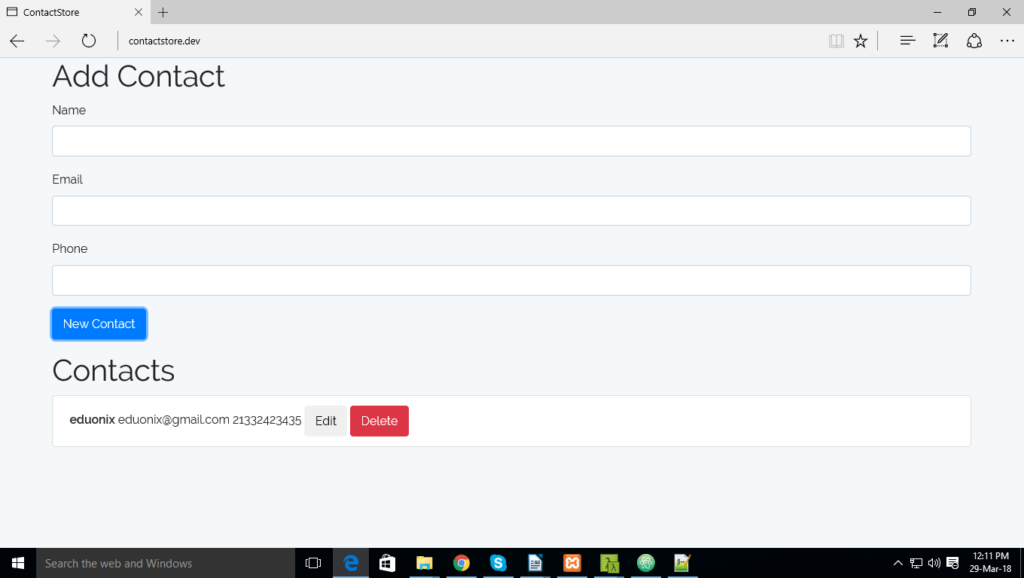
You will see that you’ve created the contact form.
Fetch, update delete Contact:
Now, let’s add a few functions. Open a new Cmder console and go to “C:\xampp\htdocs\contactstore” location. Install the Axios library within your application by using command below:
npm install --save axios
Open the app.js file from location “C:\xampp\htdocs\contactstore\resources\assets\js” and add axios to your app.js file:
require('./bootstrap');

window.Vue = require('vue');

let axios = require('axios');

Vue.component('contacts', require('./components/Contacts.vue'));

const app = new Vue({
    el: '#app'
});
To fetch, update, delete contact make changes in your “Contacts.vue file”. Add the code given below:
<template>
  <div>
    <h1>Add Contact</h1>
    <form action="#" @submit.prevent="edit ? updateContact(contact.id) : createContact()">
      <div class="form-group">
        <label>Name</label>
        <input v-model="contact.name" type="text" name="name" class="form-control">
      </div>
      <div class="form-group">
        <label>Email</label>
        <input v-model="contact.email" type="text" name="email" class="form-control">
      </div>
      <div class="form-group">
        <label>Phone</label>
        <input v-model="contact.phone" type="text" name="phone" class="form-control">
      </div>
      <div class="form-group">
        <button v-show="!edit" type="submit" class="btn btn-primary">New Contact</button>
        <button v-show="edit" type="submit" class="btn btn-primary">Update Contact</button>
      </div>
    </form>
    <h1>Contacts</h1>
    <ul class="list-group">
      <li class="list-group-item" v-for="contact in list">
        <strong>{{contact.name}}</strong> {{contact.email}} {{contact.phone}}
        <button @click="showContact(contact.id)" class="btn btn-default btn-xs">Edit</button>
        <button @click="deleteContact(contact.id)" class="btn btn-danger btn-xs">Delete</button>
      </li>
    </ul>
  </div>
</template>

<script>
  export default {
    data: function(){
      return {
        edit:false,
        list:[],
        contact:{
          id:'',
          name:'',
          email:'',
          phone:''
        }
      }
    },
    mounted: function(){
      console.log('Contacts Component Loaded...');
      this.fetchContactList();
    },
    methods: {
      fetchContactList:function(){
        console.log('Fetching contacts...');
        axios.get('api/contacts')
          .then((response) => {
            console.log(response.data);
            this.list = response.data;
          }).catch((error) => {
            console.log(error);
          });
      },
      createContact: function(){
        console.log('Creating contact...');
        let self = this;
        let params =Object.assign({}, self.contact);
        axios.post('api/contact/store', params)
          .then(function(){
            self.contact.name = '';
            self.contact.email = '';
            self.contact.phone = '';
            self.edit = false;
            self.fetchContactList();
          })
          .catch(function(error){
            console.log(error);
          });
      },
      showContact: function(id){
        let self = this;
        axios.get('api/contact/'+id)
          .then(function(response){
            self.contact.id = response.data.id;
            self.contact.name = response.data.name;
            self.contact.email = response.data.email;
            self.contact.phone = response.data.phone;
          })
          self.edit = true;
      },
      updateContact: function(id){
        console.log('Updating contact '+id+'...');
        let self = this;
        let params =Object.assign({}, self.contact);
        axios.patch('api/contact/'+id, params)
          .then(function(){
            self.contact.name = '';
            self.contact.email = '';
            self.contact.phone = '';
            self.edit = false;
            self.fetchContactList();
          })
          .catch(function(error){
            console.log(error);
          });
      },
      deleteContact: function(id){
        axios.delete('api/contact/'+id)
          .then(function(response){
            self.fetchContactList();
          })
          .catch(function(error){
            console.log(error);
          });
      }
    }
  }
</script>
We will now define the fillable property and created an array with Name, Email, Phone by adding the following code in the Contact.php file. which is located at “C:\xampp\htdocs\contactstore\app”
<?php

namespace App;

use Illuminate\Database\Eloquent\Model;

class Contact extends Model
{
    protected $fillable = ['name', 'email', 'phone'];
}
Congratulations! You’ve finished create your very own Contact Form Page by using VueJS in Laravel.

