

AureliaJS is a JavaScript client framework for web, mobile and desktop development. It is a frontend framework like Angular, ReactJS, and VueJS framework. Aurelia is an open-source, flexible and powerful JavaScript framework. In this article, we are going to learn how to build a Aurelia Js User Manager App. For this application, we are using a ToDo List application project that is already present in the aurelia
If you want to become familiar with AureliaJS and its basic syntax, including benefits, you can check out our Introduction to AureliaJS article. The article covers basic JavaScript syntax, Advantages & Disadvantages of Aurelia and also becoming familiar with Aurelia’s CLI.
Before starting the project, you will need to download a few things. You can check out the prerequisites given below:
1) You will need the sublime text editor and visual studio code for writing and editing the code. This editor offers a number of different benefits for working with JavaScript.
Download and install the visual studio code from “https://code.visualstudio.com/download”
Download and install the sublime text editor from “https://www.sublimetext.com/download”
2) We will also need NodeJS, which you can download and install from – “https://nodejs.org/en/ ”
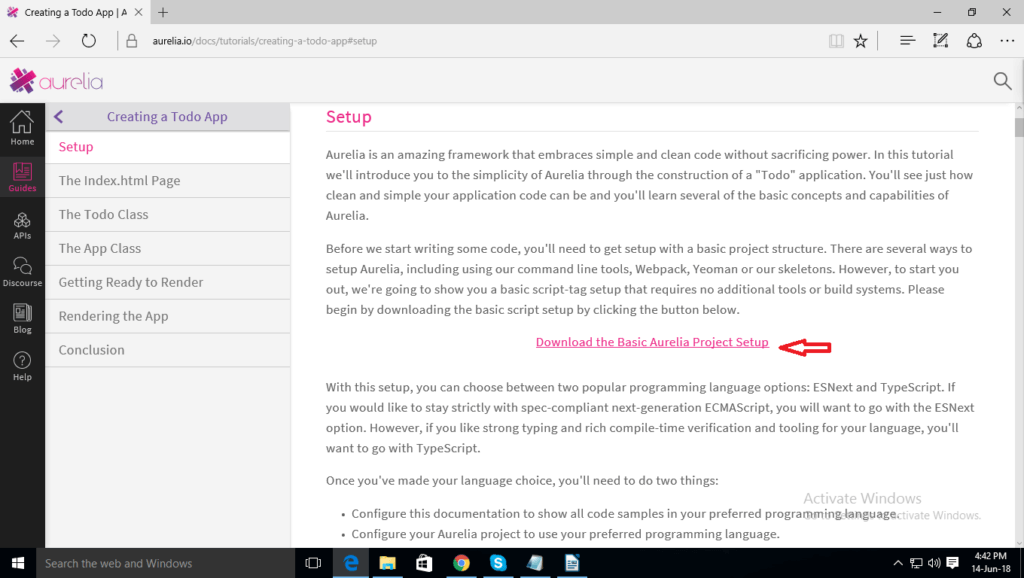
Visit the Aurelia ToDo App link above and click on the “Download the Basic Aurelia Project Setup ” setup and download the zip file.
Create another folder in your project folder with the name “UserManager” and copy all files from the downloaded zip file and paste in the “UserManager” folder.
Open the command prompt as an administrator and go to your “UserManager” folder. Then Run a command to open the project in Visual Studio Code “code”.
Open an index.html file and replace your typescript.js file with the esnext.js file. Check the index.html file as per given below:-
<!DOCTYPE html>
<html>
  <head>
    <title>Aurelia</title>
  </head>
  <body aurelia-app="src/main">
    <script src="scripts/system.js"></script>
    <script src="scripts/config-esnext.js"></script>
    <script src="scripts/aurelia-core.min.js"></script>
    <script>
      System.import('aurelia-bootstrapper');
    </script>
  </body>
</html>
In the SRC folder, create a file with the name “customer.js ” and add the code below:-
export class Customer {
    constructor(name, email, phone) {
      this.name = name;
      this.email = email;
      this.phone = phone;
    }
  }
Create an app.js file in the SRC folder and add the following code –
import { Customer } from './customer';

export class App {
  constructor() {
    this.heading = 'User Manager';
    this.customers = [];

    this.customerName = '';
    this.customerEmail = '';
    this.customerPhone = '';
  }

  addCustomer() {
    if(this.customerName && this.customerEmail && this.customerPhone)
     {
      this.customers.push(new Customer(this.customerName,
        this.customerEmail, this.customerPhone));


      // Clear Fields
      this.customerName = '';
      this.customerEmail = '';
      this.customerPhone = '';
    }
  }

  removeCustomer(customer) {
    let index = this.customers.indexOf(customer);
    if(index !== -1) {
      this.customers.splice(index, 1);
    }

  }


  }
Create a file in the SRC folder under the name “main.js” and add the following code –
export function configure(aurelia) {
    aurelia.use.basicConfiguration();
    aurelia.start().then(() => aurelia.setRoot());
  }
Again dive into the SRC folder, and create a file under the name “app.html” and add the following code. This file displays the heading from the app.js file
     <template>
    <h1>${heading}</h1>
  </template>
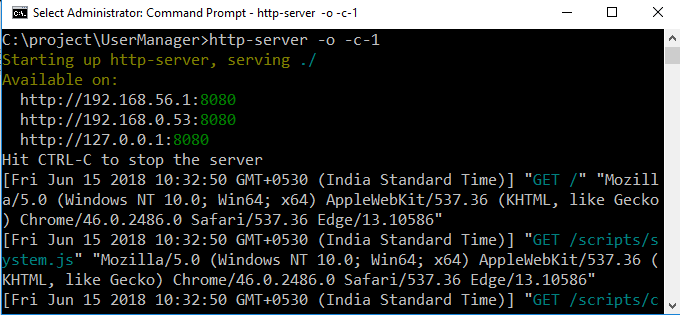
Save all files and in your visual studio code, open an integrated terminal using the view option which is on the upper side of the visual studio code editor and run a command below to install the HTTP server globally using NPM
“npm install -g http-server”
To run the project, run the command given below. You will see the project will automatically open on localhost:8000
“http-server -o -c-1”
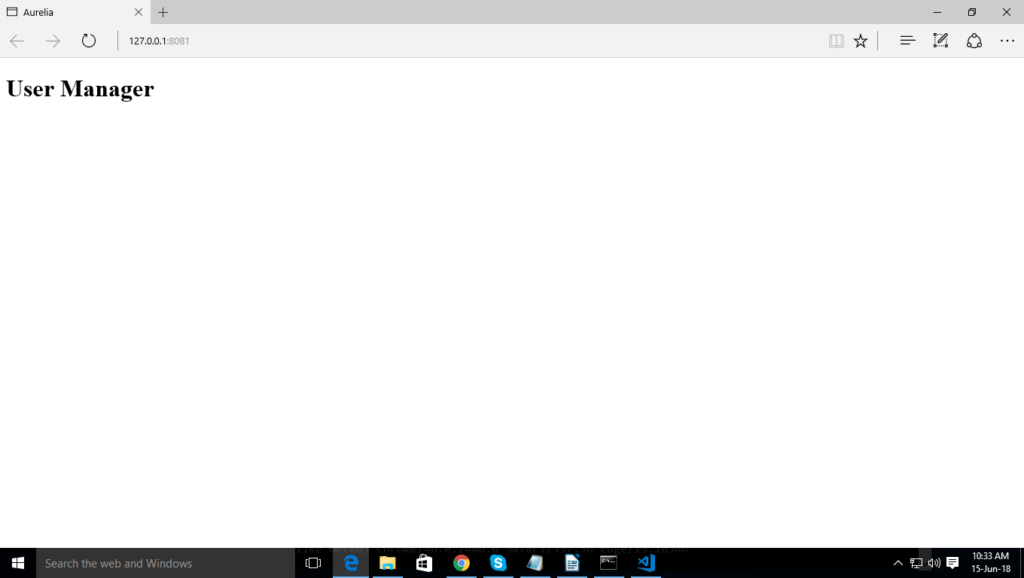
Please check the screenshot of the project after starting the server
In this article, we don’t want bootstrap, but we are using the skeleton CSS from “https://cdnjs.com/libraries/skeleton” link.
For this go to “https://cdnjs.com/libraries/skeleton” and copy the following code “” by clicking on the copy link tag and paste it in the index.html file between the head tag as shown below:-
<!DOCTYPE html>
<html>
  <head>
    <title>Aurelia</title>
    <link rel="stylesheet" href="https://cdnjs.cloudflare.com/ajax/libs/skeleton/2.0.4/skeleton.css" />
  </head>
  <body aurelia-app="src/main">
    <script src="scripts/system.js"></script>
    <script src="scripts/config-esnext.js"></script>
    <script src="scripts/aurelia-core.min.js"></script>
    <script>
      System.import('aurelia-bootstrapper');
    </script>
  </body>
</html>
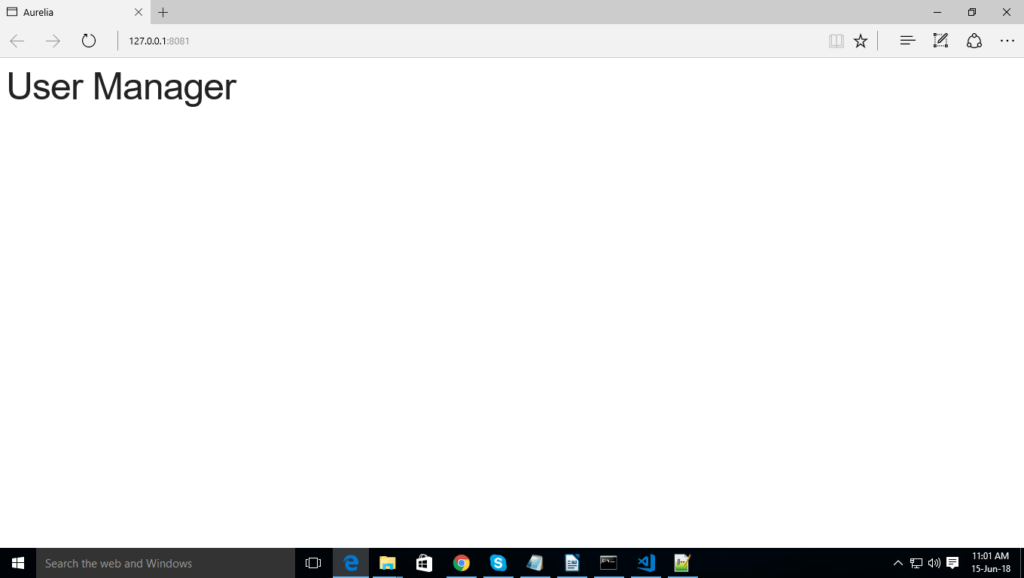
After you’ve added the CSS, you will see the CSS will be applied to project. Rerun the project and check the screenshot –
Open the app.html file from “C:\project\UserManager\src\app.html” and create a field for name, email and phone number as shown below:-
<template>
  <div class="container">
    <h1>${heading}</h1>

    <form submit.trigger="addCustomer()">
      <input type="text" value.bind="customerName" placeholder="Name" class="u-full-width">
      <input type="email" value.bind="customerEmail" placeholder="Email Address" class="u-full-width">
      <input type="text" value.bind="customerPhone" placeholder="Phone Number" class="u-full-width">
      <button type="submit" class="u-full-width">Add Customer</button>
    </form>

    <table class="u-full-width">
      <tr>
        <th>Name</th>
        <th>Email</th>
        <th>Phone</th>
        <th></th>
      </tr>
      <tr repeat.for="customer of customers">
        <td>${customer.name}</td>
        <td>${customer.email}</td>
        <td>${customer.phone}</td>
        <td><button click.trigger="removeCustomer(customer)">Remove</button></td>
      </tr>
    </table>
  </div>
</template>
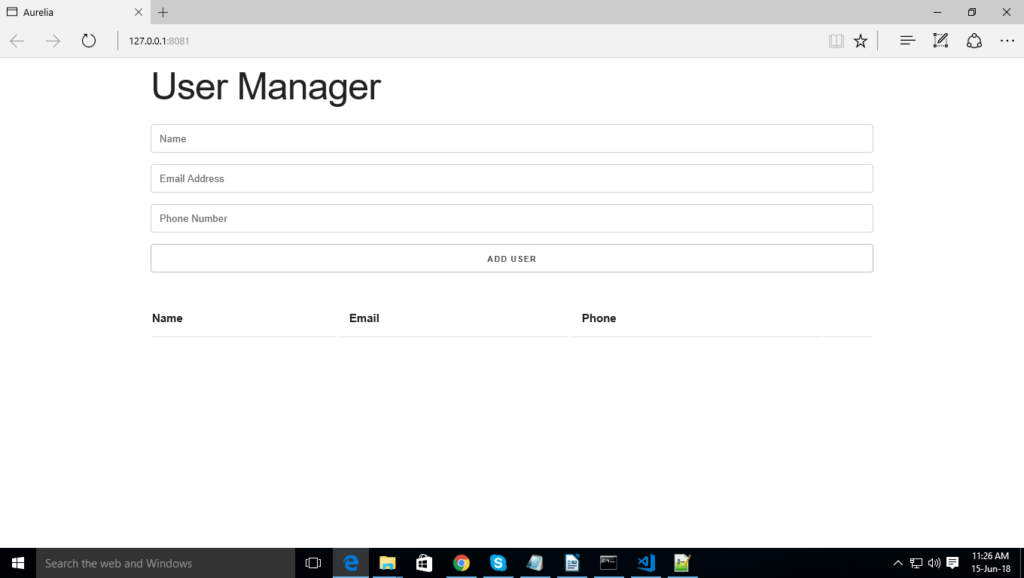
Restart the server and check your field that will be added as shown in the image:-
In the index.html file, add the following code:-
<!DOCTYPE html>
<html>
  <head>
    <title>Aurelia</title>
    <link rel="stylesheet" href="https://cdnjs.cloudflare.com/ajax/libs/skeleton/2.0.4/skeleton.css" />
  </head>
  <body aurelia-app="src/main">
    <script src="scripts/system.js"></script>
    <script src="scripts/config-esnext.js"></script>
    <script src="scripts/aurelia-core.min.js"></script>
    <script>
      var systemLocate = System.locate;
      System.locate = function(load) {
        var System = this;
        return Promise.resolve(systemLocate.call(this, load)).then(function(address) {
          if(address.lastIndexOf("html.js") > -1) return address;
          if(address.lastIndexOf("css.js") > -1) return address;
          return address + System.cacheBust;
        });
      };
      System.cacheBust = '?bust=' + Date.now();

      System.import('aurelia-bootstrapper');
    </script>
  </body>
</html>
Open the app.js file and make a change to add local storage as given below:-
import { Customer } from './customer';

export class App {
  constructor() {
    this.heading = 'Customer Manager';
    this.customers = this.getCustomersFromStorage();

    this.customerName = '';
    this.customerEmail = '';
    this.customerPhone = '';
  }

  getCustomersFromStorage() {
    let customers;
    if(localStorage.getItem('customers') === null) {
      customers = [];
    } else {
      customers = JSON.parse(localStorage.getItem('customers'));
    }

    return customers;
  }

  addCustomer() {
    if(this.customerName && this.customerEmail && this.customerPhone) {
      this.customers.push(new Customer(this.customerName, this.customerEmail, this.customerPhone));

      // Store in LS
      this.storeCustomer(this.customerName, this.customerEmail, this.customerPhone);

      // Clear Fields
      this.customerName = '';
      this.customerEmail = '';
      this.customerPhone = '';
    }
  }

  storeCustomer(name, email, phone){
    let customers;
    if(localStorage.getItem('customers') === null){
      customers = [];
    } else {
      customers = JSON.parse(localStorage.getItem('customers'));
    }

    customers.push({name: name, email: email, phone: phone});
    localStorage.setItem('customers', JSON.stringify(customers));
  }

  removeCustomer(customer) {
    let index = this.customers.indexOf(customer);
    if(index !== -1) {
      this.customers.splice(index, 1);
    }
    this.removeCustomerFromStorage(index);
  }

  removeCustomerFromStorage (index){
    let customers = JSON.parse(localStorage.getItem('customers'));

    customers.splice(index, 1);

    localStorage.setItem('customers', JSON.stringify(customers));
  }
}
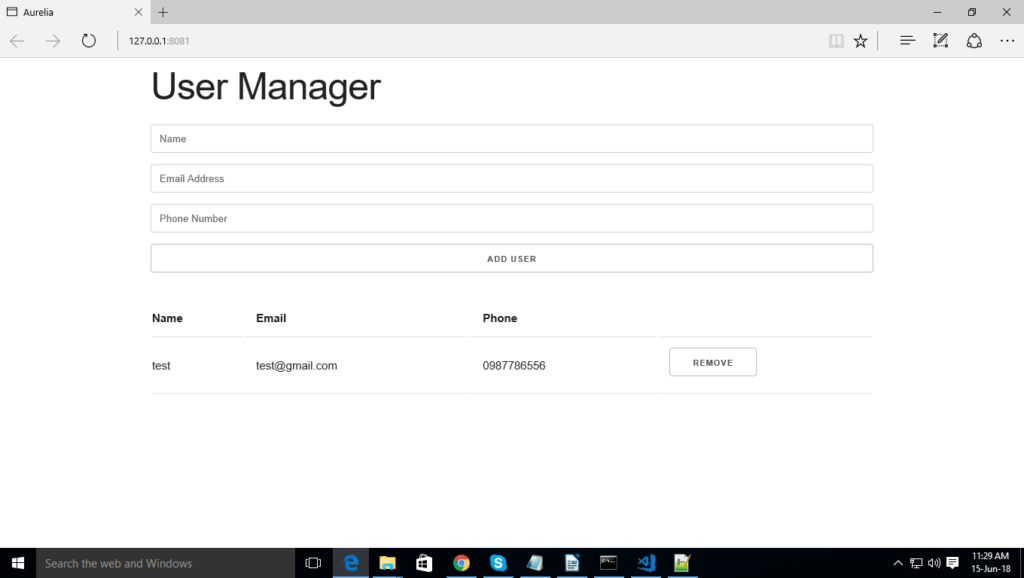
After using the local storage in the app.js file, restart the server and add the name, email address, and phone number. You will see that the information will be added to the database and you can also remove it. See the screenshot below;
We hope that this article has been helpful and informative in understanding the basic building blocks of AureliaJS. We have listed one of the easiest way to start building apps using the Aurelia Framework. If you liked this blog or have any questions, let us know in the comments section down below.

