

Let’s take a look into what Laravel is, what it is used for and what it offers. Laravel is one of the most popular PHP framework, in the ranks along with CodeIgniter, Symfony and Yii2. Laravel is an open-source PHP web application framework, which means it uses PHP a server-side scripting language and is commonly used for server-side development, not in clients or browsers. It also uses a Model-View-Controller, or MVC, design pattern, which is popular for small and really large applications.
Since, PHP is one of the most popular programming language, it is a must for any newbie who is looking to become a developer. If you want to learn more about Laravel and PHP programming in a new and fun way with 10 amazing projects, then you can help us bring our amazing Laravel Projects Course to life! All you need to do is to support our Kickstarter Campaign.
Features of Laravel
Laravel offers some amazing features that can help simplify coding apps and websites: –
• Bundles: – everything is packed in a Moduler Packing System
• Eloquent ORM: – basically a PHP implementation of Active Record, which makes it easier to deal with the Database.
• Query Builder: – provides a fluent interface to create and run database queries
• Reverse Routing: – this has to creating links to other pages
• RESTful Controllers: – which helps build controllers around resources and makes it easier to deal with HTTP requests.
• Blade Templating Engine: – makes your PHP tags cleaner and easier to use
• Database Migrations: – makes things easier to migrate
• Artisan CLI: – it can manage so many different things such as migrations, publishing package assets, generating boilerplate code, create things requests, controllers models, etc.
For this tutorial blog post, we will be using the Laravel version 5. Before we delve into the coding aspects, please keep in mind you will need to have the following: –
• Apache or NGINX Web Server
• PHP version 5.4 or higher
• Some extensions – OpenSSL, PDO, Mbstring, Mcrypt and PHP JSON (on some servers)
• Enviornments – Cpanel Webserver or XAMPP or WAMP
Before we get started with Laravel, we need to first create our development environment. For this we first need to download and configure our server, and for this project we will be using XAMPP. Following this we will also install Netbeans, which is an IDE and works extremely well with PHP.
To download XAMPP, go to https://www.apachefriends.org/download.html and click on the Download button for your respective version and OS.

Once, this is done. Let’s go back to XAMPP. Find the XAMPP folder, open it and look for the xampp-control file. Right-click and select ‘Run As Administrator’

Now, the control panel would pop up. It should look something like this:
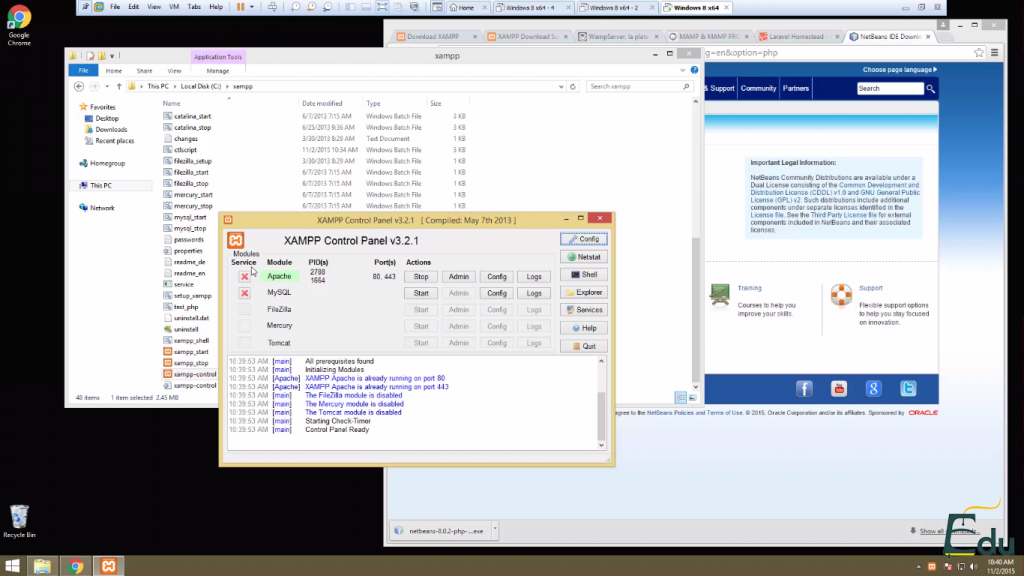
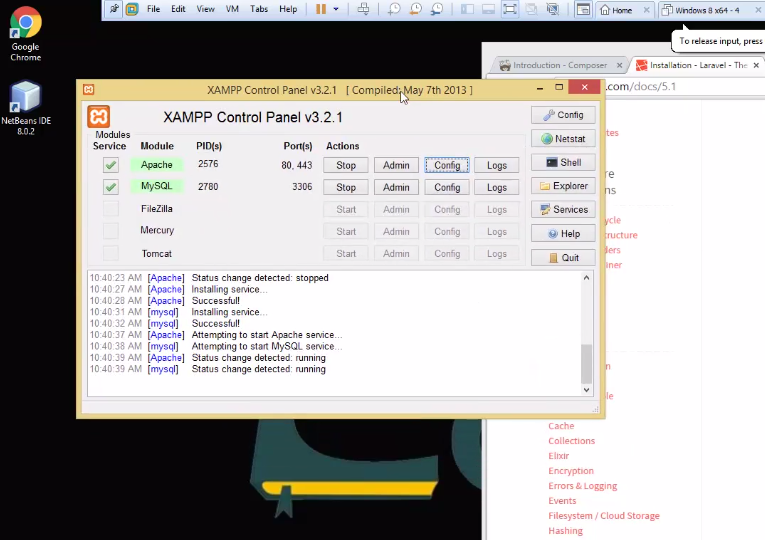
Now, we needed to run this as administrator, because otherwise it wouldn’t have given us this control panel, which we need to run services such as Apache and MySQL. Stop the running services, and click on the little X button to install the service. It will show you a pop-up to let you know when it’s finished. Click on the Start button for both the services. You can google localhost on your browser, to check if it works.
We also have to check if the OpenSSL PHP extension works, so go back to your xampp control panel, right click on the Config button next to Apache. Click on the PHP.ini file, and click Ctrl+F. Search OpenSSL and check if there is a semi-colon (;) next to it. If there is, that means it’s not enabled. If there is no (;), then it is enabled.
Now, let’s get started on installing the Composer Manager for PHP, Laravel, and set up a virtual host that we can use for our Laravel installation. You can download it from the https://getcomposer.org/download/ website or we can install it directly from the xampp panel.
On the panel, click on the shell button the right-hand side corner.
This will pop up a terminal. Now, we want to enter the PHP folder, so write cd php and press enter. Now, enter the following lines of code, which is available on the Composer Website. Check the website for the latest code, before you copy paste it, as it changes with every version.
php -r "copy('https://getcomposer.org/installer', 'composer-setup.php');"
php -r "if (hash_file('SHA384', 'composer-setup.php') === '669656bab3166a7aff8a7506b8cb2d1c292f042046c5a994c43155c0be6190fa0355160742ab2e1c88d40d5be660b410') { echo 'Installer verified'; } else { echo 'Installer corrupt'; unlink('composer-setup.php'); } echo PHP_EOL;"
php composer-setup.php
php -r "unlink('composer-setup.php');"
Once, downloaded. Go to your PHP folder and create a new text document. Label this composer.bat and ensure that the extension is bat. Open the file with Notepad and type the following:
@ECHO OFF
SET SUBDIR-%~dp0
php %SUBDIR%\composer.phar %*
Save and close.
Now, go back to your shell that you used to install Composer. And type in the following:
cd.. (Press Enter)
cd htdocs (Press Enter)
cd laraveldev (Press Enter)
Go to the Laravel website – www.laravel.com/docs/5.1 and grab the code snippet to download Laravel.
composer global require "laravel/installer"
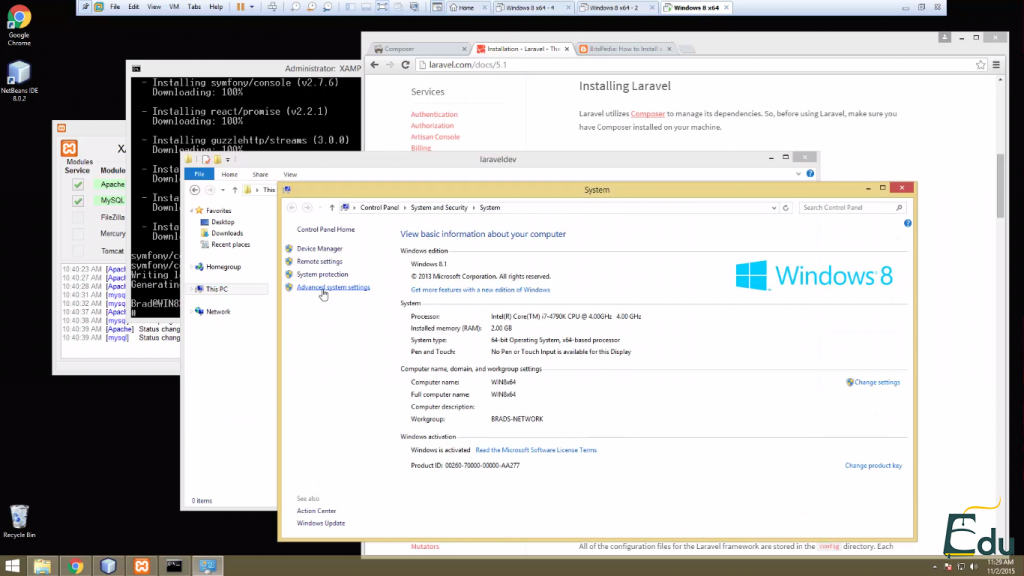
After this, you need to ensure the correct path, so select your local computer system, right click on it and select Properties. On the left hand-side click on the ‘Advanced System Setting’ and then ‘Environment Variables’ Check if PATH is highlighted, and click on the Edit button. Over there add a semicolon (;) to the path already provided and add C:\Users\(YourPCName)\AppData\Roaming/Composer/Vendor\bin; – Save and Restart your system.
Now, go back to the shell and type cd htdocs and then laravel new laraveldev, to create your system folder. Now, we need to create a virtual host for your php application.
Within the xampp director, go to apache, conf, extra, and there is a file called httpd-vhosts.conf. Open this file with a text editor. Replace the text in the file with the following one:
#
# Use name-based virtual hosting.
#
NameVirtualHost *:80
#
# VirtualHost example:
# Almost any Apache directive may go into a VirtualHost container.
# The first VirtualHost session is used for all requests that do not
# match a ##ServerName or ##ServerAlias in any <VirtualHost> block.
#

<VirtualHost *:80>
….DocumentRoot: “C:/xampp/htdocs”
….ServerName localhost
</VirtualHost>

<VirtualHost *:80>
….DocumentRoot: “C:/xampp/htdocs/laraveldev/public”
….ServerName laraveldev
</VirtualHost>

##<VirtualHost*:80
	##ServerAdmin [email protected]
	##DocumentRoot “C:/xampp/htdocs/dummy-host.example.com”
	##ServerName dummy-host.example.com
	##ErrorLog “logs/dummy-host.example.com-error.log”
	##CustomLog “logs/dummy-host.example.com-access.log” common
##</VirtualHost>

##<VirtualHost*:80
	##ServerAdmin [email protected]
	##DocumentRoot “C:/xampp/htdocs/dummy-host2.example.com”
	##ServerName dummy-host2.example.com
	##ErrorLog “logs/dummy-host2.example.com-error.log”
	##CustomLog “logs/dummy-host2.example.com-access.log” common
##</VirtualHost>
Save this. Run your Notepad as Administrator and go to C drive, Windows and System32, Drivers, etc and then open hosts.
Replace the last two lines with the following:
#	127.0.0.1	localhost
	127.0.0.1	laraveldev
#	::1		localhost
Save and Close. Restart your Apache server. Now, when you type localhost/laraveldev in the browser, it should take you to the desired page. Now, we just need to add the project to Netbeans.
Open Netbeans. Selet File, New Project. Select PHP and then PHP Application with Existing Sources. Click Next. Go to the laraveldev folder and click next and then Finish.
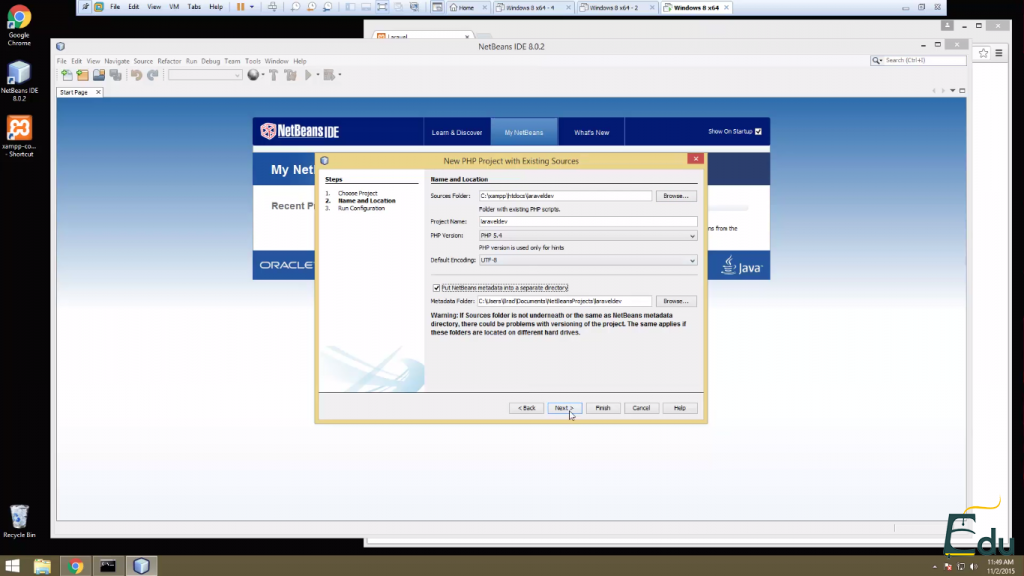
Now, you are ready start working with Laravel in Netbeans and your system environment is completely set up.
If you liked this tutorial, you can check out the entire Laravel course that can help you learn the ins and outs of Laravel from scratch.

