
In this article, we are going to build an audio player using HTML5. We are going to incorporate HTML5 audio features as well as JavaScript and jQuery. We will add features like Play, Previous, Next, Pause, Stop and Volume control. We will also include a progress-bar with time, as well as create a playlist of the songs added.
Steps for creating Audio Player UI – HTML
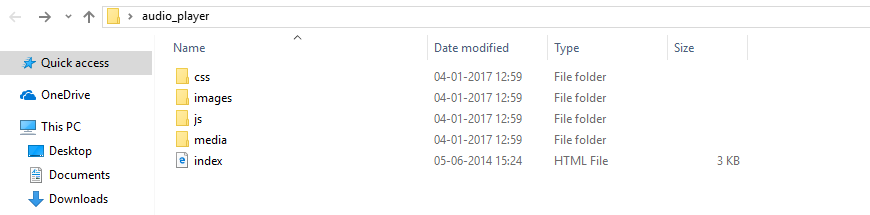
- We are going to create a folder named “audio_player” and inside we are going to create the following structure:
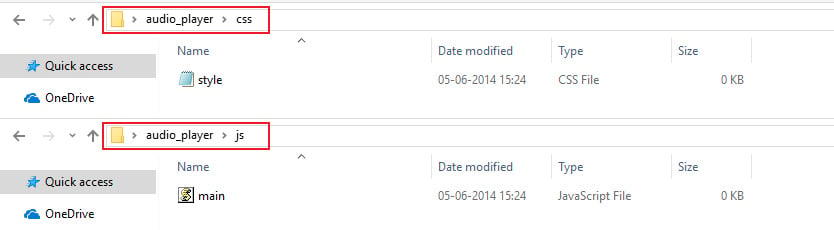
- Inside the “CSS” folder, we will create a “style.css” file. Similarly, In the “JS” folder we will add a “main.js” file. Please have a look at the screen-shot below.
- After that, go to jquery.com and download the “jquery” file. So, your folder structure should look like this.

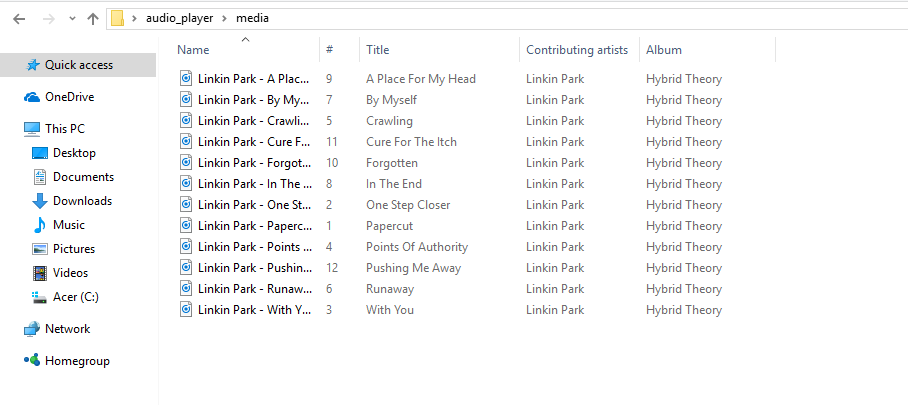
- Inside the “Media” folder, you can see the song list. I’ve attached the screen-shot below for reference:
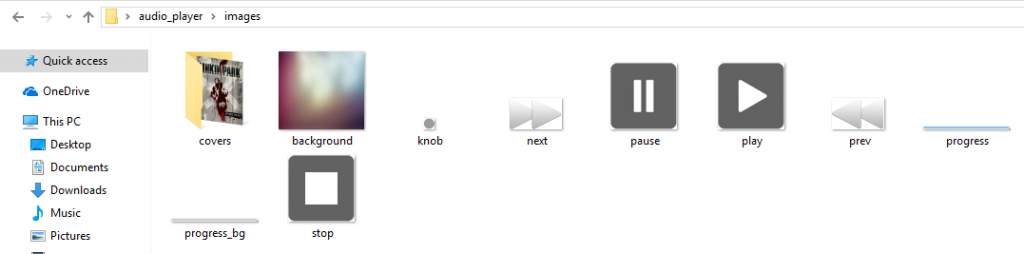
- Inside the “Image” folder, you can find the images and in the “cover” folder, you can find out the cover image of the album. I’ve attached the screen shot below:
- Now, its time to design your front page. Open the index.html page and add the following code.
Index.html
<html>
<head>
    <title>HTML5 Audio Player</title>
	<link rel="stylesheet" href="css/style.css">
</head>
<body>
	<div id="container">
		<div id="audio-image">
			<img class="cover">
		</div>
		<div id="audio-player">
			<div id="audio-info">
				<span class="artist"></span> - <span class="title"></span>
			</div>
			<input id="volume" type="range" min="0" max="10" value="4">
			<br>
			<div id="buttons">
				<span>
					<button id="prev"></button>
					<button id="play"></button>
					<button id="pause"></button>
					<button id="stop"></button>
					<button id="next"></button>
				</span>
			</div>
			<div class="clearfix"></div>
			<div id="tracker">
				<div id="progress-bar">
					<span id="progress"></span>
				</div>
				<span id="duration"></span>
			</div>
			<div class="clearfix"></div>
			<ul id="playlist" class="hidden">
				<li class="active" song="Linkin Park - Papercut.mp3" cover="cover1.jpg" artist="Linkin Park">Papercut.mp3</li>
				<li song="Linkin Park - One Step Closer.mp3" cover="cover1.jpg" artist="Linkin Park">One Step Closer.mp3</li>
				<li song="Linkin Park - With You.mp3" cover="cover1.jpg" artist="Linkin Park">With You.mp3</li>
				<li song="Linkin Park - Points Of Authority.mp3" cover="cover1.jpg" artist="Linkin Park">Points Of Authority.mp3</li>
				<li song="Linkin Park - Crawling.mp3" cover="cover1.jpg" artist="Linkin Park">Crawling.mp3</li>
				<li song="Linkin Park - Runaway.mp3" cover="cover1.jpg" artist="Linkin Park">Runaway.mp3</li>
				<li song="Linkin Park - By Myself.mp3" cover="cover1.jpg" artist="Linkin Park">By Myself.mp3</li>
				<li song="Linkin Park - In The End.mp3" cover="cover1.jpg" artist="Linkin Park">In The End.mp3</li>
				<li song="Linkin Park - A Place For My Head.mp3" cover="cover1.jpg" artist="Linkin Park">A Place For My Head.mp3</li>
				<li song="Linkin Park - Forgotten.mp3" cover="cover1.jpg" artist="Linkin Park">Forgotten.mp3</li>
				<li song="Linkin Park - Cure For The Itch.mp3" cover="cover1.jpg" artist="Linkin Park">Cure For The Itch.mp3</li>
				<li song="Linkin Park - Pushing Me Away.mp3" cover="cover1.jpg" artist="Linkin Park">Pushing Me Away.mp3</li>
			</ul>
		</div>
	</div>

	<script src="js/jquery.js"></script>
	<script src="js/main.js"></script>
</body>
</html>
Steps for creating Audio Player UI – CSS
- Now we are going to add the css code in our “style.css” file. For that, open your css folder and inside that you will see your style.css file. Open that file and add the following code:
Style.css
*{
	margin:0;
	padding:0;
	border:none;
	outline:none;
}

body{
	font-family:Arial;
	font-size:13px;
	line-height:1.5em;
	color:#fff;
	background: #78284a; /* Old browsers */
	background: -moz-linear-gradient(left, #78284a 0%, #6d8a9f 100%); /* FF3.6+ */
	background: -webkit-gradient(linear, left top, right top, color-stop(0%,#78284a), color-stop(100%,#6d8a9f)); /* Chrome,Safari4+ */
	background: -webkit-linear-gradient(left, #78284a 0%,#6d8a9f 100%); /* Chrome10+,Safari5.1+ */
	background: -o-linear-gradient(left, #78284a 0%,#6d8a9f 100%); /* Opera 11.10+ */
	background: -ms-linear-gradient(left, #78284a 0%,#6d8a9f 100%); /* IE10+ */
	background: linear-gradient(to right, #78284a 0%,#6d8a9f 100%); /* W3C */
}

.clearfix{
	clear:both;
}

#container{
	width:330px;
	min-height:400px;
	background:#333;
	overflow:auto;
	margin:20px auto;
	border-radius:10px;
	box-shadow:0 10px 8px -8px #333;
}

#audio-image{
	position:relative;
	overflow:hidden;
	height:200px;
	margin-bottom:15px;
}

#audio-image .cover{
	width:100%;
}

#audio-info{
	text-align:center;
}

#audio-info .artist{
	font-weight:bold;
}

input#volume{
	width:95%;
	margin-left:2%;
	-webkit-appearance:none !important;
	background:#ccc;
	height:1px;
	margin-bottom:20px;
}
input#volume::-webkit-slider-thumb{
	-webkit-appearance:none !important;
	background:url(../images/knob.png) no-repeat;
	height:12px;
	width:12px;
}

#buttons{
	width:90%;
	display:block;
	margin:15px auto;
	margin-left:23px;
	overflow:auto;
}

button#play{
	width:70px;
	height:70px;
	background:url(../images/play.png) no-repeat;
	float:left;
	margin-left:-2px;
}

button#pause{
	width:70px;
	height:70px;
	background:url(../images/pause.png) no-repeat;
	float:left;
	margin-left:-2px;
}

button#stop{
	width:70px;
	height:70px;
	background:url(../images/stop.png) no-repeat;
	float:left;
	margin-left:3px;
}

button#prev{
	width:70px;
	height:70px;
	background:url(../images/prev.png) no-repeat;
	float:left;
	margin-top:15px;
}

button#next{
	width:70px;
	height:70px;
	background:url(../images/next.png) no-repeat;
	float:right;
	margin-top:15px;
}

#tracker{
	position:relative;
	width:100%;
}

#progress-bar{
	width:80%;
	margin-left:2%;
	margin-bottom:20px;
	margin-top:9px;
	height:10px;
	background:url(../images/progress_bg.png) no-repeat;
	float:left;
}

#progress{
	background:url(../images/progress.png) no-repeat;
	height:10px;
	display:inline-block;
}

#duration{
	position:absolute;
	top:0;
	right:10px;
	padding: 4px 8px;
	background:#000;
	border-radius:5px;
}

#playlist{
	list-style:none;
}
#playlist li{
	cursor:pointer;
	margin:5px;
}
#playlist li.active{
	font-weight:bold;
	padding:3px;
	background:#666;
}
Steps for creating Play, Pause & Stop buttons:
- Now, we are going to add three buttons to our application using JavaScript for which you will need to go to your js folder and open the main.js file and add the following code:
Main.js:
var audio = new Audio('media/Linkin Park - Papercut.mp3');

//Hide Pause
$('#pause').hide();

//Play button
$('#play').click(function(){
	audio.play();
	$('#play').hide();
	$('#pause').show();
	showDuration();
});

//Pause button
$('#pause').click(function(){
	audio.pause();
	$('#play').show();
	$('#pause').hide();
});

//Stop button
$('#stop').click(function(){
	audio.pause();
	audio.currentTime = 0;
});
- Now we are going to add code for volume control and time duration in your main.js file. I had attached the code:
/Volume control
$('#volume').change(function(){
	audio.volume = parseFloat(this.value / 10);
});

//Time/Duration
function showDuration(){
	$(audio).bind('timeupdate',function(){
		//Get hours and minutes
		var s = parseInt(audio.currentTime % 60);
		var m = parseInt(audio.currentTime / 60) % 60;
		if(s < 10){
			s = '0'+s;
		}
		$('#duration').html(m + ':'+ s);
		var value = 0;
		if(audio.currentTime > 0){
			value = Math.floor((100 / audio.duration) * audio.currentTime);
		}
		$('#progress').css('width',value+'%');
	});
}
- After that is done, we are going to add the Playlist functionality code. So, your final main.js should look like:
var audio;

//Hide Pause
$('#pause').hide();

initAudio($('#playlist li:first-child'));

function initAudio(element){
	var song = element.attr('song');
	var title = element.text();
	var cover = element.attr('cover');
	var artist = element.attr('artist');

	//Create audio object
	audio = new Audio('media/'+ song);

	//Insert audio info
	$('.artist').text(artist);
	$('.title').text(title);

	//Insert song cover
	$('img.cover').attr('src','images/covers/'+cover);

	$('#playlist li').removeClass('active');
	element.addClass('active');
}

//Play button
$('#play').click(function(){
	audio.play();
	$('#play').hide();
	$('#pause').show();
	showDuration();
});

//Pause button
$('#pause').click(function(){
	audio.pause();
	$('#play').show();
	$('#pause').hide();
});

//Stop button
$('#stop').click(function(){
	audio.pause();
	audio.currentTime = 0;
});

//Next button
$('#next').click(function(){
	audio.pause();
	var next = $('#playlist li.active').next();
	if(next.length == 0){
		next = $('#playlist li:first-child');
	}
	initAudio(next);
	audio.play();
	showDuration();
});

//Prev button
$('#prev').click(function(){
	audio.pause();
	var prev = $('#playlist li.active').prev();
	if(prev.length == 0){
		prev = $('#playlist li:last-child');
	}
	initAudio(prev);
	audio.play();
	showDuration();
});

//Playlist song click
$('#playlist li').click(function(){
	audio.pause();
	initAudio($(this));
	$('#play').hide();
	$('#pause').show();
	audio.play();
	showDuration();
});

//Volume control
$('#volume').change(function(){
	audio.volume = parseFloat(this.value / 10);
});

//Time/Duration
function showDuration(){
	$(audio).bind('timeupdate',function(){
		//Get hours and minutes
		var s = parseInt(audio.currentTime % 60);
		var m = parseInt(audio.currentTime / 60) % 60;
		if(s < 10){
			s = '0'+s;
		}
		$('#duration').html(m + ':'+ s);
		var value = 0;
		if(audio.currentTime > 0){
			value = Math.floor((100 / audio.duration) * audio.currentTime);
		}
		$('#progress').css('width',value+'%');
	});
}
- After we are finished with the coding, our application should look like this:
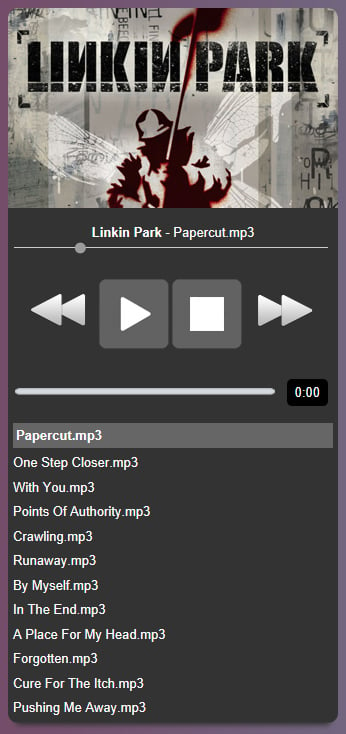
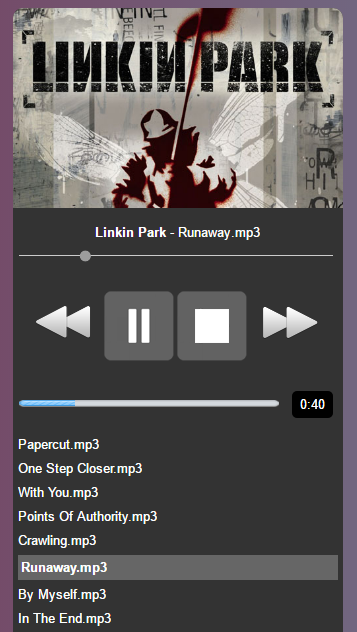
I hope this has been helpful for you guys in understanding a how to create Audio Player Application using HTML5 Goodluck!


Great tutorial, can you please add full source code because I can’t see some images you used
how can i implement a play all button using this ?
var currentSong = 0;
$(‘#playall’).click(function () {
audio.play();
showDuration()
currentSong = $(‘#playlist li’).index()
});
audio.addEventListener(‘ended’, function () {
currentSong++;
if (currentSong == $(‘#playlist li’).length) {
currentSong = 0;
}
var nextsong = $($(“#playlist li”)[currentSong])
initAudio(nextsong)
audio.play();
showDuration()
})
I tried to do this but it only play the next song, after that, it doesn’t play the third