

Every dynamic web application requires the input handling as forms. In Angular 1, we have ng-model directives which are used to manage input handling in forms, but still there is a scope of improvement. Therefore in Angular 2, the new Forms module is easier to develop and reason about than ng-model directives of Angular 1 and it has no drawbacks.
In this article, we are going to cover the design objectives for the Angular 2 form module and we will demonstrate the practical examples on the ‘Student App’ for the common use cases.
To build the form for the student App in Angular 2, the following are the steps.
1. Firstly, we will create a model class known as Student. In the constructor of this model class, we are declaring the variables rollNo, name, course and branch with their modifier and data type as shown below. The following is the file student.ts present in the app package.
app/student.ts
export class Student {
  constructor(
    public rollNo: number,
    public name: string,
    public course: string,
    public branch?: string
  ) {  }
}
2. We need to add a stylesheet styles.css to the font and web elements on the Student App form page. The following is the file styles.css present in the app package.
assets/styles.css
h2 {
  color: #369;
  font-family: Georgia, Helvetica, sans-serif;
  font-size: 250%;
}
.ng-valid[required] {
  border-left: 5px solid #42A948; /* green */
}

.ng-invalid {
  border-left: 5px solid #a94442; /* red */
}
p {
  color: #969;
  font-family: Georgia, Helvetica, sans-serif;
  font-size: 250%;
}

html {
  font-family: sans-serif;
  -ms-text-size-adjust: 100%;
  -webkit-text-size-adjust: 100%;
}
body {
  margin: 0;
}
3. Next, we need to create the template for the Student App webpage. This page will have the five web elements that corresponds to the model class. The first three fields namely rollNo, name, and branch are the input text box. The filed course is a dropdown select menu and the last field is a ‘submit’ button. The following is the template file student-form.component.html present in the app package.
app/student-form.component.html
<div [hidden]="submitted">
Form Values Diagnosis: {{diagnostic}}
<div class="container">
<h1>Login Form</h1>
<form *ngIf="active" (ngSubmit)="onSubmit()" #studentForm="ngForm">
<div class="form-group">
<label for="rollNo">Roll No</label> <input type="text"
class="form-control" id="rollNo"
required
[(ngModel)]="model.rollNo" name="rollNo"
#rollNo="ngModel">
<div [hidden]="rollNo.valid || rollNo.pristine"
class="alert alert-danger">Roll No is required field.</div>
</div>
<div class="form-group">
<label for="name">Name</label> <input type="text"
class="form-control" id="name"
required
[(ngModel)]="model.name" name="name"
#name="ngModel">
<div [hidden]="name.valid || name.pristine"
class="alert alert-danger">Name is required field.</div>
</div>
<div class="form-group">
<label for="branch">Degree</label> <input type="text"
class="form-control" id="branch"
required
[(ngModel)]="model.branch" name="branch"
#branch="ngModel">
<div [hidden]="branch.valid || branch.pristine"
class="alert alert-danger">Degree is required field.</div>
</div>
<div class="form-group">
<label for="course">Course</label> <select class="form-control"
id="course" required
[(ngModel)]="model.course"
name="course">
<option *ngFor="let p of courses" [value]="p">{{p}}</option>
</select>
</div>
<button type="submit" class="btn btn-danger">Submit</button>
<button type="button" class="btn btn-warning" (click)="newStudent()">Reset</button>
<button type="button" class="btn btn-warning" (click)="default()">Default</button>
</form>
</div>
</div>
<div [hidden]="!submitted">
<h2>Thanks for submitting your details.</h2>
<div class="row">
<div class="col-xs-3">Name:</div>
<div class="col-xs-9 pull-left">{{ model.name }}</div>
</div>
<div class="row">
<div class="col-xs-3">Roll No:</div>
<div class="col-xs-9 pull-left">{{ model.rollNo }}</div>
</div>
<div class="row">
<div class="col-xs-3">Course:</div>
<div class="col-xs-9 pull-left">{{ model.course }}</div>
</div>
<div class="row">
<div class="col-xs-3">Degree:</div>
<div class="col-xs-9 pull-left">{{ model.branch }}</div>
</div>
<br>
<button class="btn btn-danger" (click)="submitted=false">Edit</button>
</div>
Explanation of the above HTML template.
- In the above template, we are using the two-way data bind with [(ngModel)] syntax which is used for reading and writing the values to input controls.
- The ngModel combined with a form helps to track the change state and validity of form controls.
- We are capturing the visual feedback as green or red color by using the special CSS classes (in styles.css) that helps to track the state of the controls.
- Also, we are displaying validation errors to users when the required input field on the form is empty with the help of the [hidden] attribute.
- Lastly, we are handling the form submission with ‘ngSubmit’ syntax and also setting the form to be active or inactive by using *ngIf syntax.
4. The following is the file student-form.component.ts present in the app package. This file has the component with selector as ‘student-form’ and the template URL as ‘app/student-form.component’ i.e. the HTML template that we have created in the last step. The class ‘StudentFormComponent’ after the @Component block controls the form and it has the following methods for form action.
- An array that provides values to the dropdown menu.
- The ‘onSubmit ()’ method that sets the submitted flag to true on the form submission.
- The ‘newStudent ()’ method that is used to reset the form elements.
- The ‘default ()’ method that is used to set the default values of the form elements.
- The diagnostic method to return the JSON object value for the form parameters.
app/student-form.component.ts
import { Component } from '@angular/core';
import { Student }    from './student';
@Component({
  selector: 'student-form',
  templateUrl: 'app/student-form.component.html'
})
export class StudentFormComponent {
  courses = ['Computer', 'Electronics',
            'Mechanical', 'Electrical','Chemical'];
  model = new Student(308251, 'Rajat Sharma', this.courses[0], 'Engineering');
  submitted = false;
  onSubmit() {
  		this.submitted = true;
  }
  active = true;
  newStudent() {
     this.model = new Student(0, '', '');
     this.active = false;
     setTimeout(() => this.active = true, 0);
  }

  default() {
  	    this.model = new Student(308251, 'Rajat Sharma', this.courses[0], 'Engineering');
  }
  get diagnostic() {
  		return JSON.stringify(this.model);
  }
}
5. The following is the root App component typescript file that has the selector as ‘student-app’ and the template as ‘<student-form></student-form>’ which was actually the selector in ‘app/student-form.component’ file.
app/Component.ts
import { Component } from '@angular/core';
@Component({
  selector: 'student-app',
  template: '<student-form></student-form>'
})
export class AppComponent {
}
6. The following is the root App Module typescript file which is present in the app package. This type imports the NgModule, BrowserModule, FormsModule, AppComponent, and StudentFormComponent as shown below. The @NgModule annotation is declared here.
app/Module.ts
import { NgModule }      from '@angular/core';
import { BrowserModule } from '@angular/platform-browser';
import { FormsModule }   from '@angular/forms';
import { AppComponent }  from './Component';
import { StudentFormComponent } from './student-form.component';
@NgModule({
  imports: [
    BrowserModule,
    FormsModule
  ],
  declarations: [
    AppComponent,
    StudentFormComponent
  ],
  bootstrap: [ AppComponent ]
})
export class AppModule {
}
7. The following is the main.ts file, this file imports platformBrowserDynamic, AppModule and starts the bootstrap module.
app/main.ts
import { platformBrowserDynamic } from '@angular/platform-browser-dynamic';
import { AppModule } from './Module';
platformBrowserDynamic().bootstrapModule(AppModule);
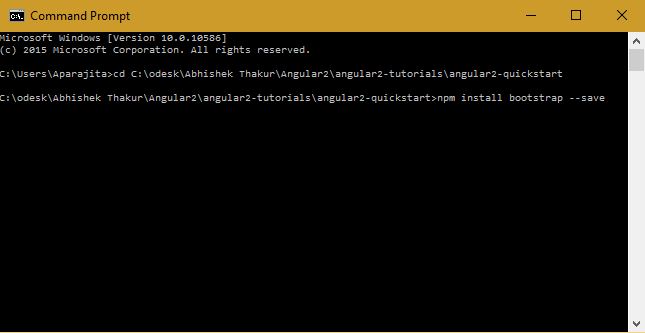
8. Lastly, we have to call the above Student App selector present in the root Component typescript file i.e. ‘student-app’ in the index.html file as shown below. In this example, we are using the bootstrap css stylesheet (node_modules/bootstrap/dist/css/bootstrap.min.css). In Angular 2, we can install bootstrap by executing the following command on the command line as shown below.
npm install bootstrap --save
Index.html
<html>
<head>
<title>Student App</title>
<meta charset="UTF-8">
<meta name="viewport" content="width=device-width, initial-scale=1">
<link rel="stylesheet" href="assets/styles.css">
<!-- 1. Load libraries -->
<!-- Poly-fills for the older browsers -->
<script src="node_modules/core-js/client/shim.min.js"></script>
<script src="node_modules/zone.js/dist/zone.js"></script>
<script src="node_modules/reflect-metadata/Reflect.js"></script>
<script src="node_modules/systemjs/dist/system.src.js"></script>
<link rel="stylesheet"
      href="node_modules/bootstrap/dist/css/bootstrap.min.css">
<!-- 2. Configure SystemJS -->
<script src="systemjs.config.js"></script>
<script>
      System.import('app').catch(
    		  function(err){
    			  console.error(err);
    			  }
    		  );
</script>
</head>
<!-- 3. Display the application -->
<body>
<student-app>A moment please...</student-app>
</body>
</html>
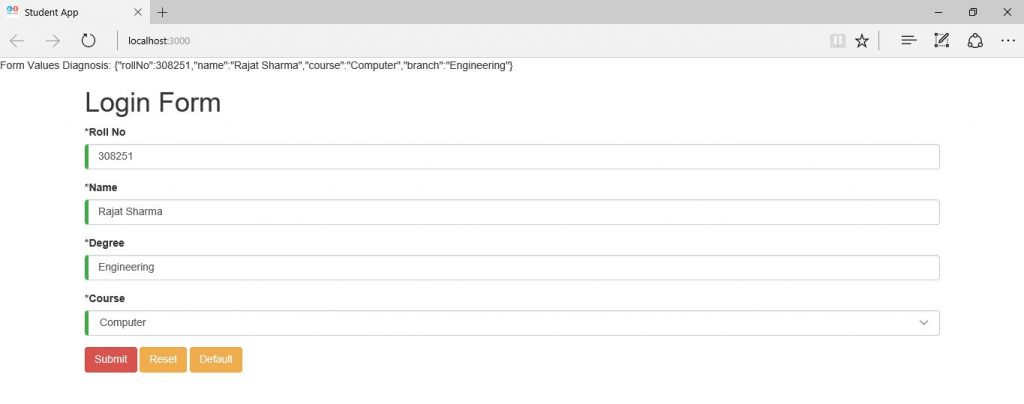
Output
When we execute the command ‘npm start’ on the command line then we will see the following output. In the output, we can see a form on the Student App webpage.
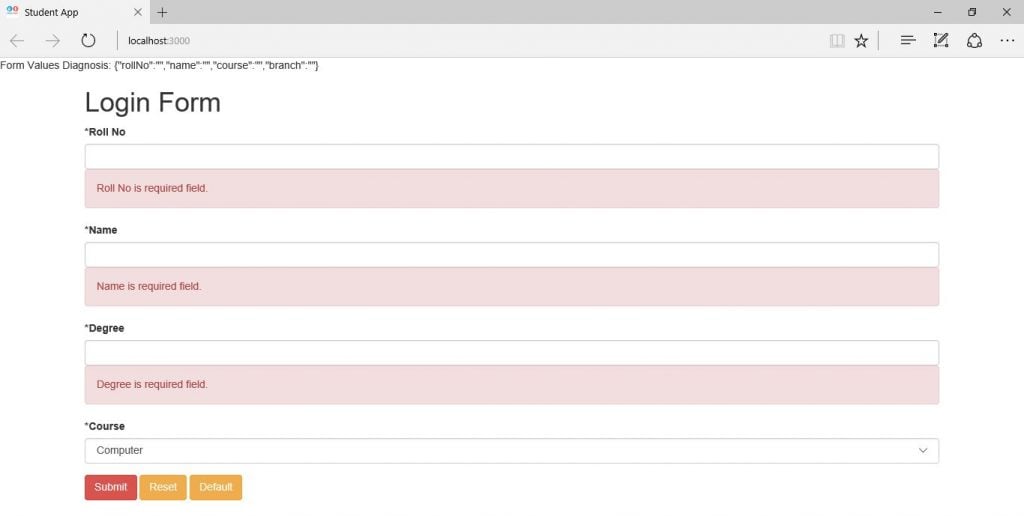
When we remove the value of any of the above web element then we notice the message as that particular field is required field as shown below.
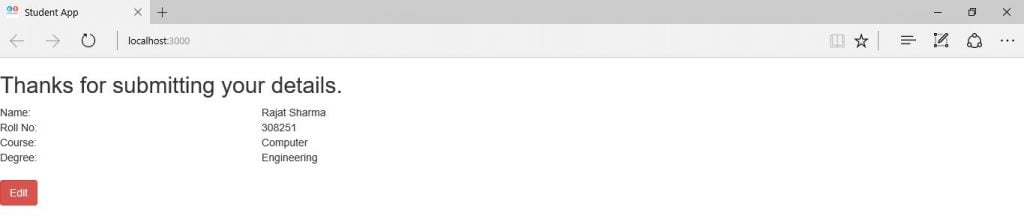
When, we successfully submit the current form by clicking the ‘Submit’ button then we can see the following output screen.
Source Code for Forms in Angular 2
Conclusion
In this article, we have discussed the template-driven form in Angular 2 framework and have covered the concept of the two-way data binding, form elements validation, change tracking, and error handling with the example of the Student App.

