

In this lesson we’re going to create a simple interactive form which saves user data in the ‘backstage’ using AngularJS. We are going to use the HTML input-control elements – input, select, button etc – to allow for data binding with the ng-model directive. The ng-model binds the property to the application(and controller) so that it can be used ‘backstage’ as well as in the view.
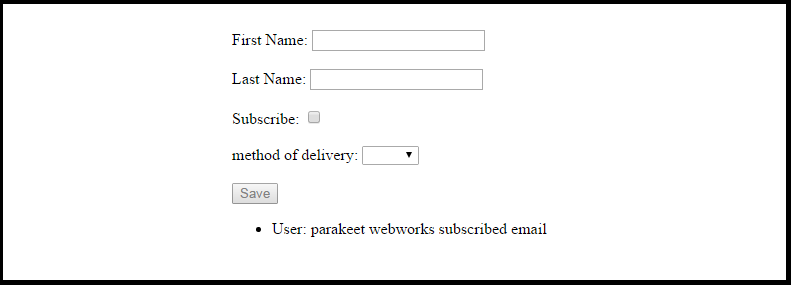
We want to be able to save our user’s first name and surname, whether or not they subscribed, and their preferred method of delivery.
Lets start with the script, by defining a new app, controller, and default values for our user data array:
var app1 = angular.module('app1', []);
app1.controller('userC', function($scope) {

  $scope.user= [{
    fname: "ian",
    surname: "curtis",
    subscribe: "subscribed",
    delivery: "email"
  }];
We’ve created a user property which is an array containing objects of 4 key-value pairs each. The ‘fname’ key is for the first name, the ‘surname’ key for the surname, the ‘subscribe’ key for ‘subscribed’ or ‘not subscribed’ and so on…
Lets start writing the HTML.
<body ng-app='app1'>
    <div ng-controller='userC'>
      <form name='form1' ng-submit='updateU(Udata)'>
We gave the form a name so we can reference it, and we used the ng-submit directive to indicate where we want to save our data whenever a user submits the form. the ng-submit directive indicates that a specific function should be triggered when the submit button is clicked. In this case the function is updateU which takes a parameter called Udata.
<label>First Name:</label>
<input type="text" name="fname" ng-model="Udata.fname"
        ng-required="true" ng-minlength="2" />
Here we are requiring that a value be provided for the first name field and that it’s at least 2 characters long. The ng-required directive is set to true to indicate the field is a required one.
<span class='error' ng-show="form1.fname.$dirty
        && form1.fname.$error.required">Must Enter a First Name
        </span>
This span is what’s going to show if the user enters erroneous input.
The ng-show directive shows or hides an element. form1.fname.$dirty
&& form1.fname.$error.required is the condition that needs to be true in order for the message to display. $dirty indicates that the field has been changed. This condition has to be true as well as the condition that the field is required.
<span class='error' ng-show="form1.fname.$dirty
          && form1.fname.$error.minlength">Must be a Minimum of 2 Characters</span>
This is another error checking span. Again, we are checking that the field has been changed and the error is that the input is less than 2 characters long.

We are going to follow the same steps for the surname:
<label>Last Name:</label>

        <input type="text" name='surname' ng-model='Udata.surname'
        ng-required="true" ng-minlength="2" />

        <span class='error' ng-show="form1.surname.$dirty
        && form1.surname.$error.required">Must Enter a Last Name
        </span>

        <span class='error' ng-show="form1.surname.$dirty
          && form1.surname.$error.minlength">Must be at least 2 characters</span>
With this we’re finished with our text field validation. On to check box validation:
<label>Subscribe:</label>
  <input type="checkbox" name="subscribe" ng-model="Udata.subscribe"
      ng-true-value="'subscribed'" ng-false-value="'not subscribed'" />
If the check box is checked the value we will save is ‘subscribed’. Otherwise the value will be ‘not subscribed’. ng-true-value sets the value when the box is selected. ng-false-value sets the value when the box is not selected.
<label>method of delivery:</label>

        <select name="delivery" ng-model="Udata.delivery"  ng-required="true">

          <option value="email">Email</option>
          <option value="post">Mail</option>

        </select>
We are creating a required field where the user needs to specify their method of delivery.
<input type="submit" value="Save" ng-disabled="form1.$invalid"/>
This is the submit button. the ng-disabled directive specifies a condition under which the submission will be disabled. In our case, that condition is that form1 contains required fields with no input.
<ul>
        <li ng-repeat = "item in user">
          {{ 'User: ' + item.fname + " " + item.surname +
            " " + item.subscribe + " " + item.delivery}}
        </li>
      </ul>
We have used ng-repeat to output our data to the user.
We’re going to finish off by going back to our script and create the updateU function:
 $scope.updateU = function(Udata) {
    if($scope.form1.$valid) {
      $scope.user.push({
        fname: Udata.fname, surname: Udata.surname, subscribe: Udata.subscribe, delivery: Udata.delivery
      });
      console.log('User Saved');
    } else {
      console.log('Error : Couldn\'t Save User');
    }
 }
When the function updateU is triggered, it takes Udata in as a parameter. Udata is an object containing the current user’s data/selections. If our form is valid (all required fields filled), we are adding the data in updateU into our user array in the form of a new array (object) item.
Conclusion
To summarize, we’ve demonstrated how useful Angular can be in creating forms with a simple interactive form which saves user data. In doing so, we used HTML input-control elements in combination with the ng-model directive to allow for data binding. In the process, we’ve learned about Angular directives which greatly simplify the creation of interactive forms such as ng-submit, ng-show and ng-false-value/ng-true-value.

