

Automated Twitter polls with @emoji__polls
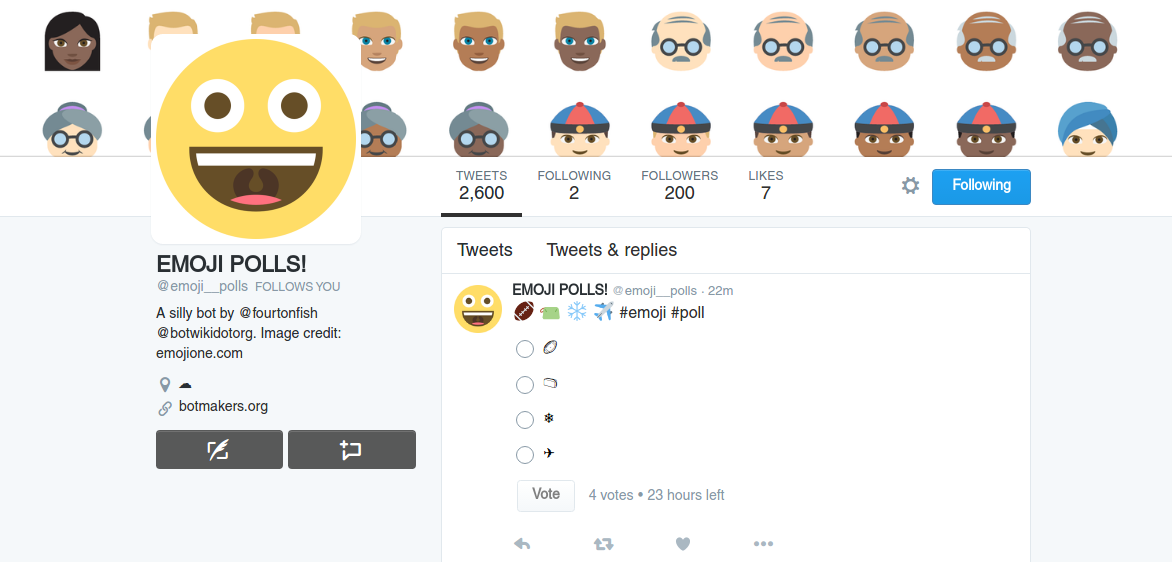
Automated Twitter polls with @emoji__polls
What is a bot?
Most people might think of bots as little automated programs that send out spam email and messages online. Yes, there are certainly those kinds of bots, but a bot is really just that: a little automated program, and it can automate all kinds of activities. Anything from generating images and poetry, to telling stories and letting you play games.
The only limits to what a bot can do is your imagination! And maybe the Twitter API rate limits.
In this tutorial, I am going to show you how easy it is to create your own Twitter bot using node.js, a popular framework that lets you run JavaScript on a server, as opposed to a browser, and Twit, a popular node.js library for interacting with Twitter’s public API.
A few words on APIs
API, which stands for Application Programming Interface, is, to put it simply, a way for you to interact with the data of a website by accessing it directly on their server.
So for example, with Twitter’s API you will be able to read Tweets as they are posted on the site, or post your own Tweets, respond to people, follow users, and pretty much everything else that a regular Twitter user could do using Twitter’s website or mobile app.
This is the key part: Twitter’s API is what lets you automate user behavior, in order to create a Twitter bot. And like I said in the beginning, this activity could be non-malicous and even entertaining.
So let’s make something fun then!
Tools
Here, again, are the tools we will need to make our bot:
- node.js
- the Twit library
- OpenShift, to host our bot
- git, for deploying your code (here is a very quick overview of what git is, and some git tutorials)
Hosting your bot is probably going to be harder part of creating a Twitter bot, so let’s start by running it straight from your computer first.
Node.js
First, let’s install node.js. The instructions will vary a bit depending on your operating system, so just follow the official download and installation guide.
Once you have node.js installed, you can open your command line (check out this brief tutorial if you need to get up to speed with using it) and type:
node --version
When you type this and hit Enter, you should see something like 6.0.0 (the number might be a bit different, but the point is that you should see a number to check that node.js was installed correctly).
Great, now let’s bootstrap our node.js application.
At its core, node.js is just JavaScript that can be executed on a web server. Let’s try this: create a file called server.js. Inside this file, type:
console.log('I am making a Twitter bot!');
Save the file, go back to your console, and run your script:
node '/home/stefan/twitter-bots/server.js'
Your console will display I am making a Twitter bot!. Very well, you just wrote your first node.js application! Let’s move on to the actual bot now.
Node.js comes with a little program called npm, or Node Package Manager. npm lets you, among other things, keep node.js up to date, and install various libraries.
The one we are going to need today is called Twit. But before we install it, let’s do one thing real quick.
Go back to your command line and type npm init. You will be prompted to fill out some basic information about your node.js app.
You can pretty much just keep pressing Enter to accept the default values. Once that’s done, let’s go back to npm and Twit.
Still in the command line, type npm install twit –save. This will download the Twit library and place the necessary files into the node_modules folder.
There is no real need to interact with the actual files, instead open your server.js file, delete the console.log command, and replace it with the following:
var fs = require('fs'),
    path = require('path'),
    Twit = require('twit'),
    config = require(path.join(__dirname, 'config.js'));
Here we are loading a few modules (or libraries). You already know Twit, and fs and path are modules that come with node.js by default and let your work with files.
As for config, we are going to need to make another detour.
Creating a Twitter app
Before you can write a lot of code, you will need something called API keys. These will let you make API calls, or in other words, interact with the data on Twitter’s website.
To get your API keys, you need to first create a Twitter app. Let’s start by signing up for a new Twitter account, which will be controlled by our new bot. We also need to add a phone number to our account. (You will get an error at the next step if you don’t do this.)
Note: If you are already using your phone number with a different Twitter account, you should be able to remove it, and add it to your bot account.
Alternatively, you can sign up for Google Voice (Skype number won’t work, because Skype doesn’t let you receive text messages, which you will need to verify your phone number).
One solution, that’s a bit slow, is to create the Twitter app using your regular account that already has a phone number associated with it, and transfer it to your bot account. I personally prefer this method, but this is done manually by Twitter’s staff, and can take from several hours to a few days.
Once you have your phone number sorted out, go to apps.twitter.com and click the Create a New App button.
After that, fill in some basic information about your new app. You can leave the Callback URL field empty.
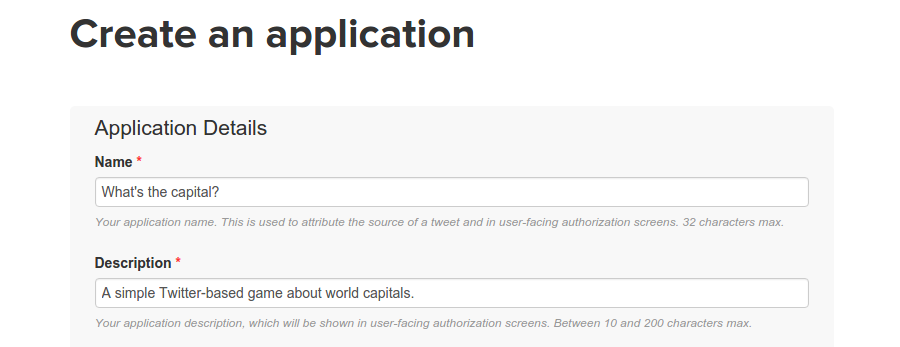
Once you do that, switch to the Keys and Access Tokens tab. Under Application Settings, make sure that it says Read and write for your app’s Access level.
We are going to need four things from this page:
- Consumer Key
- Consumer Secret
- Access Token
- Access Token Secret
(You need to click the button in the Your Access Token section to generate the last two.)
Remember the config earlier? This is going to be the file that holds our API keys. It is a common practice to save these in a separate file, more on that later.
Here’s what the config.js file should look like:
var config = {
  consumer_key:         'XXXXX',
  consumer_secret:      'XXXXX',
  access_token:         'XXXXX',
  access_token_secret:  'XXXXX'
}
module.exports = config;
Replace XXXXX with matching values, for example, consumer_key should be your app’s Consumer Key, and so on.
Now you can go back to your server.js file and add the following line:
var T = new Twit(config);
T.post('statuses/update', { status: 'Look, I am tweeting!' }, function(err, data, response) {
  console.log(data)
});
So your full server.js file should look like this:
var Twit = require('twit')
var fs = require('fs'),
    path = require('path'),
    Twit = require('twit'),
    config = require(path.join(__dirname, 'config.js'));
var T = new Twit(config);
T.post('statuses/update', { status: 'Look, I am tweeting!' }, function(err, data, response) {
  console.log(data)
});
And now, back to the console:
node server.js
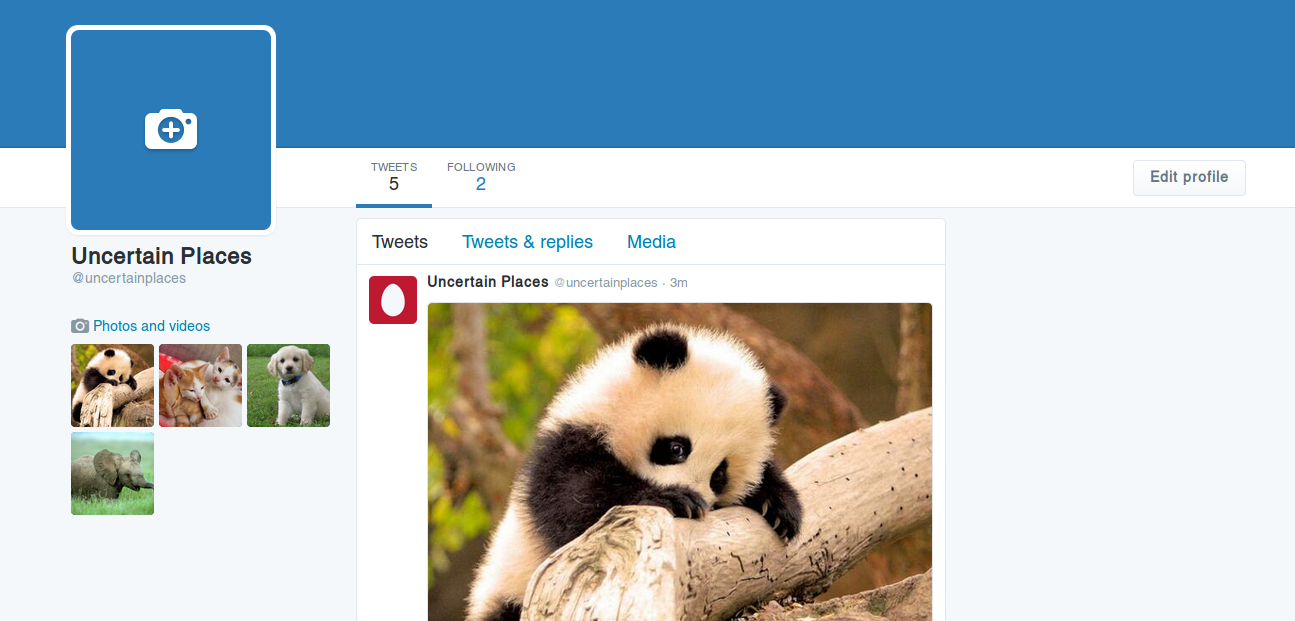
Your console will fill up with a bit of information about the successful posting of your tweet, and if you switch to your browser and look at your bot’s profile page –

Congratulations, your bot is now tweeting!
Congratulations, your bot is now tweeting!
There are two more steps left now. Making your bot do something interesting, and hosting your bot somewhere so that you can turn off your computer without having to shut down the script powering your bot.
Cute animals bot
Here’s an idea: maybe our bot could post cute pictures of puppies, kittens, panda bears, and other animals!
First, download a few pictures of animals that you think look cute. Create a folder called cute-animals and add these images here.
Next, remove the code that posted your first tweet:
T.post('statuses/update', { status: 'Look, I am tweeting!' }, function(err, data, response) {
console.log(data)
});
And replace it with this:
var images = [
'two-kittens.jpg',
'puppy.jpg',
'kitten.jpg',
'baby-panda.jpg',
'baby-elephant.jpg'
];
This is an array with names of the files of your images. (Feel free to add a lot more cute animal pictures!) Now, let’s wrap them with a function that returns a randomly picked animal.
The updated code will look like this:
function pick_random_cute_animal(){
var cute_animals = [
'two-kittens.jpg',
'puppy.jpg',
'kitten.jpg',
'baby-panda.jpg',
'baby-elephant.jpg'
];
return cute_animals[Math.floor(Math.random() * cute_animals.length)];
}
var cute_animals = [
'two-kittens.jpg',
'puppy.jpg',
'kitten.jpg',
'baby-panda.jpg',
'baby-elephant.jpg'
];
return cute_animals[Math.floor(Math.random() * cute_animals.length)];
}
We’re using a little trick here. On its own, Math.random() returns a random number between 0 and 1 (excluding the number 1). What we need is to pick a random number between 0 and the last index of our array, so that we can access a random element of the array.
In my case, cute_animals.length will be 5. So Math.random() * cute_animals.length will always give me a number between 0 and 5, but excluding the number 5, which is okay, because the index of an array in JavaScript starts at 0, and the last index is always its length minus 1.
To avoid picking a number like 3.202108, we are using the Math.floor() function, which rounds the number down to the nearest whole number.
With the pick_random_cute_animal() function in place, we can now start uploading the images. Here is the function, with a few console logs for easier understanding of the code.
function upload_random_image(){
console.log('Opening an image...');
var image_path = path.join(__dirname, '/cute-animals/' + pick_random_cute_animal()),
b64content = fs.readFileSync(image_path, { encoding: 'base64' });
console.log('Uploading an image...');
T.post('media/upload', { media_data: b64content }, function (err, data, response) {
if (err){
console.log('ERROR');
console.log(err);
}
else{
console.log('Uploaded an image!');
T.post('statuses/update', {
media_ids: new Array(data.media_id_string)
},
function(err, data, response) {
if (err){
console.log('Error!');
console.log(err);
}
else{
console.log('Posted an image!');
}
}
);
}
});
}
There are some technical parts to this, but in essence, we are starting by picking a random cute animal picture (image_path), and then loading the file into a variable b64content.
The b64 refers to Twitter requiring the uploaded media files to be “base64-encoded” (see this StackOverflow thread for a more technical explanation of what this means).
Once we load our image, we can use Twitter’s media/upload API endpoint (documented here). After the image is succesfully uploaded to Twitter’s server, we can use the statuses/update method we previously used to post our first tweet and use it to post the image.
T.post('statuses/update', {
media_ids: new Array(data.media_id_string)
}
We can test our script using setInterval():
setInterval(
upload_random_image,
10000
);
Here’s what the final server.js file should look like:
var Twit = require('twit')
var fs = require('fs'),
path = require('path'),
Twit = require('twit'),
config = require(path.join(__dirname, 'config.js'));
var T = new Twit(config);
function pick_random_cute_animal(){
var cute_animals = [
'two-kittens.jpg',
'puppy.jpg',
'kitten.jpg',
'baby-panda.jpg',
'baby-elephant.jpg'
];
return cute_animals[Math.floor(Math.random() * cute_animals.length)];
}
function upload_random_image(){
console.log('Opening an image...');
var image_path = path.join(__dirname, '/cute-animals/' + pick_random_cute_animal()),
b64content = fs.readFileSync(image_path, { encoding: 'base64' });
console.log('Uploading an image...');
T.post('media/upload', { media_data: b64content }, function (err, data, response) {
if (err){
console.log('ERROR');
console.log(err);
}
else{
console.log('Uploaded an image!');
T.post('statuses/update', {
media_ids: new Array(data.media_id_string)
},
function(err, data, response) {
if (err){
console.log('Error!');
console.log(err);
}
else{
console.log('Posted an image!');
}
}
);
}
});
}
setInterval(
upload_random_image(),
10000
);
When you run node server.js now, you will see your Twitter bot post a random picture every 10 seconds (or 10,000 milliseconds).
Great job so far!
Your console will show what the bot is up to:
Opening an image...
Uploading an image...
Uploaded an image!
Posted an image!
Opening an image...
Uploading an image...
Uploaded an image!
Posted an image!
And once again, looking at our bot’s Twitter page, we see it was indeed posting.
You can press CTRL+C while looking at the command line to end the script.
Hosting your bot
Great, so now you have your very own tweeting bot. The final step is moving the code to a server that will host the bot for you.
While there are many free options for hosting free websites, these are mostly for simple HTML/CSS/JavaScript-based projects, not so much for back-end code.
For a good overview check out this list of available hosting solutions, but keep in mind that almost all of them are paid, starting at $5-$7 a month. And the free options are usually quite limited (for example, Heroku only allows your app to run for a few hours every day if you’re on the free plan).
For this tutorial, I am going to use OpenShift, which does offer a limited free plan that shuts down your app if it doesn’t receive any traffic for 24 hours, but you can lift this limit by adding your credit card information to your account and upgrade to the still free Bronze Plan.
Hosting your bot on OpenShift
First, let’s sign up for a new OpenShift account. As I mentioned above, you can upgrade to the free Bronze plan to avoid the 24 hour limit, but this step is optional.
Next, we will create a new node.js app. You don’t need to change anything other than the Public URL for your project.
To be able to interact with your OpenShift project, you should download the rhc command line tool, just follow the instructions for your operating system. You can also read the User Guide.
With rhc installed, let’s run the following code to download our newly created node.js app.
rhc git-clone -a NAMEOFYOURNODEJSAPP
cd NAMEOFYOURNODEJSAPP
Now, we’re going to repeat some of the steps from earlier.
npm install twit --save
Open the file app.js
Copy over your config.js file.
git add config.js
git add cute-animals/*
git commit -a -m "Uploading my Twitter bot"
git push
Inside the command line you will see information about your OpenShift app getting updated. Once this is finished, go back to your Twitter bot’s profile page and you will see it tweeting again!
If you upgraded to the free Bronze plan, you Twitter bot will go on tweeting. If you stay on the basic free plan, it will shut down after 24 hours and you will have to restart the application.
rhc app-restart
For a simple bot that tweets every few minutes or hours, you can also look into cron (learn more about cron here) instead of relying on setInterval().
I hope you enjoyed making your Twitter bot! Feel free to browse the Twit documentation and Twitter API documentation to learn more about what your bot can do, and maybe get some more ideas!

