In this chapter, we are going to learn the basic installation steps for the MySQL database on a windows platform (Windows 10 as the operating system). A database in computer terminology can be defined as an organized data set held in a computer’s disk, that can easily be accessed in numerous ways after querying it through a SQL language. SQL is nothing but a structured query language. There are numerous database available in the market such as MySQL, Oracle, IBM DB2, Sybase, etc. Each of these databases have their importance and uses. In this tutorial, we are going to work on the MySQL database starting from its installation on the machine with Windows 10 as the operating system.
The following are the steps for the installation of the MySQL 5.7.19.0 database.
Step 1: – The very first step is to download the installer for MySQL database. It can be downloaded from the link given below. The installer actually does the job of installing the MySQL database on your system.
|
MySQL installer download link |
Once you load the above URL on the web browser, you can see a web page as shown below. Depending on the Window operating type (i.e. 32-bit or 64-bit), you can choose an appropriate zip package. But, in this tutorial we are going to download the Windows Installer MSI.
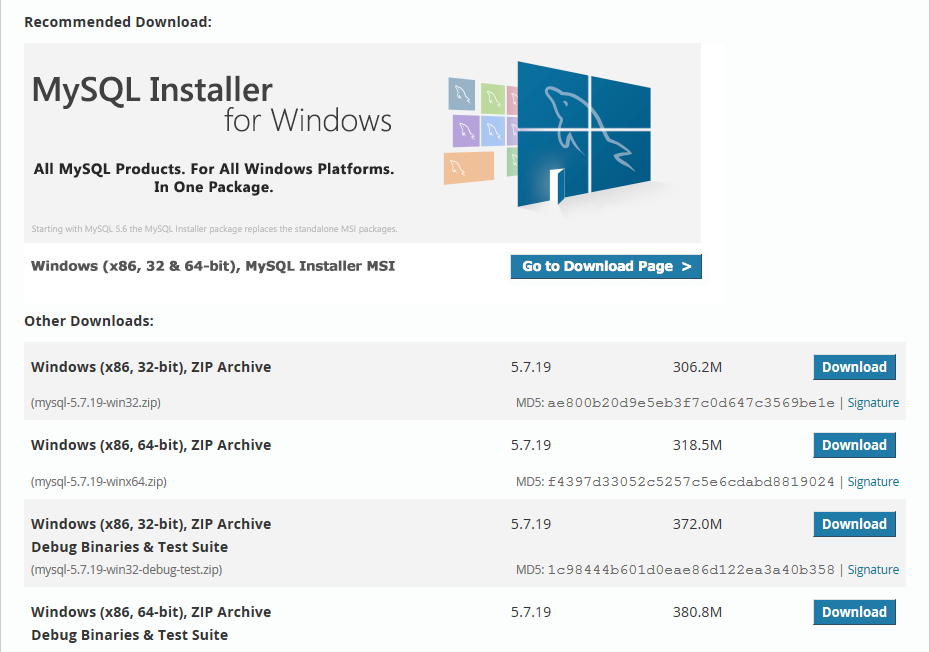
Step 2: – When you click on the “Go to Download Page >” link, you have to click on the MSI installer download link. You will be asked to enter your Oracle credentials. Don’t worry, if you don’t have those credentials as you can sign up with your email address and create a new account.
Step 3: – Once you are logged into the MySQL website, you will be asked to fill up the following submit form.
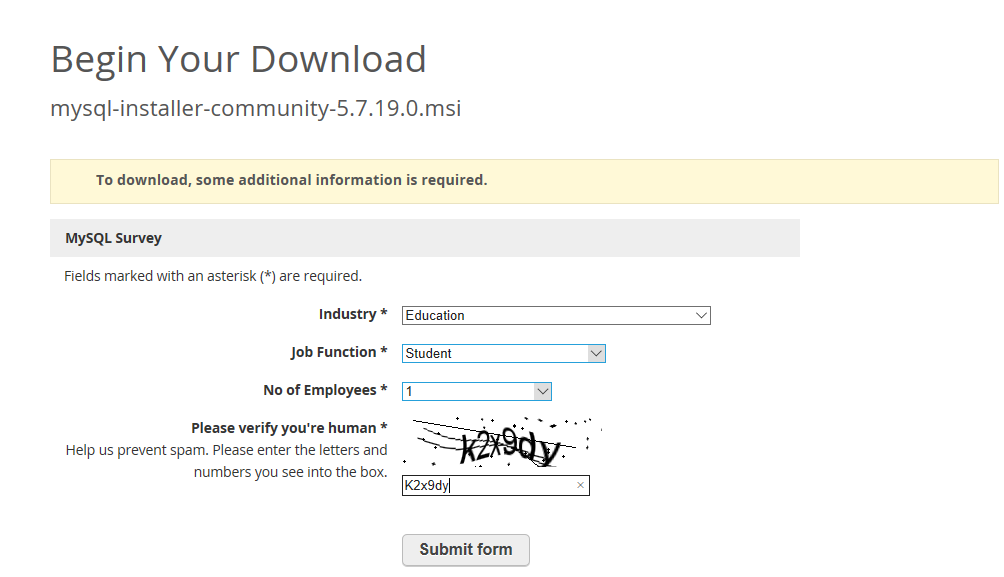 Once you are able to successfully submit the form. You will procure the actual MySQL 5.7.19.0 download link as shown below.
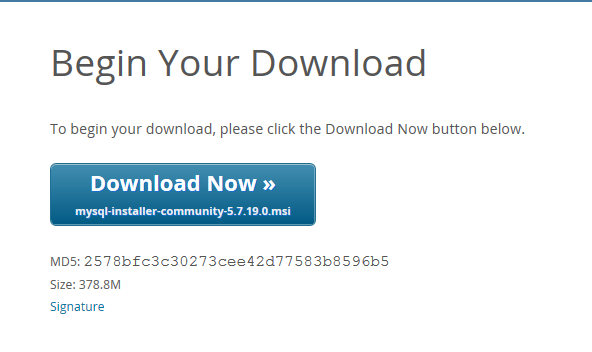 Step 4: – Click on the download link to complete the MSI installer download. Once complete, you’ll observe a downloaded file with the name as mysql-installer-community-5.7.19.0.msi (it will be around 320 MB in size). Next, double click on this installer to kick start the installation of MySQL package. In the package, you will observe multiple products such as MySQL database server, MySQL workbench, connectors and other software products.
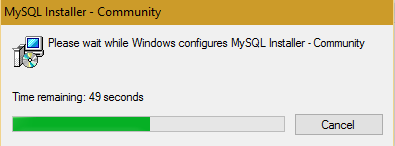
Step 5: – At this step you will see that MySQL MSI installer has begun its installation job and its progress can be monitored through a progress bar as shown below.
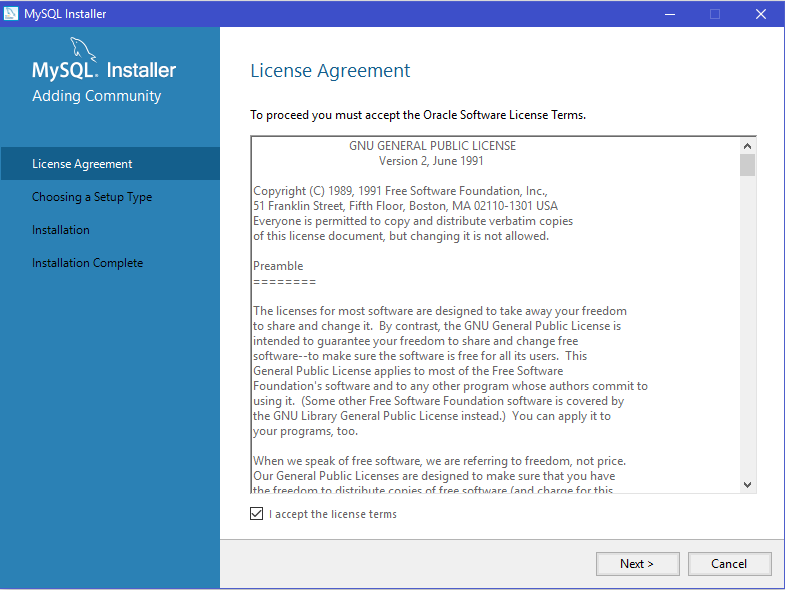
 Step 6: – Next, you will observe a dialogue box, where you will be asked to read and accept the licence agreement as shown below. You need to check the checkbox and click on the Next button in order to proceed with the installation.
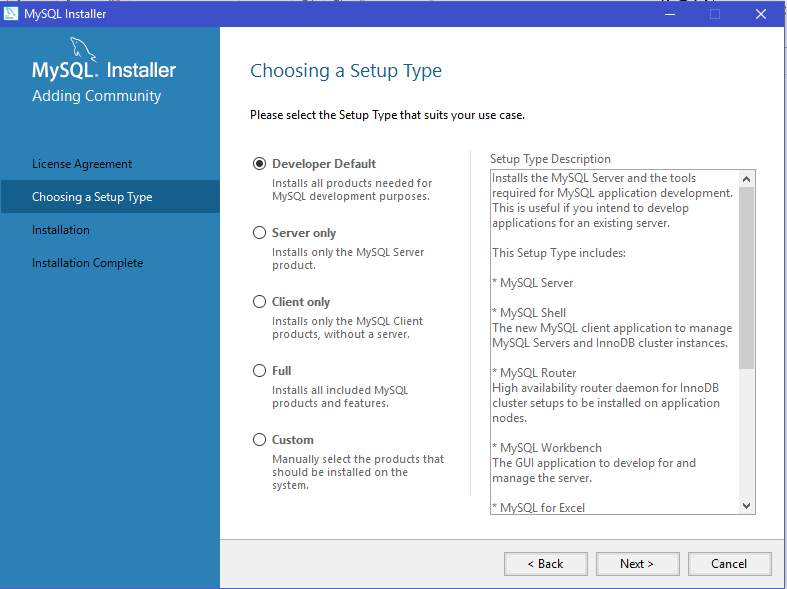
 Step 7: – Next, you will be asked to select a setup. Here we recommend you to choose the ‘Developer Default’ set up. Click on the ‘Next’ button to proceed further.
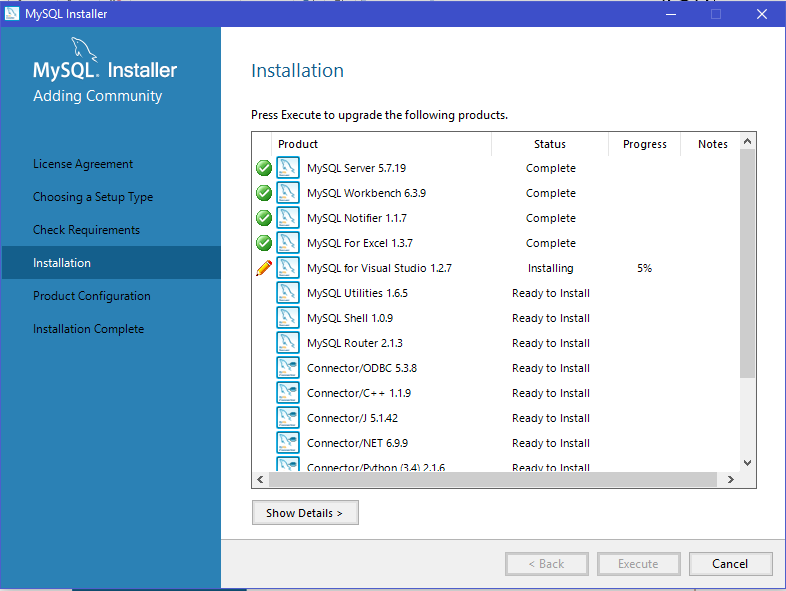
 Step 8: – Next, click on the ‘Execute’ button available at the bottom of the dialogue box as shown below. At this step the installation of MySQL package will get started automatically.
 Step 9: – This step will take couple of minutes to complete the installation of MySQL products. The screenshot below demonstrates the products that are getting installed sequentially one after the other.
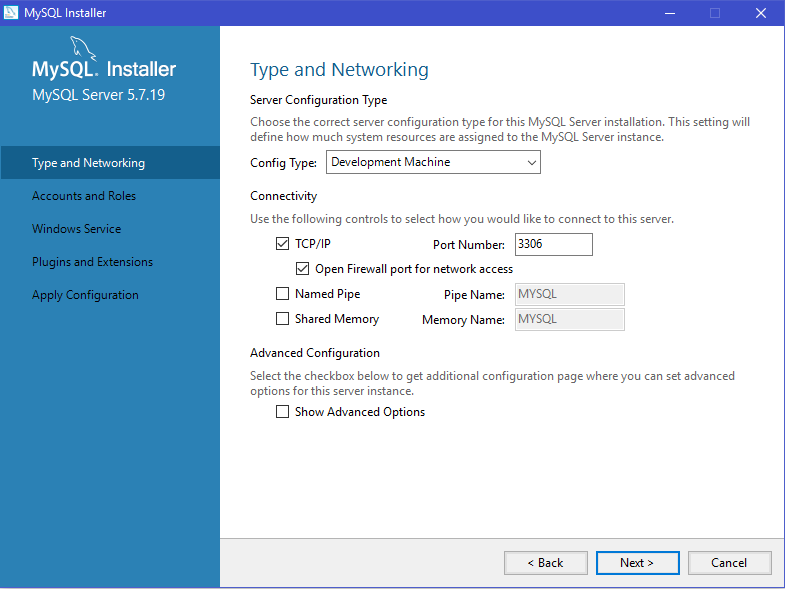
 Step 10: – After all products are successfully installed, you will be asked to make the required system configurations such as Config type and other connectivity directives. Here, we have chosen the Config type as ‘Development Machine’, Connectivity as TCP/IP and Port number is 3306 as shown below.
 Step 11: – Next, you will be prompted to create an account and roles. At this step, you will need to enter the MySQL root password as shown below. At this step you can add users by clicking on the ‘Add User’ button. If you don’t want to create a user at this point of time? No worries, you can add users later by using your root username and password. Click on the next button to proceed further.
|
Property |
Value |
|
username |
root |
|
Password |
mysqldb |
|
Confirm Password |
mysqldb |
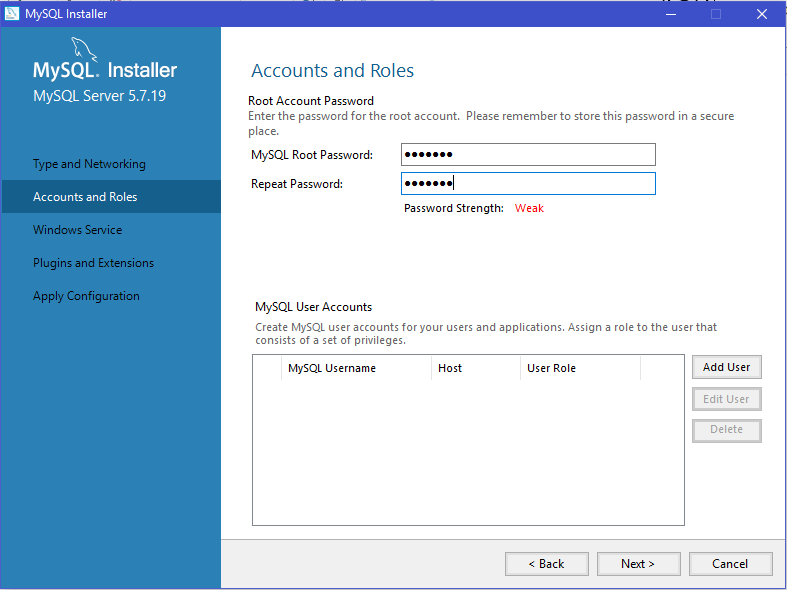 Step 12: – Next, the system will apply the required configurations automatically as shown below. Click on the finish button to complete this step.
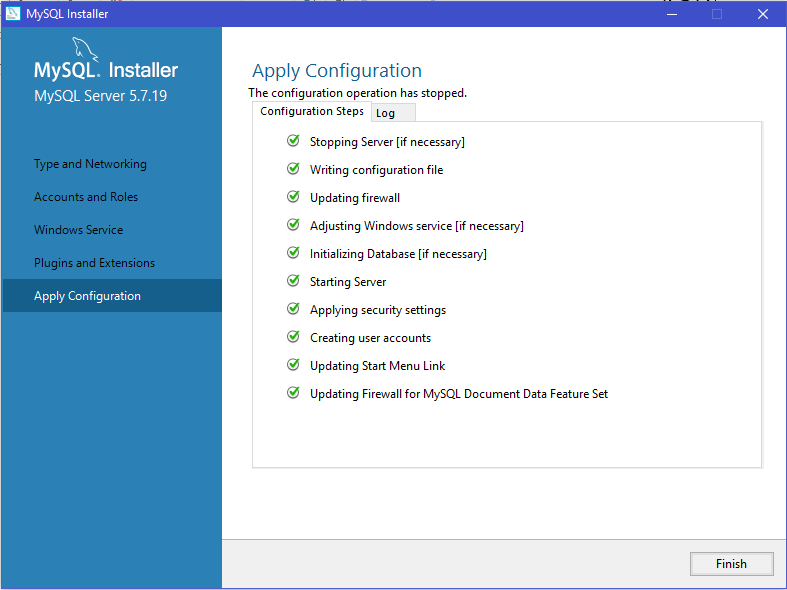 Step 13: – Next, you simply click on the check button in order to test the DB Connectivity. If you see “connection successful” message. It means everything went well with MySQL DB installation.
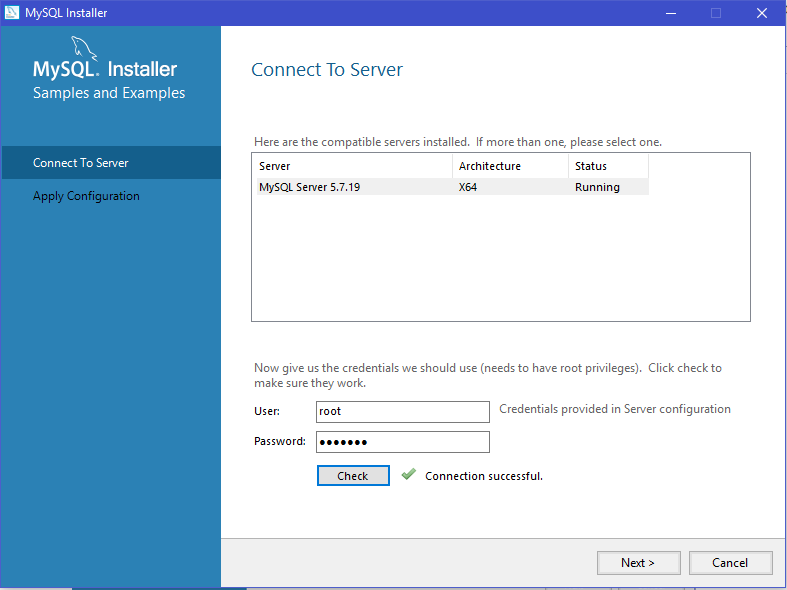 Step 14: – Allow the system to apply the remaining configuration automatically as shown below. This step will take couple of minutes to complete.
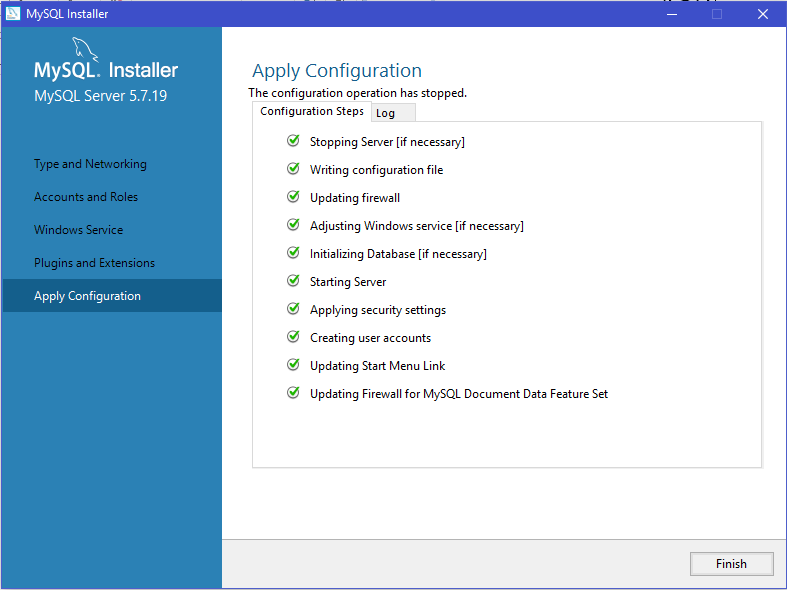 Step 15: – Click on the execute button, once it gets activated and then the Finish button on the next screen in order to complete the installation of the MySQL database on your machine. You will observe that MySQL workbench has automatically opened up on your machine as shown below.
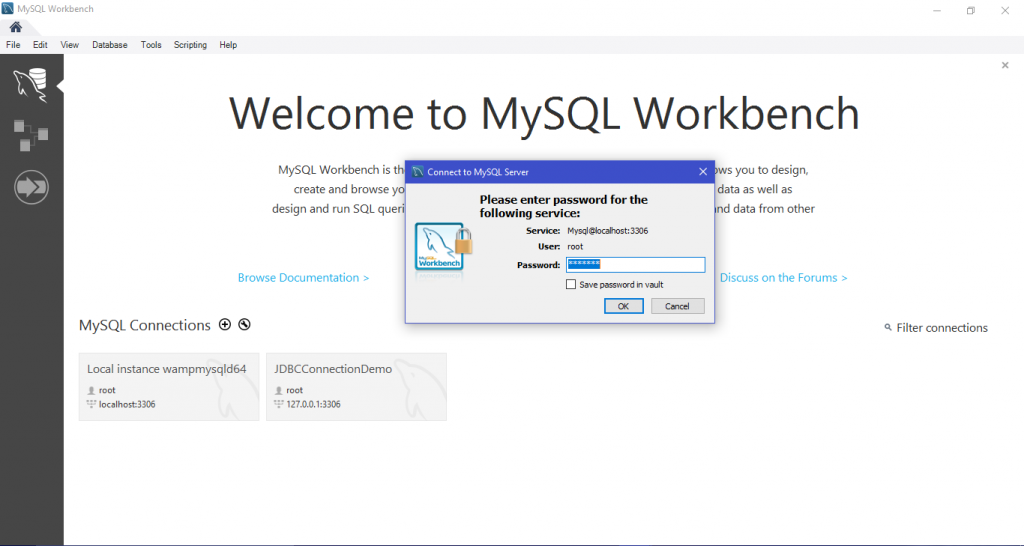
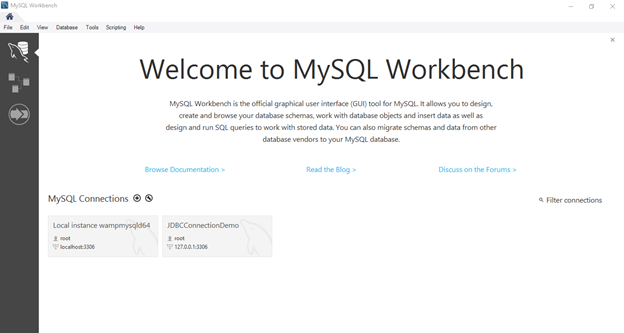 Step 16: – Click on the database link at the menu tab and choose the local instance for the connection. The system will prompt you to enter the root password. Enter root password as “mysqldb”, which we entered in the step 11.
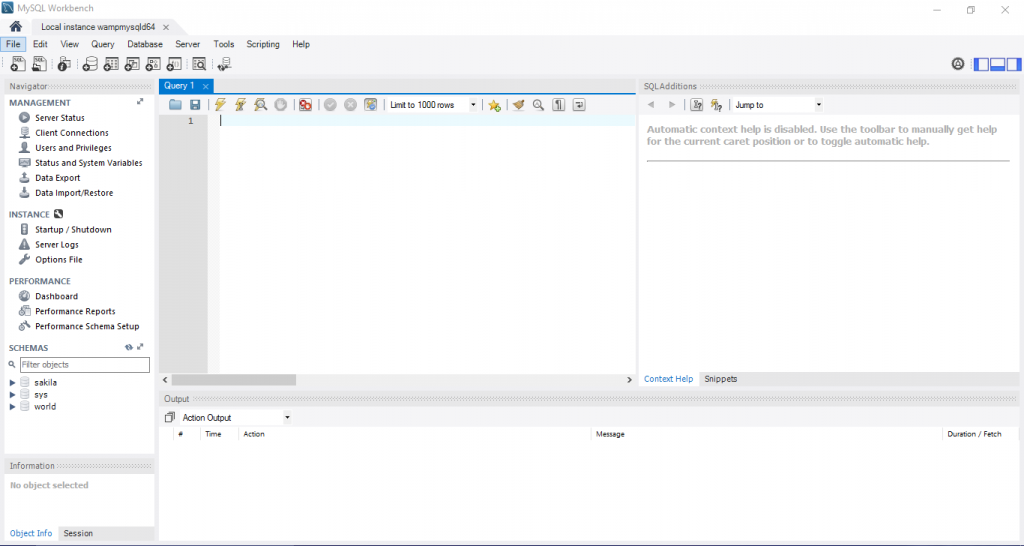
 Step 17: – At this step you are successfully logged into the local DB instance and you will be able to see the below page on the screen.
 Conclusion: –
In this chapter, we have covered step by step the basic installation of the MySQL database and related products with appropriate screenshots.


