

ReactJS is a popular front-end JavaScript framework which is powered by Facebook. Like other front-end frameworks, it is capable of handling the view layer for mobiles as well as web applications. Using React JS, we can build reusable UI components. In this article, we are going to quickly create our workspace to build a React JS based web application where we will discuss the concept of state in detail.
React JS is widely used to build reusable UI components through composeable user interfaces with which data presentation changes from time to time. React JS is capable of abstracting away the DOM that offers a simpler programming model with better performance over other front-end libraries. We can use React Native to power native apps in order to render it on the server by using Node. It implements one-way reactive data flow that helps to reduce the boilerplate and provide edge over the traditional data binding.
Creating React JS workspace
We require Node.JS to be installed on your device before we can work with ReactJS in order to build a responsive web application. We need to create the root directory where we are going to develop a web project with React JS and webpack dependencies.
STEP 1: – Open the windows command line and execute the following command. It will create our project root directory as “react-js-state-demo”.
C:\Upwork\Abhishek – Eduonix\ReactJS\Workspace>mkdir react-js-state-demo
STEP 2: – Next, we are going to create “package. json” file by executing the following command at the project root directory “react-js-state-demo”.
C:\Upwork\Abhishek – Eduonix\ReactJS\Workspace>cd react-js-state-demo C:\Upwork\Abhishek – Eduonix\ReactJS\Workspace\react-js-state-demo>npm init
The command “npm init” will create a “package. json” file where it will ask us to enter the name, version, scripts and description of the project which we are going to create.
STEP 3: – Next, we are going to install the required dependencies to build and run the project using React JS libraries. We need the following libraries.
C:\Upwork\Abhishek – Eduonix\ReactJS\Workspace\react-js-state-demo>npm install babel babel-cli react react-addons-css-transition-group react-dom babel-core babel-loader babel-preset-react babel-preset-es2015 webpack webpack-cli webpack-dev-server –save-dev
These libraries will be downloaded and installed under the node_modules directory and our final “package. json” file will look as shown below after STEP 3 completion.
File: “package. json”
{
  "name": "react-js-state-demo",
  "version": "1.0.0",
  "description": "react js state demo",
  "main": "index.js",
  "scripts": {
    "start": "webpack-dev-server --hot --mode development"
  },
  "author": "",
  "license": "ISC",
  "dependencies": {},
  "devDependencies": {
    "babel": "^6.23.0",
    "babel-cli": "^6.26.0",
    "babel-core": "^6.26.0",
    "babel-loader": "^7.1.3",
    "babel-preset-es2015": "^6.24.1",
    "babel-preset-react": "^6.24.1",
    "react": "^16.2.0",
    "react-addons-css-transition-group": "^15.6.2",
    "react-dom": "^16.2.0",
    "webpack": "^4.0.0",
    "webpack-cli": "^2.0.9",
    "webpack-dev-server": "^3.0.0"
  }
}
STEP 4: – Next, we need to create “webpack.config.js” file with the following configuration content in it as shown below.
File: “webpack.config.js”
var config = {
   entry: './main.js',
   output: {
      path:'/',
      filename: 'index.js',
   },
   devServer: {
      inline: true,
      port: 8080
   },
   module: {
      rules: [
         {
            test: /\.jsx?$/,
            exclude: /node_modules/,
            loader: 'babel-loader',
            query: {
               presets: ['es2015', 'react']
            }
         }
      ]
   }
}
module.exports = config;
STEP 5: – Next, we need to create the following files with the given content in them at project root “react-js-state-demo” directory as shown below.
File: “Application. jsx”
In this file, we are going to define the state of the application. State can be defined as the place which supplies the data. It is recommended to make our state (i.e. data supplier) as comprehensive as possible and also we need to minimize the number of stateful components. Say for example, if we have five components that requires data from the state, then we should be creating just one container component which can keep the state for all the five components (i.e. simplicity). The file content is shown below.
import React from 'react';

class App extends React.Component {
   constructor(props) {
      super(props);

      this.state = {
         message: "Please read carefully the message",
         details: "welcome to React JS state concept...",
		 conclusion: "Thank You!"
      }
   }
   Render () {
      return (
         <div align ="center">
            <h1>{this.state.message}</h1>
            <h2>{this.state.details}</h2>
	      <h3>{this.state.conclusion}</h3>
         </div>
      );
   }
}
export default App;
File: “main.js”
import React from 'react';
import ReactDOM from 'react-dom';
import App from './Application.jsx';

ReactDOM.render(<App />, document.getElementById('app'));
File: “index.html”
It is our view layer which will do the required styling from “/css/style.css” and display the app “index.js” which we have created through react JS application (Application. Jsx) which we have just created.
<!DOCTYPE html>
<html lang = "en">

   <head>
      <meta charset = "UTF-8">
      <link rel = "stylesheet" type = "text/css" href = "/css/style.css">
      <title>React App</title>
   </head>

   <body>
      <div id = "app"></div>
      <script src = "index.js"></script>
   </body>

</html>
File: “/css/style.css”
It is the stylesheet used by the web application.
body {
  font-family: sans-serif;
  display: flex;
  justify-content: center;
  align-items: center;
  min-height: 100vh;
  margin: 0;
  font-size: calc(10px + 2vmin);
  background:#3636c1;
  background:linear-gradient(to bottom, #3636c1 0%, #161658 100%);
}

section {
  display: flex;
  align-items: center;
  justify-content: center;
}

section > *+* {
  margin-left: 2rem;
}


h1 {
  font-size: calc(20px + 6vmin);
  margin-top: 0;
  margin-bottom: 1rem;
  text-align: center;
  color: white;
  font-weight:300;
}

h2 {
  font-size: calc(8px + 5vmin);
  margin-top: 0;
  margin-bottom: 1rem;
  text-align: center;
  color: pink;
  font-weight:150;
}

h3 {
  font-size: calc(6px + 4vmin);
  margin-top: 0;
  margin-bottom: 1rem;
  text-align: center;
  color: green;
  font-weight:100;
}
Application Execution
At the project root, execute the command “npm start”, the system will show below logs with compilation successful and application can be assessed from this URL “http://localhost:8080/”.
C:\Upwork\Abhishek - Eduonix\ReactJS\Workspace\react-js-state-demo>npm start

> [email protected] start C:\Upwork\Abhishek - Eduonix\ReactJS\Workspace\react-js-state-demo
> webpack-dev-server --hot --mode development

(node:7160) DeprecationWarning: Tapable.plugin is deprecated. Use new API on `.hooks` instead
Project is running at http://localhost:8080/
webpack output is served from /
i 「wdm」: Hash: 8150ef72856afd394417
Version: webpack 4.0.0
Time: 12551ms
Built at: 2018-2-25 15:10:13
   Asset      Size  Chunks                    Chunk Names
index.js  1000 KiB    main  [emitted]  [big]  main
Entrypoint main [big] = index.js
[./Application.jsx] 2.79 KiB {main} [built]
[./main.js] 510 bytes {main} [built]
[./node_modules/react-dom/index.js] 1.33 KiB {main} [built]
[./node_modules/react/index.js] 190 bytes {main} [built]
[./node_modules/strip-ansi/index.js] 161 bytes {main} [built]
[./node_modules/url/url.js] 22.8 KiB {main} [built]
[./node_modules/webpack-dev-server/client/index.js?http://localhost:8080] (webpack)-dev-server/client?http://localhost:8080 7.75 KiB {main} [built]
[./node_modules/webpack-dev-server/client/overlay.js] (webpack)-dev-server/client/overlay.js 3.58 KiB {main} [built]
[./node_modules/webpack-dev-server/client/socket.js] (webpack)-dev-server/client/socket.js 1.05 KiB {main} [built]
[./node_modules/webpack/hot sync ^\.\/log$] (webpack)/hot sync nonrecursive ^\.\/log$ 170 bytes {main} [built]
[./node_modules/webpack/hot/dev-server.js] (webpack)/hot/dev-server.js 1.66 KiB {main} [built]
[./node_modules/webpack/hot/emitter.js] (webpack)/hot/emitter.js 77 bytes {main} [built]
[./node_modules/webpack/hot/log-apply-result.js] (webpack)/hot/log-apply-result.js 1.31 KiB {main} [built]
   [0] multi (webpack)-dev-server/client?http://localhost:8080 webpack/hot/dev-server ./main.js 52 bytes {main} [built]
[./node_modules/webpack/hot/log.js] (webpack)/hot/log.js 1.03 KiB {main} [built]
    + 37 hidden modules
i 「wdm」: Compiled successfully.
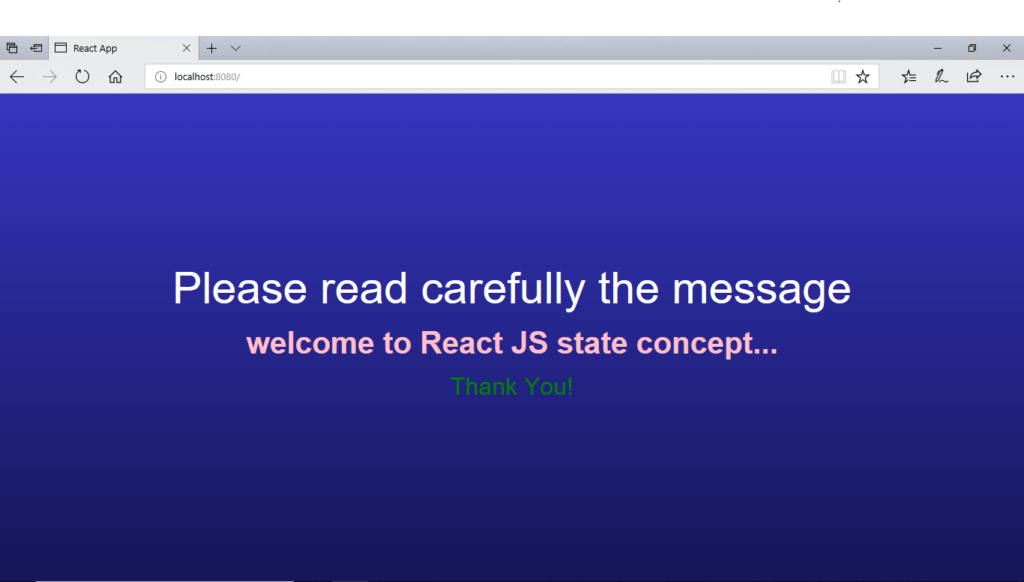
Our React JS Web application at http://localhost:8080/ will look as shown below.
Conclusion: –
In this article, we have created our workspace to build a React JS based web application and we discussed the concept of state in detail.

