

In the last chapter, we covered the topic ‘Routing in Angular 2.0 revisited’, where we discussed the various routing and navigation syntaxes in Angular 2.0 along with the basic routing example. In this chapter, we are going to discuss about using case like protect routes in Angular 2.0 app with the use of Guards. Protecting routes is a very useful concept for building any application in order to restrict a users’ access to certain pages or areas which are not meant for them. Guards make sure that the application user with the access permission can access that particular area in the application.
The following are the different types of routing guards available in Angular 2.0 to implement such a use case that we just discussed.
Guard Types in Angular 2.0: The following four guard types help us to protect our routes:
- CanActivate this guard helps decide whether a route can be activated or not.
- CanActivateChild this guard helps to decide whether children routes of a route can be activated or not.
- CanDeactivate this guard helps decide whether a route can be deactivated or not.
- CanLoad this guard helps decide whether a module can be loaded lazily or not.
Depending on our route protection requirements, we can implement these guards. Let’s understand how we can use guards in Angular 2.0.
Defining Guards in Angular 2.0:
We can implement routing guards in two different ways: guard as a function and guard as a Class. Let’s understand how they work.
- Routing Guard as a Functions: When used as a function, such function return Observable, Promise or boolean. Also, such guards are required to be registered in @NgModule of ‘app-module.ts’ file in order to inject this guard in Application routes when required. We have to define a string token and the guard function for the registration of guards as demonstrated below.
app/app-module.ts
import { NgModule } from '@angular/core';
import { BrowserModule } from '@angular/platform-browser';
import { RouterModule } from '@angular/router';
import { AppComponent } from './app-component';
import { EmployeeContactsAppRoutes } from './employee-contacts.routes';
import { ContactsDetailComponent } from './employee-contacts-detail.component';
import { ContactsListComponent } from './employee-contacts-list.component';
import { ContactsService } from './employee-contacts.service';

@NgModule({
  imports: [
    BrowserModule,
    RouterModule.forRoot(EmployeeContactsAppRoutes)
  ],
  declarations: [
    AppComponent,
    ContactsListComponent,
    ContactsDetailComponent
  ],
    providers: [
    ContactsService,
    provide: 'appActivatedGuard',
     useValue: () => {
      return true;
    }
  ],
  bootstrap: [AppComponent]
})

export class AppModule {}
Here, we have declared a string token in the providers section of the @NgModule that decides whether a guard function would be activated or remain deactivated based on the return value (could be true or false). Here, we have hardcoded it to be true, so nothing is protected in terms of routing. If we make this false, then that link won’t be visible on the browser at all. The following is the route configuration for the token ‘appActivatedGuard’, which gets executed when routing control is to that specific route as shown below.
export const EmployeeContactsAppRoutes = [
  {
  	path: '',
  	component: ContactsListComponent,
  	canActivate: ['appActivatedGuard' ]
  }
- Routing Guard as a Class: In this case, we will be implementing routing guard as a class. We will create an authentication class as ‘ActivationViaAuthenticationGuard’ which will guard the route to the userid as ‘angular2’. This userid has the rights to view the list of employees and the userid other than this cannot view the list of employees. The following is the detailed code for this.
app/main.ts
import { platformBrowserDynamic } from '@angular/platform-browser-dynamic';
import { AppModule } from './app-module';
platformBrowserDynamic().bootstrapModule(AppModule);
Explanation of Code:
The above main.ts file is used to Bootstrap the angular 2.0 app that uses the root component from the NgModule.
app/app-module.ts
import { NgModule } from '@angular/core';
import { BrowserModule } from '@angular/platform-browser';
import { RouterModule } from '@angular/router';
import { AppComponent } from './app-component';
import { EmployeeContactsAppRoutes } from './employee-contacts.routes';
import { ContactsDetailComponent } from './employee-contacts-detail.component';
import { ContactsListComponent } from './employee-contacts-list.component';
import { ContactsService } from './employee-contacts.service';
import { ActivationViaAuthenticationGuard } from './routing-guard';

@NgModule({
  imports: [
    BrowserModule,
    RouterModule.forRoot(EmployeeContactsAppRoutes)
  ],
  declarations: [
    AppComponent,
    ContactsListComponent,
    ContactsDetailComponent
  ],
    providers: [
    ContactsService,
    ActivationViaAuthenticationGuard
  ],
  bootstrap: [AppComponent]
})

export class AppModule {}
Explanation of Code: The root App Module (app-module.ts) typescript file is present in the app package. Here, we are importing the NgModule, BrowserModule, and RouterModule.forRoot (EmployeeContactsAppRoutes), as shown above. The ‘RouterModule’ helps to load the application at the given router links present in the ‘EmployeeContactsAppRoutes’ array. Here, we have the declaration classes as ‘AppComponent’, ‘ContactsListComponent’, and ‘ContactsDetailComponent’. The ‘ContactsService’, ‘ActivationViaAuthenticationGuard’ are the Service providers for the employee’s details where ‘ContactsService’ is guarded by ‘ActivationViaAuthenticationGuard’ against a logged in userid as ‘angular2’. The @NgModule decorator is declared here has imports, declaration classes, providers and bootstrap class to start the app.
app/app-component.ts
import { Component } from '@angular/core';
import { ROUTER_DIRECTIVES } from '@angular/router';
import { ContactsListComponent } from './employee-contacts-list.component';
import { ContactsService } from './employee-contacts.service';

@Component({
  selector: 'my-routing-app',
  templateUrl: 'resource/app-component.html',
  directives: [ROUTER_DIRECTIVES],
  providers: [ContactsService]
})

export class AppComponent {
	heading = "Employee Details App";
}
Explanation of Code:
It has the selector ‘my-routing-app’ which is used on the index.html to load the complete app on the browser. It has the template URL as ‘resource/app-component.html’ as shown below. In the controller class ‘AppComponent’, we have the heading field with value as “Employee Details App”.
resource/app-component.html
<h1>{{heading}}</h1>
<ul>
	<li><a [routerLink]="['/']">Login to view list of Employees</a></li>
</ul>
<router-outlet></router-outlet>
Explanation of Code:
It is the HTML code template for the ‘app-component-ts’. It has a router link on the link text “Login to view list of Employees” that will help navigate to the home page that displays the employees list. Here, this link is guarded and can only be accessed by the user with userid as ‘angular2’.
app/employee-contact.model.ts
export interface EmployeeContact {
  name:string;
  id:number;
}
Explanation of Code:
It is an interface as an employee model that has name of type string and id of type number.
app/employee-contacts-detail.component.ts
import { Component, OnInit } from '@angular/core';
import { ActivatedRoute } from '@angular/router';
import { ContactsService } from './employee-contacts.service';
import { EmployeeContact } from './employee-contact.model';

@Component({
  selector: 'employee-contacts-detail',
  templateUrl: 'resource/employee-contacts-detail.component.html'
})
export class ContactsDetailComponent implements OnInit {

  constructor(private contactsService: ContactsService, private route: ActivatedRoute) {

  }

  ngOnInit() {
    this.contact = this.contactsService.getContact(this.route.snapshot.params.id);
  }
}
Explanation of Code:
It has the selector ’employee-contacts-detail’ and the template URL as ‘resource/model-form-component.html’ as shown below. The controller class ‘ContactsDetailComponent’ implements an ‘OnInit’ interface and hence the ‘ngOnInit ()’ method as shown above. It has a constructor where we are invoking the ‘ContactsService’ for the employee contact details and ‘ActivatedRoute’ (present in ‘@angular/router’ package) for enabling routing.
resource/employee-contacts-detail.component.html
<h2>Selected Name is: {{contact.name}}</h2>
Explanation of Code:
This is the HTML template code to display the employee name which is selected through the click on the hyperlink.
app/employee-contacts-list.component.ts
import { Component, OnInit } from '@angular/core';
import { ROUTER_DIRECTIVES } from '@angular/router';
import { ContactsService } from './employee-contacts.service';
import { EmployeeContact } from './employee-contact.model';

@Component({
  selector: 'employee-contacts-list',
  templateUrl: 'resource/employee-contacts-list.component.html',
  directives: [ROUTER_DIRECTIVES]
})
export class ContactsListComponent implements OnInit {

  employeeContacts: EmployeeContact[];

  constructor(private contactsService: ContactsService) {

  }

  ngOnInit() {
    this.employeeContacts = this.contactsService.getContacts();
  }
}
Explanation of Code:
It has the selector ’employee-contacts-list’, the template URL as ‘resource/employee-contacts-list.component.html’ (as shown below), and directives as ROUTER_DIRECTIVES (for routing directions). The controller class ‘ContactsListComponent’ implements an ‘OnInit’ interface and hence the ‘ngOnInit ()’ method to set the values received from the employee contact service (‘ContactsService’) into the ‘EmployeeContact’ array as shown above. It has a constructor where we are invoking the ‘ContactsService’ for the employee contact details.
resource/employee-contacts-detail.component.html
<h2>Employee Name and ID Summary</h2>
<ul>
<li *ngFor="let employeeContact of employeeContacts"><a
[routerLink]="['/detail', employeeContact.id ]">Name is {{employeeContact.name}}
& ID is {{employeeContact.id}} </a></li>
</ul>
Explanation of Code:
This is the HTML template code to display the list of employees as their name and ID after iterating over the ‘employeeContacts’ array by using ’*ngFor’ directive. Each of this employee record is displayed as a list of hyperlinks that has routerLink binding defined as ‘[routerLink] =”[‘/detail’, employeeContact.id]”’.
app/employee-contacts-routes.component.ts
import { ContactsListComponent } from './employee-contacts-list.component';
import { ContactsDetailComponent } from './employee-contacts-detail.component';
import { ActivationViaAuthenticationGuard } from './routing-guard';

export const EmployeeContactsAppRoutes = [
  {
  	path: '',
  	component: ContactsListComponent,
  	canActivate: [ ActivationViaAuthenticationGuard ]
  },
  {
  	path: 'detail/:id',
  	component: ContactsDetailComponent
  }
]
Explanation of Code:
Here we are defining the const as ‘EmployeeContactsAppRoutes’ which has the path components as ‘ContactsListComponent’ and ‘ContactsDetailComponent’. This class is given as an input to the RouterModule.forRoot(EmployeeContactsAppRoutes) in @NgModule as an import in ‘app-module.ts’ for bootstrapping the application. Here, we can notice that the ‘ContactsListComponent’ path component is guarded against the controller class ‘ActivationViaAuthenticationGuard’ which is imported from ‘routing-guard.ts’ shown below.
app/routing-guard.ts
import { Injectable } from '@angular/core';
import { CanActivate } from '@angular/router';
import { ContactsService } from './employee-contacts.service';

@Injectable()
export class ActivationViaAuthenticationGuard implements CanActivate {

  constructor(private employeeService: ContactsService) {}

  canActivate() {
    return this.employeeService.isLoggedIn();
  }
}
Explanation of Code:
Here we are using the ‘@Injectable ()’ decorator function in order to inject this class ‘ActivationViaAuthenticationGuard’ as a routing guard. This class implements ‘CanActivate’ interface after overriding its method ‘canActivate ()’ to return the status of the current userid with which the user is logged in through ‘isLoggedIn ()’ method defined in ContactsService class of ‘employee-contacts-service.component.ts’ as shown below.
app/employee-contacts-service.component.ts
export class ContactsService {
user : string;
employees = [
{ name: 'Mohit Jain', id: 123 },
{ name: 'Aparajita Jain', id: 223 },
{ name: 'Ram Singh', id: 323 },
{ name: 'Ming Lee', id: 423 },
{ name: 'Donald Trump', id: 523 },
{ name: 'Rahul Modi', id: 623 }
];
getContacts() {
return this.employees;
}
getContact(id) {
return this.employees.find(employeeContact => employeeContact.id == id);
}
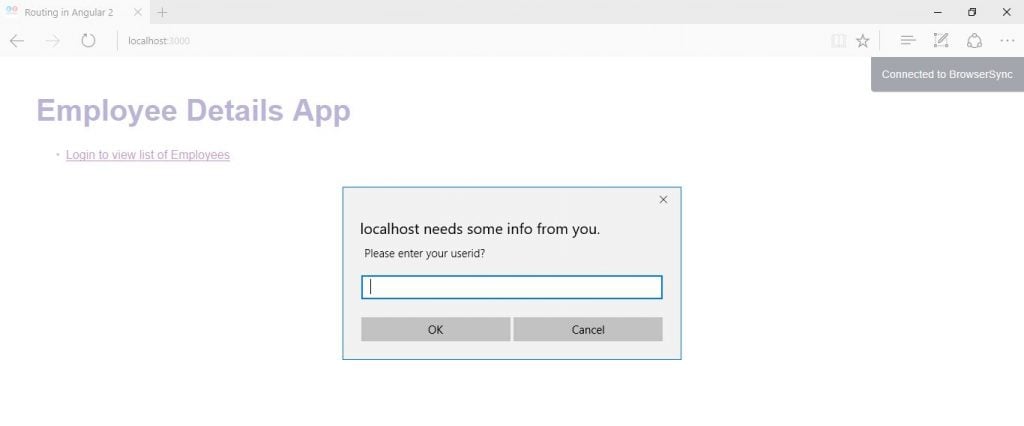
isLoggedIn(){
this.user = window.prompt(' Please enter your userid?');
if (this.user === 'angular2'){
window.alert('Login Successful, you can see list of employees!')
return true;
}
else {
window.alert('Login Unsuccessful, you cannot see list of employees!')
return false;
}
}
}
Explanation of Code:
Here we are creating a ‘ContactsService’ that has all the employees’ details (i.e. name and ID). Also, we are defining two functions ‘getContacts ()’ and ‘getContact (id)’ to fetch all the employee details, including ones that are based on his ID, respectively. Next, we have defined another method ‘isLoggedIn ()’ which returns true when the user enter userid as ‘angular2’ through windows prompt box, otherwise false for all other ids. This is the way we are protecting the routes through guards (here via CanActivate interface).
assets/styles.css
/* Master Styles */
h1 {
  color: #549;
  font-family: Arial, Helvetica, sans-serif;
  font-size: 250%;
}
h2, h3 {
  color: #754;
  font-family: Arial, Helvetica, sans-serif;
  font-weight: lighter;
}
body {
  margin: 3em;
}
body, input[text], button {
  color: #898;
  font-family: Arial, Helvetica, sans-serif;
}
a {
  cursor: pointer;
  cursor: hand;
}

/* Navigation link styles */
nav a {
  padding: 6px 12px;
  text-decoration: none;
  margin-top: 12px;
  display: inline-block;
  background-color: #fee;
  border-radius: 5px;
}
nav a:visited, a:link {
  color: #607U8B;
}
nav a:hover {
  color: #039fe5;
  background-color: #CGH8DC;
}
nav a.router-link-active {
  color: #039he5;
}

/* everywhere else */
* {
  font-family: Arial, Helvetica, sans-serif;
}
Explanation of Code:
It is the stylesheet used to style the text on the web page of the app.
Index.html
<!DOCTYPE html>
<html>
<head>
<title>Routing in Angular 2</title>
<meta charset="UTF-8">
<meta name="viewport" content="width=device-width, initial-scale=1">
<link rel="stylesheet" href="assets/styles.css">

<!-- 1. Load libraries --><!-- Polyfill(s) for older browsers -->
<script src="https://npmcdn.com/core-js/client/shim.min.js"></script>
<script src="https://npmcdn.com/[email protected]?main=browser"></script>
<script src="https://npmcdn.com/[email protected]"></script>
<script src="https://npmcdn.com/[email protected]/dist/system.src.js"></script>

<!-- 2. Configure SystemJS -->
<script src="systemjs.config.js"></script>
<script>
      System.import('app').catch(
    		  function(err){
    			  console.error(err);
    			  }
    		  );
</script>
<script>document.write('<base href="' + document.location + '" />');</script>
</head>

<!-- 3. Display the application -->
<body>
	<my-routing-app>Loading...</my-routing-app>
</body>
</html>
Explanation of Code:
It is the ‘index.html’ file that has the ‘my-routing-app’ tag in its body section i.e. selector defined in the ‘app-component’ to load and display the complete application. Here, we are including all the paths for the scripts which are required for the Angular 2.0 build as shown above.
Output
When we run the above angular 2.0 model-driven form app by executing the command ‘npm start’ on command line that has pointer to the application’s root directory ‘angular2-routing-guards’, then we will observe the following output.
Case 1: Enter incorrect userid as ‘angular1’. Since guards are equipped to work only for ‘angular2’ userid, therefore it will display the alert as ‘Login Unsuccessful, you cannot see list of employees!’ and finally no list of employees will be displayed on the screen as shown below.
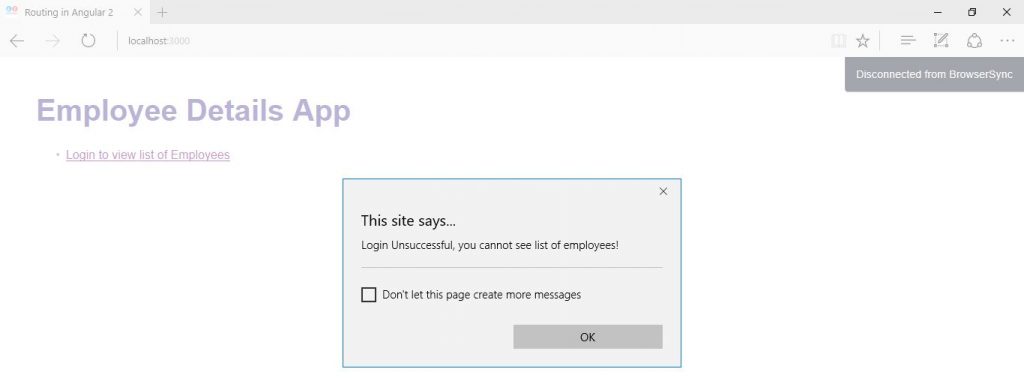
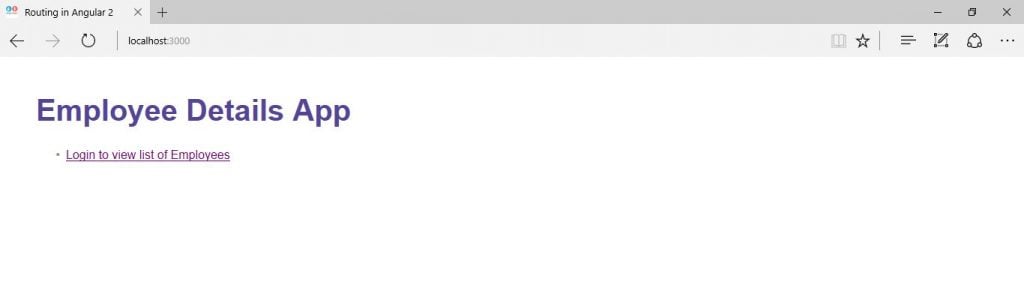
When you click on the ok button, you will notice that the list of employees is not displayed as shown below.
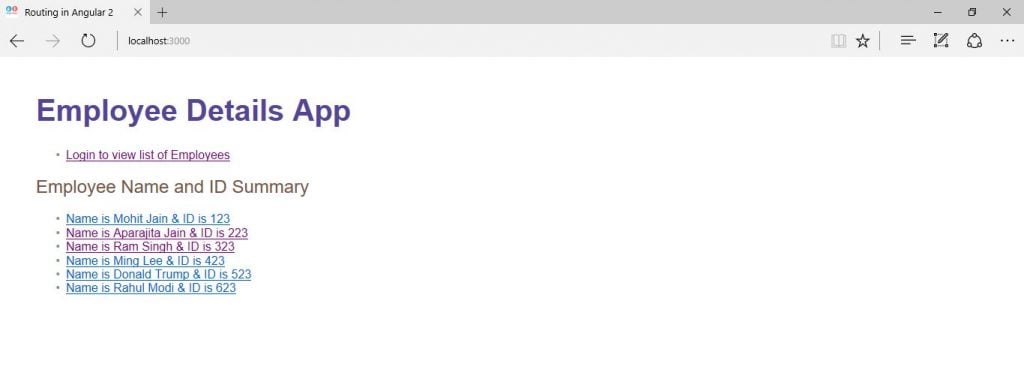
Case 2: Enter the correct userid as ‘angular2’. Since guards are equipped to work only for ‘angular2’ userid, therefore it will display the alert as ‘Login Successful, you can see list of employees!’ and finally the list of employees will be displayed on the screen as shown below.
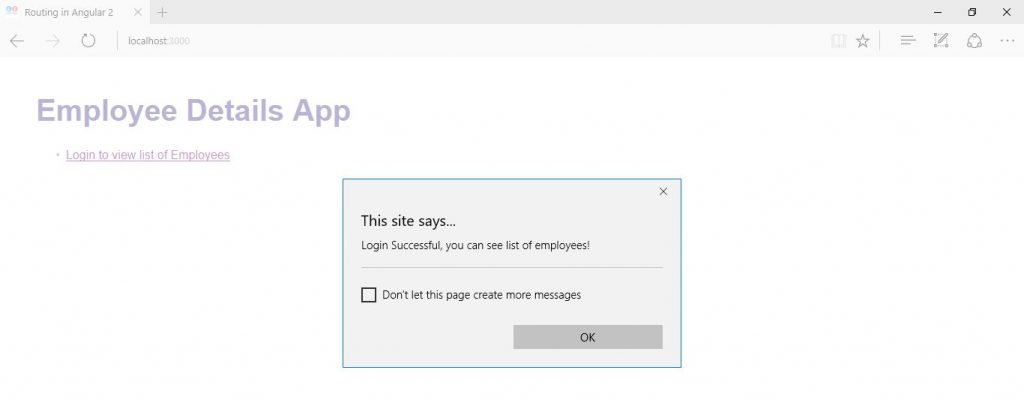
When you click on the ok button, you will notice that the list of employees is displayed as shown below.
Source Code for Routing Guard in Angular 2.0
Conclusion
In this chapter, we have learnt about the protection of the routes using Guards along with a basic example of routing guard as a class (CanActivate) in Angular 2.0.


 in Angular 2.0.)
Hi,
do you also take development work in Angular & Node?
we are looking for angular development work.
please drop us a line ([email protected])