

Microsoft has stepped into the future with its next-gen server technology. Being the most used server on the market, Microsoft has given the IT professionals something brand new to look forward to. The latest Server 2016, builds up on the company’s 2008 and 2012 server, but adds more innovative features including integrated services, cloud support, etc.
For the brilliant technicians and IT professional who want to take a step deeper into this amazing futuristic technology, we have designed a complete and comprehensive course to help them not only understand but also master this amazing technology first hand. Be the first few to take a step in a new direction – cloud.
This course has been designed for information technology (IT) professionals or beginners who want to start their careers as a Microsoft server administrator and want to upgrade their technical skills from Windows Server 2008 or Windows Server 2012 to Windows Server 2016.
This course is not a product-upgrade, rather it details considerations for migrating and upgrading students’ specific environment to Windows Server 2016 and helps beginners who want to step in server administration.
It is the next-gen server that offers a high level of support for cloud-service providers such as IAAS, PAAS, and SAAS. Hyper-V is upgraded with maximum support for cluster integrated services, generation of machines to support 64-bit OS(server or client OS).
The course covers over 11 hours of content. It provides you with all that you need to start with and become comfortable with Server 2016 administration. The course includes all the upgraded and latest features of Server 2016.The lab set up is completely done on a Server 2016 data center (64-bit) edition.
It uses a hands-on approach and asks the student to keep the computer ready with the virtualization software (hyper-v, Virtualbox, vigrant, etc.) and also the downloaded ISO copy of the Server 2016 (evaluation version) that is for study purposes only.
Audience for the course:
- Student who wants to learn the latest Windows 2016 Server Administration Any one who wants to set up the Windows based server infrastructure
- IT professionals who are experienced in Windows Server 2012 or Windows Server 2008 system administrators
- Additionally, IT professionals who plan to take the Microsoft Certified System Administration (MCSA) exams might also be interested in this course to prepare for the MCSA exams.
Introduction of the Course:
- Contains the video for the introduction of the course explaining the flow of the course:
Installing and Configuring Windows Server 2016: –
- This session covers the installation of Server 2016 on a virtual machine and also describes the licensing process of Windows and how to active the Server OS. It describes the type of client licenses available through Microsoft for Microsoft customers.
The session is covered in following parts: –
1. Installation of Server 2016.
2. Local configuration of Server 2016.
3. Describe activation and CALS.
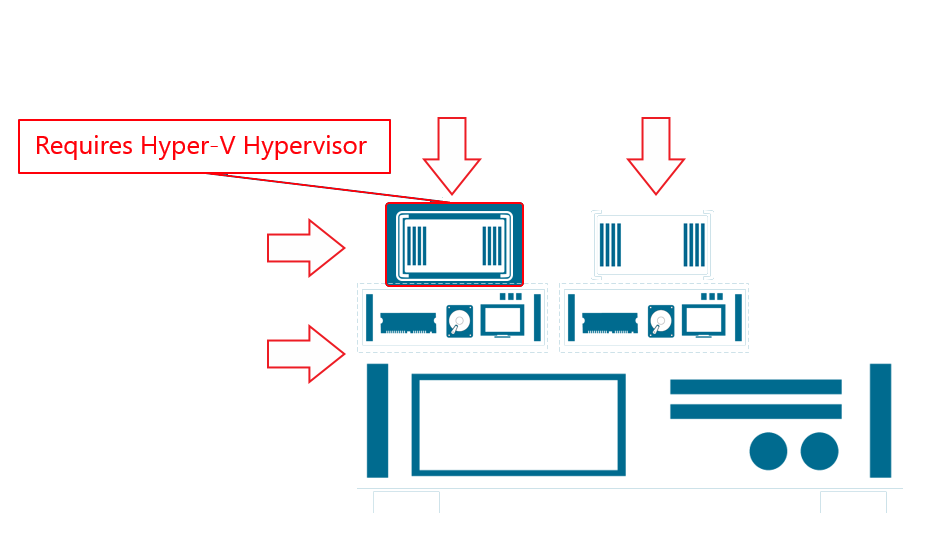
Install and Configure Nano server 2016: –
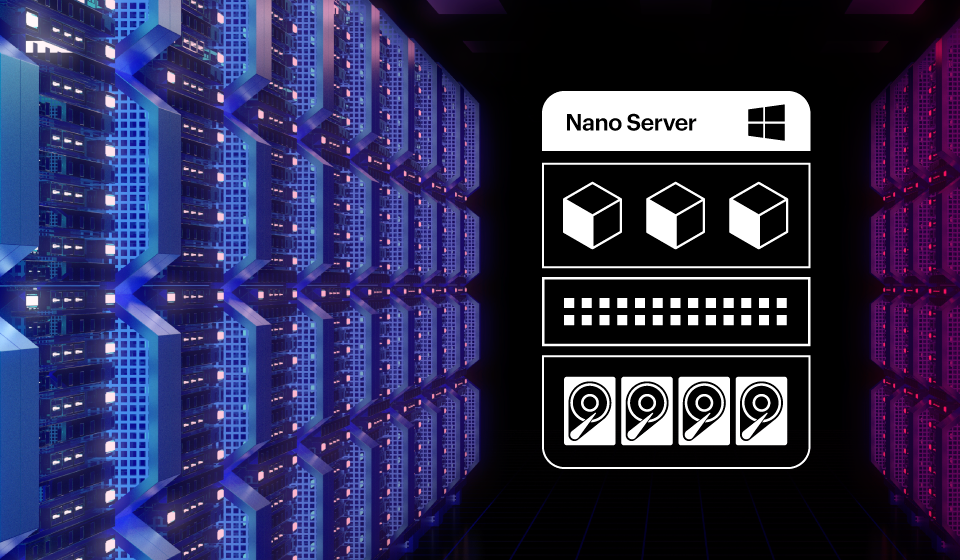
Microsoft has stripped-down its server operating system to address the problems associated with running huge services and running server OS in the data center. We can see it as a stripped down version of Server OS that removes the unused services and makes a server as a process oriented server to lower the load of the server and maximize the speed of service.
By removing the GUI of the OS and features like 32-bit support, MSI and various default Server Core components, Windows Nano Server can deliver better speed, stability and security, as well as dramatically reduce resource consumption. This leads to real-world benefits such as 93% lower VHD size.
Nano Server was first made available as a preview to the Windows Server 2016 and we are going to start with this server and move along to operate the server with following flow:
1. Generate and Install Nano server VHD
2. Installating packages through online repositories
3. Manage disk on Nano Server
4. Recovery console
5. File transfer with Nano Server
6. Prerequisite of Hyper-V on Nano Server
7. Configure Hyper-V on Nano Server
8. Adding Nano Server as a domain client
Overview of storage in Windows Server 2016: –
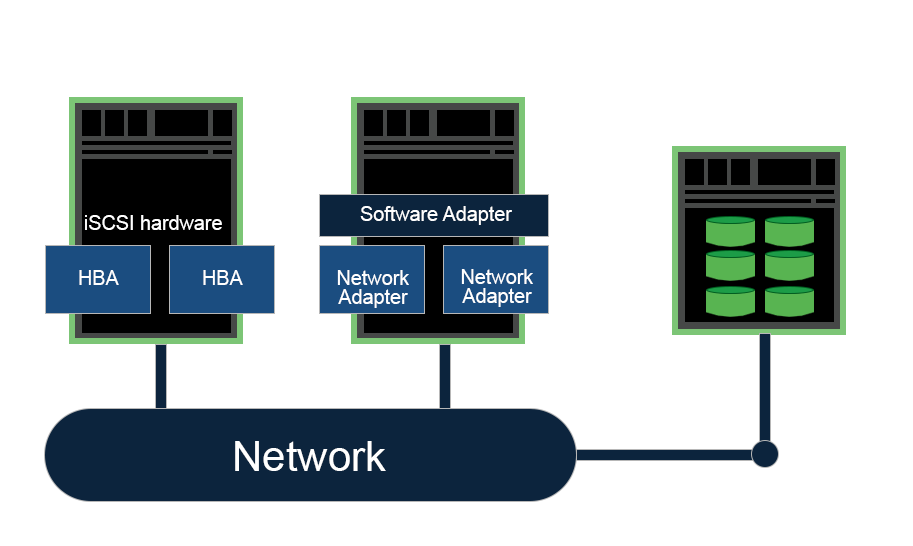
The session covers the basic description of server 2016, which includes the steps to access store data on the Server 2016 SAN and optimizes free space on a volume by examining the data on the volume for duplication. The session includes:
1. Introduction and Configuration of Dedupe GUI and Powershell.
2. ISCSI storage
3. Storage space direct
Implementing Directory services: –
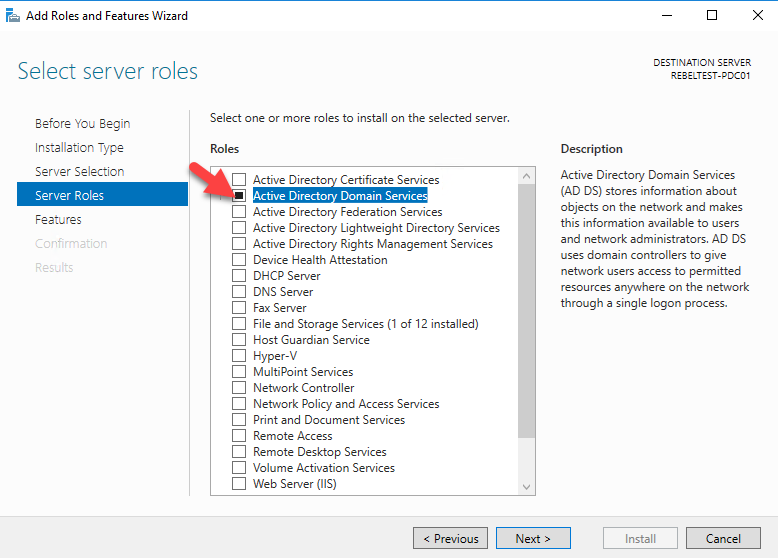
DNS and Active Directory (ADDS) play a key role in domain networks, where ADDS makes a server a Domain controller which acts as a roof for all domain connected computers called as Domain members/Clients and DNS plays a role which enables a resolution of IP and Domain name to help clients connect the domain server and other PCs with the user-friendly name or domain name.
The Session covers how to install, configure and maintain the Domain Name System, the Domain Controller and its clients. Here is a breakdown of what you will find in this session:
1. DNS Server Introduction
2. Install and Configure the DNS Server
3. Delegating DNS Zone
4. Introduction to DNSSec
5. Configure DNSSec
6. Resolve SRV registration issues
7. Domain controller
8. Cloning a DC
9. RODC
10. Demoting a domain controller and RODC
Implementing Hyper-V: –
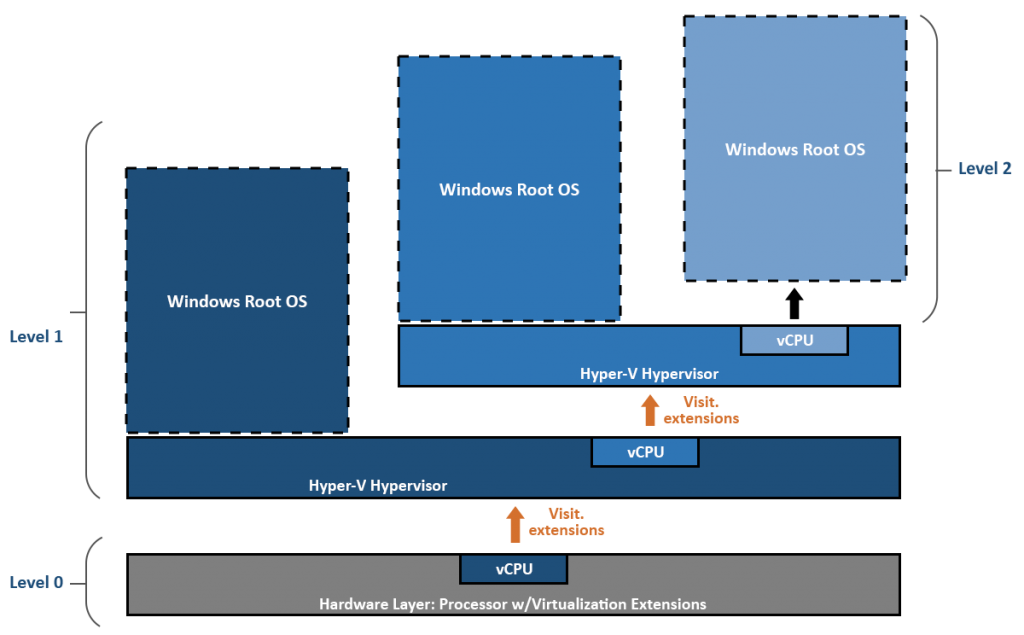
Hyper-V is a virtualization feature of Server operating system created by Microsoft which was first introduced in Server 2008 and subsequently available with all future Server OS releases. It can create 32-bit or 64-bit virtual machines and can be installed on Windows and non-Windows OS. Hyper-V virtual machines can be configured to expose individual virtual machines to one or more networks.
Server 2016 has come up with more extendible features in Hyper-V, including Shielded VM, Integrated services, hot-adding the disks and RAM.
This session will help you install and configure Hyper-V servers by following the sub-sessions mentioned below: –
1. Intro to Hyper-V
2. Install Hyper-V
3. Creating VM in Hyper-V manager
4. Manage VM using powershell
5. Manage Hyper-V switches
6. Import Export VM
7. Configure Integrated Services
8. Implement Nested Virtualization in HYPER-V VMs
9. Configure Differencing Disks
10. Manage Hyper-V using guest OS
Configuring advanced networking features: –
Microsoft provides some interesting virtualization features in latest versions of Windows Server. You can connect or isolate virtual machines, and Windows Server 2016 even supports virtual switches.
In Windows Server 2016, you can hot plug and unplug network adapters on one wink. You do not need to shut down or pause the VMs to shut down an adapter. This feature is particularly useful if you work with different VLANs or network segments and need a way to connect VMs to networks quickly and easily. But this feature only works with generation 2 VMs.
Nested virtualization is possible in Windows Server 2016, as of TP4, and Windows 10 from build 10565. You can thus install Hyper-V on a virtual server, which you virtualized with Windows 10 or Windows Server 2016, and create virtual switches. You can also add the virtual adapter and create a Network Teaming in the Server.
All the above features are covered in this session, which also includes: –
1. Manage Hyper-V switches
2. Introduction to NIC teaming
3. Configure NIC teaming
Implementing Network services: –
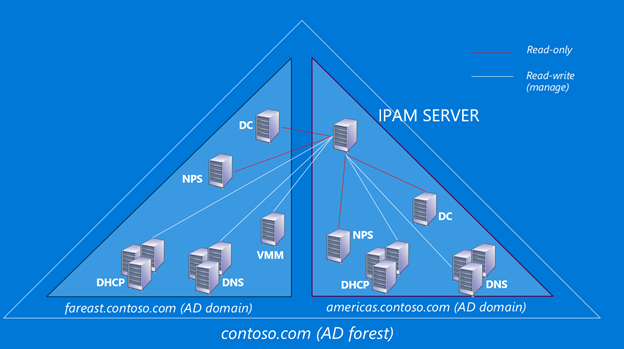
IPAM integrates and controls DNS and DHCP, so that each is aware of changes in the other (for instance DNS knows the IP address used by a client via DHCP, and updates itself in Leases addresses). Additional functionality, such as controlling reservations in DHCP as well as other data aggregation and capable of reporting DHCP.
IPAM tools are increasingly important as new Ipv6 networks are deployed with larger address pools and subnets, and more complex 128-bit hexadecimal numbers which are not human-readable as IPv4 addresses. IPv6 networking, mobile computing, and multi-homing require more dynamic address management.
The session covers the implementation and configuration of this brilliant feature of server 2016 with the following sub-sessions: –
1. Implementing IPAM
2. IPAM configuration
Implementing Remote Access: –
This session is going to explain remote access and the ways to access the remote machine on a public network using a secure private connection. The session provides the process of installing and configuring DirectAccess VPN in Windows Server 2016. In Windows Server 2016 and Windows Server 2012, you can deploy both DirectAccess and VPN (Vitrtual Private Network) on the same server. These allow you to provide DirectAccess connectivity to supported clients as well as providing VPN access to remote clients that do not support.
1. Intro to VPN
2. Configure VPN Server and Client
3. Introduction of Direct Access
Deploying and managing Windows Server and Hyper-V containers: –
A Container is an isolated place where an application can run without affecting the rest of the system and without the system affecting the application. Containers are the next evolution in virtualization. The Windows container can also be updated or modified seamlessly with the container in use in other machines or user without affecting their service.
Docker, a Windows Server Container can be managed in the same way as any other container. There are two Windows Container Type: Windows Server Containers and Hyper-V Containers. Here, we are going to have short look of vast module to pull Microsoft containers.
1. Introduction of docker and containers
2. Deploy Microsoft Containers
Implementing failover clustering with Windows Server 2016 Hyper-V.
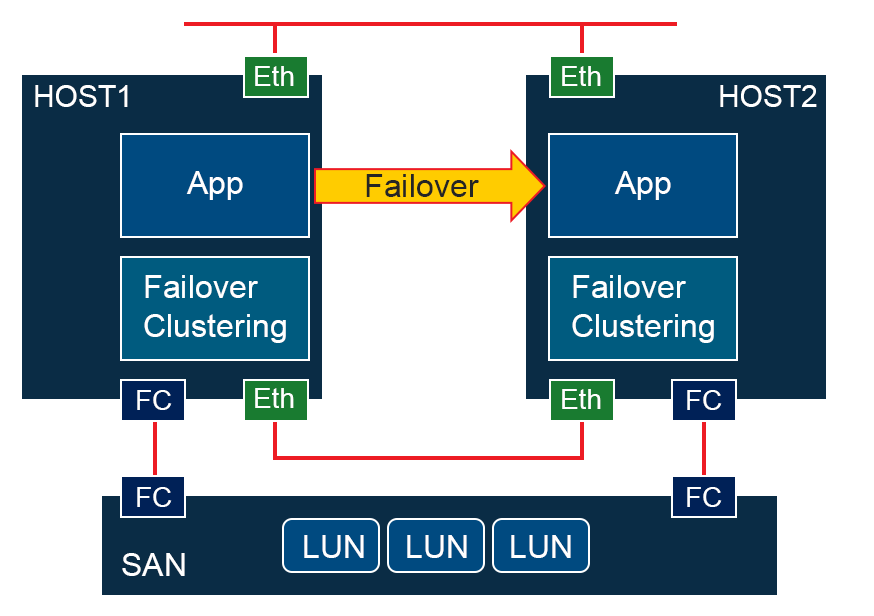
Latest feature in Failover Clustering is Cluster Operating System Rolling Upgrade, enables an administrator to upgrade the operating system of the cluster nodes from Windows Server 2012 R2 to Windows Server 2016 without stopping the Hyper-V or the Scale-Out File Server workloads. Using this feature, the downtime penalties against Service Level Agreements (SLA) can be avoided.
A Hyper-V or Scale-Out File Server cluster from Windows Server 2012 R2 to Windows Server 2016 no longer requires downtime. The cluster will continue to function at a Windows Server 2012 R2 level until all of the nodes in the cluster are running Windows Server 2016. The following sub-session provides the installation ad configuration of Failover clusters:
1. Installing failover cluster features
2. Connecting SAN with MPIO
3. Creating a cluster and adding cluster nodes
4. Introduction to Scale-out fileserver
5. Scale out file server
In this blog, you will learn about the different features of Windows Server 2016 and a short description about the latest features that are covered in each session of the corresponding Server 2016 course including topics such as Installation and configuration of Windows Server 2016, Nano Server, Hyper-V, Storage, Failover, etc… along with the sub sessions topics and hands-on practical included in the sessions.

