Hi friends,
I am back again with HTML tutorial.
- We learned HTML tables and lists theoretically earlier.
- Now we are going to study it practically.
- Before starting, I want to explain you about comments in HTML.
- Comment is a non-executable statement in a program which is written only for the information of a programmer or the viewer.
- Syntax of comment in HTML can be written as explained below:
Syntax :-  <!—some text-->

Eg: <html>
         <head>  <!--this is head section -->
               <title>HTML Tables</title>
         </head>
         <body>  <!--this is body section -->
               <h1> TABLES AND LISTS</h1>
         </body>
    </html>
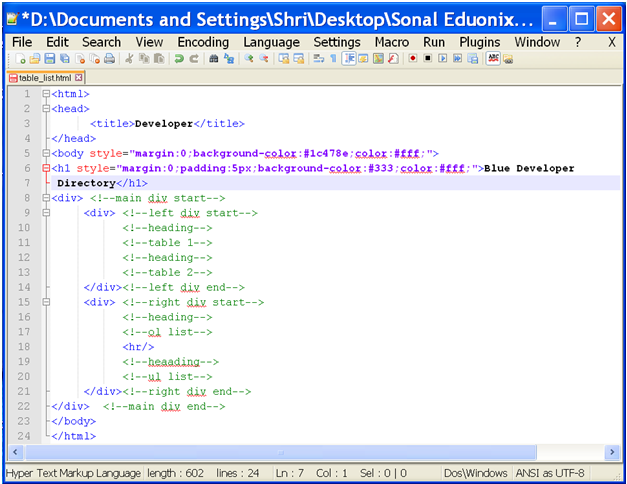
fig 1
- Here in notepad++, the outline of the program is shown.
- All the green coloured lines are comments which give us some information about the program.
- Looking at it you might have come to know about the structure of the webpage.
- The final output will be as follows:

fig 2
- Let’s start our assignment.
- Open the notepad++ editor:
- First thing to create a webpage is to open a notepad++ editor.
- Save the file before you start writing the code; no matter if you save it later, giving it name as table_list.html and then click on “Save” button as shown in fig 1.1.
- Write code:
- Change the outline step-by-step. I mean to say, replace the comments with the required code.
- The output of the program outline in fig 1 is as follows:
- Here the output shows you only a heading “Blue Developer Directory” in white colour, a horizontal line and blue background colour.
- But the structure of the outline tells you many things. Let’s discuss.
- In the outline there are three div tags in the body section.
- One is the main and the other two are inside the main div tag.
- You know that div tag defines a block. Hence among the two div tags inside the main block, one is the left block and the other is the right block.
- Left block contains two tables and the right block contains two lists.
- This was all about the outline, so now let’s start to achieve the final webpage.
- We have the output till fig 2.1, now we will have headings in the left part by replacing the comments with code as follows.
- We have added headings “Boston Developers” and “New Hempshire Developers” within h3 tags in left div:
- We have made the following changes in left div:
- See the code written in notepad++ and its output below:
- Brake tag is used for line brake.
- But, we come to know from outline that there are tables below the headings. So let’s create tables.
- First we will see the code for table under heading “Boston Developers”.
- Output of table is as shown:
- Now let’s review the table code:
- We know table starts with table tag.
- In any table, columns have heading and each column contains some data.
- So our table has a head section and a body section just like the html head and body section.
- Head section in table is denoted by starting thead tag and ending thead tag and body section is denoted by starting tbody tag and ending tbody tag.
- starting thead tag and ending thead tag contain starting th tag and ending th tag inside a row i.e. between starting tr tag and ending tr tag.
- th stands for “table header”.
- This starting th tag and ending th tag is used to give heading to each column of the table.
- Whatever written in starting th tag and ending th tag appears in centre and in bold font than the rest of the data.
- Now comes the data. Actual data in the columns is filled in the starting tbody tag and ending tbody tag.
- Data is entered in starting td tag and ending td tag inside a row (i.e. between starting tr tag and endinf tr tag), explained in previous session.
- The border attribute of table ( border=”1”) gives it the border of width 1.
- As we have a header in table, we can also have footer.
- For that we have to use starting tfoot tag and ending tfoot tag.
- We know footer is always at the bottom, but we need to place this tag between the ending thead tag and starting tbody tag.
- Let’s see the code and output for footer:
- We have shown the code between main div tag and before table body starts.
- Output:
- Even though in the output the footer is below the table body, still you need to write the code between thead tag and tbody tag.
- Now, let’s create another table under the heading ”New Hampshire Developers” in the same way.
- Code is as follows:
- Output is as follows:
- With this we have finished with the content of the left block, I mean the left div tag.
- Now, let’s start with right div block.
- The right div block contains an ordered list, a horizontal line and an un-ordered list.
- The horizontal line that we can see in all our above outputs is actually the one between the ordered list and un-ordered list.
- In the outline of program in fig 1, you can see hr tag in right div between comments for ol list and heading.
- Let’s start with the heading in right div:
- The code is written below:
- Output is shown below:
- I know the content of right div tag is on the right side of the webpage. But that we will achieve by styling later.
- Now next step is the ordered list.
- Code for ordered list is:
- We had studied ordered list in previous chapter.
- It’s output is shown below:
- Next is the horizontal line which we can see already.
- Now we will create the unordered list.
- Code contains tag for horizontal line also.
- Code for un-ordered list is:
- Code in right div tag and output is shown below:
- We have finished creating the whole content of webpage.
- Now, it’s time for styling. Styling the webpage will make it look like our final output.
- Styling the webpage:
- In this example we are again going to use inline styling.
- Let’s start from tables.
- In the final output tables don’t have border and the content is placed far off from each other. So first of all, let’s remove the border and leave some space between the content.
- Just replace the “border” attribute in each table with “width”.
- Code is as follows:
- Output is shown as follows:
- Now again we can see in final output that there are dashed lines under every row.
- Looking at it we now know that, we need to provide styling for every td tag in each row.
- But it’s too mechanical and very lengthy, because there can be ‘n’ number of rows in one table.
- I will tell you another way. Whatever styling you want to do for td tag, write it once in main HTML head section.
- This styling will be applied to all the td tags in the program.
- Here in head section styling is applied using starting style tag and ending style tag.
- Code is as follows:
- Here, in above code, “border-bottom” attribute is used to create the border under each row.
- It is the shorthand form of “border-width”,”border-style” and “border-color”.
- So we will have a border with 1px width, dashed style and with fore-colour as white.
- Padding of 5px is also given.
- Output is shown below:
- Next you can see that, the table headings “Boston Developers” and “New Hampshire Developers” have a background colour.
- Here also, we have two table headings, so we will style it by writing the code in head section, only once.
- Code is as follows:
- Here, you might have understood that, to apply common styling we need to
- write the tag to which we have to apply the styling.
- Opening curly brace.
- Styling attributes and their values
- Closing curly brace.
- Now here, for heading background colour we have used “background” attribute with hexadecimal value for blue colour shade.
- I would like to tell you that, we have seen “background-color” attribute of style previously. It can also be written as “background”, as we have used here.
- Padding of 5px is given which leaves space of 5 pixels above and below the heading.
- Output is shown below:
- Lists styling:
- Our lists have been created below tables, but we want them at right side of the webpage.
- For that we need to style our div tags one by one.
- The above code specifies width to main div tag.
- Output is shown below:
- Here in the above output, the content in the webpage is within the width of 830px.
- You can see that the horizontal line and the blue shaded background colours of the headings which had 100% width is reduced and compressed to fit in the width of 830px.
- Now second step is to style the left div tag.
- The code for left div tag styling is as follows:
- Here, width:600px; gives the width of 600 pixels to left div block.
- float:left; fixes the block at the left side of the webpage.
- float in style allows to fix a particular HTML construct to a specified position.
- The output after styling left div tag is shown below:
- Now third and last step is to style right div tag.
- The code for right div tag styling is as follows:
- Here, in above code, the right block is given width of 210px.
- float:right; means it has fixed position to the right side of the 830px main div block.
- background:#333333; gives background colour to the right block.
- padding:0 10px 0 10px; is used to leave space from all sides of the block as specified.
- It can be viewed as : padding:top right bottom left, thus leaving 0px from top and bottom and 10px from right and left sides.
- The output is as follows:
- Now this is almost like our final output, but the right div block should not touch the upper “Blue Developer Directory” background.
- This can also be achieved, by using “margin” value of style attribute as follows.
- So add “margin-top” to the right div, styling as follows:
- Here, margin-top:30px; makes the right
block to shift downwards from top by 30px.
- Thus achieving the complete final output.
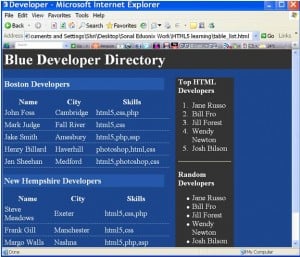
fig 3.7
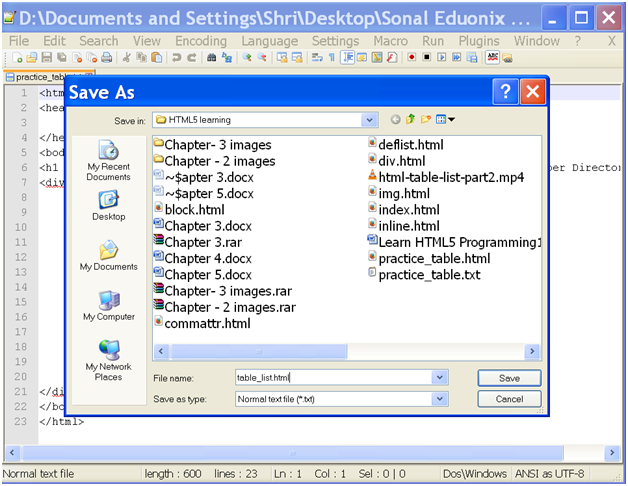
fig 1.1

fig 2.1
<div> <!--left div start-->
     <br>
     <h3>Boston Developers</h3>    <!--replaced comment-->
     <!--table 1-->
     <h3>New Hampshire Developers</h3><!--replaced   comment-->
     <!--table 2-->
</div><!--left div end-->

fig 2.2
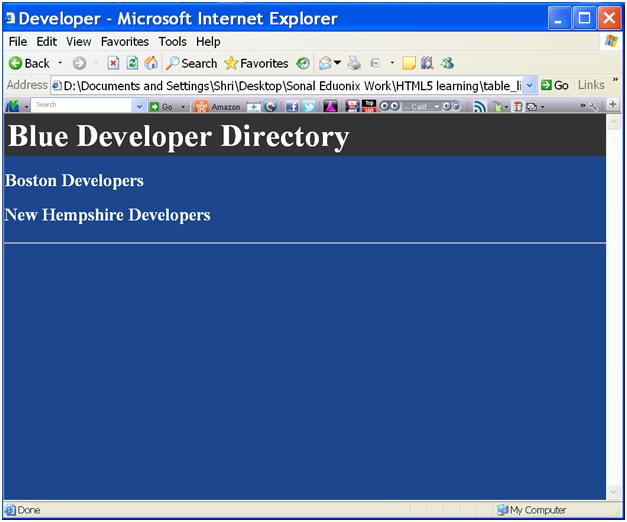
fig 2.3
<table border="1"> <!--table 1-->
     <thead>
           <tr>
              <th>Name</th>
	           <th>City</th>
	           <th>Skills</th>
           </tr>
     </thead>

     <tbody>
	   <tr>
           <td>John Foss</td>
	       <td>Cambridge</td>
	       <td>html5,css,php</td>
    	</tr>
	   <tr>
	       <td>Mark Judge</td>
	       <td>Fall River</td>
	       <td>html5,css</td>
  	   </tr>
	   <tr>
	       <td>Jake Smith</td>
	       <td>Amesbury</td>
 	      <td>html5,php,asp</td>
    </tr>
	   <tr>
           <td>Henry Billard</td>
		   <td>Haverhill</td>
		   <td>photoshop,html,css</td>
	   </tr>
	   <tr>
		    <td>Jen Sheehan</td>
		  <td>Medford</td>
            <td>html5,photoshop,css</td>
	   </tr>
      </tbody>
</table>
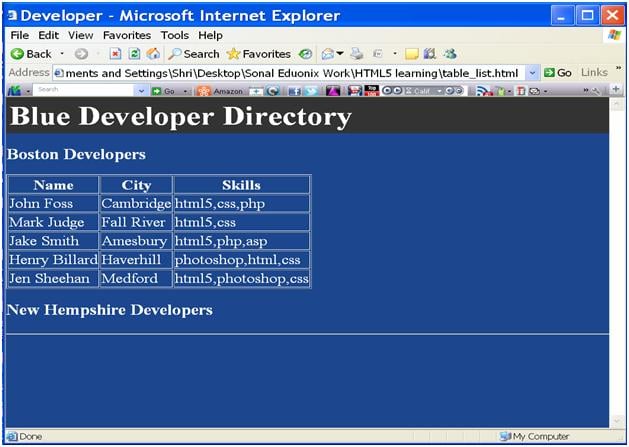
fig 2.4
 <table style="width:600;"> <!--table 1-->
       <thead>
	     <tr>
	         <th>Name</th>
		      <th>City</th>
		      <th>Skills</th>
  	   </tr>
       </thead>
       <tfoot>
         <tr>
	         <th>Name</th>
	         <th>City</th>
		     <th>Skills</th>
	     </tr>
       </tfoot>

	    <tbody>
	      <tr>
		  <td>John Foss</td>
		  <td>Cambridge</td>
		  <td>html5,css,php</td>
	      </tr>
              ---
              ---
              ---
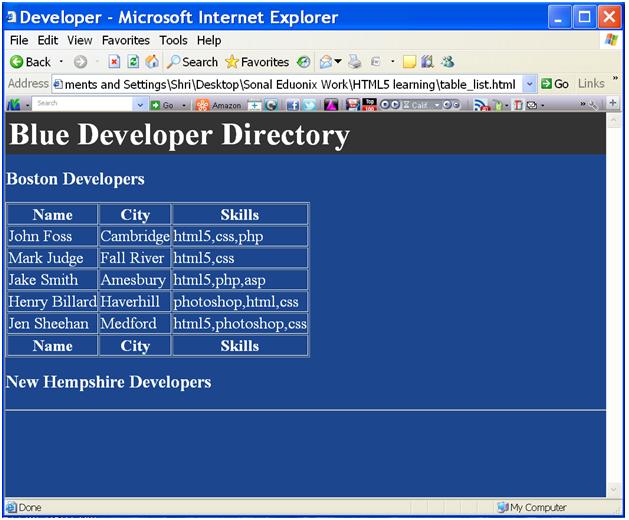
fig 2.5
<table border="1"> <!--table 2-->
      <thead>
	     <tr>
	         <th>Name</th>
 	        <th>City</th>
             <th>Skills</th>
	     </tr>
      </thead>
      <tbody>
        <tr>
             <td>Steve Meadows</td>
		      <td>Exeter</td>
		      <td>html5,css,php</td>
	    </tr>
        <tr>
	  	    <td>Frank Gill</td>
		      <td>Manchester</td>
		      <td>html5,css</td>
  	   </tr>
	     <tr>
               <td>Margo Walls</td>
		       <td>Nashna</td>
		       <td>html5,php,asp</td>
	     </tr>
         <tr>
               <td>Kevin Teague</td>
		       <td>Cancard</td>
	  	     <td>photoshop,html,css</td>
	     </tr>
	     <tr>
               <td>Jeff Goodrow</td>
		       <td>South Hampton</td>
  		     <td>html5, photoshop, css</td>
	     </tr>
      </body>
</table>
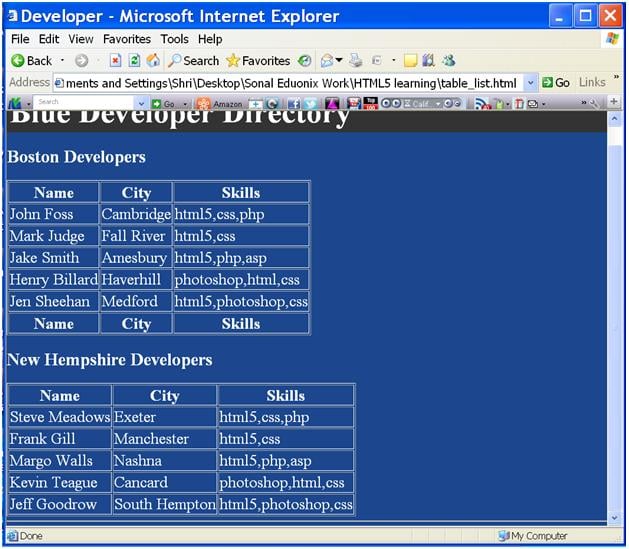
fig 2.6
<div> <!--right div start-->
	       <h4>Top HTML Developers</h4> <!--heading-->
	        <!--ol list-->
		   <hr/>
		   <!--heading-->
		   <!--ul list-->
 </div> <!--right div end-->
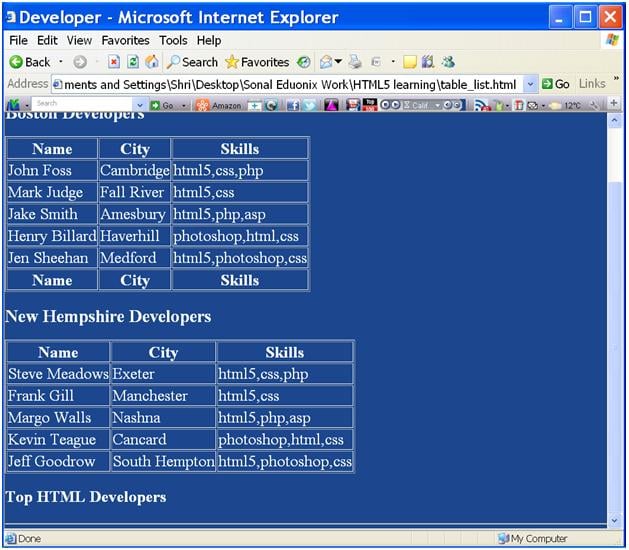
fig 2.7
<div> <!--right div start-->
	       <h4>Top HTML Developers</h4> <!--heading-->
		   <ol> <!--ol list-->
		       <li>Jane Russo</li>
			   <li>Bill Fro</li>
			   <li>Jill Forest</li>
			   <li>Wendy Newton</li>
			   <li>Josh Bilson</li>
		   </ol>
		   <hr/>
		   <!--heading-->
		   <!--ul list-->
</div><!--right div end-->
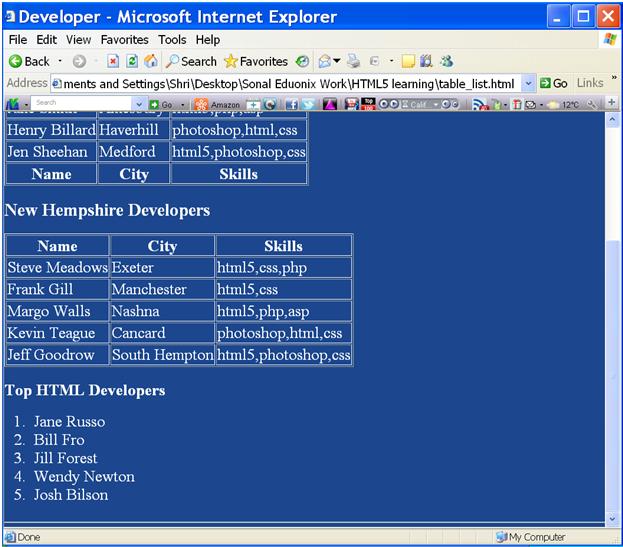
fig 2.8
<div> <!--right div start-->
 <hr/>
 <h4>Random Developers</h4><!--heading-->
 <ul> <!--ul list-->
      <li>Jane Russo</li>
      <li>Bill Fro</li>
      <li>Jill Forest</li>
      <li>Wendy Newton</li>
      <li>Josh Bilson</li>
 </ul>
</div><!--right div end-->
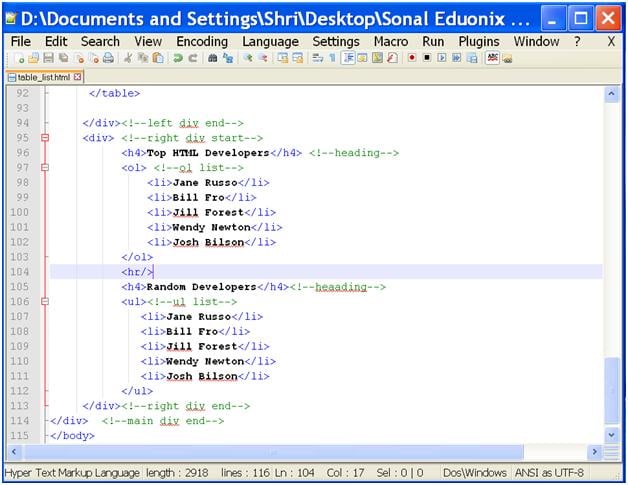
fig 2.9
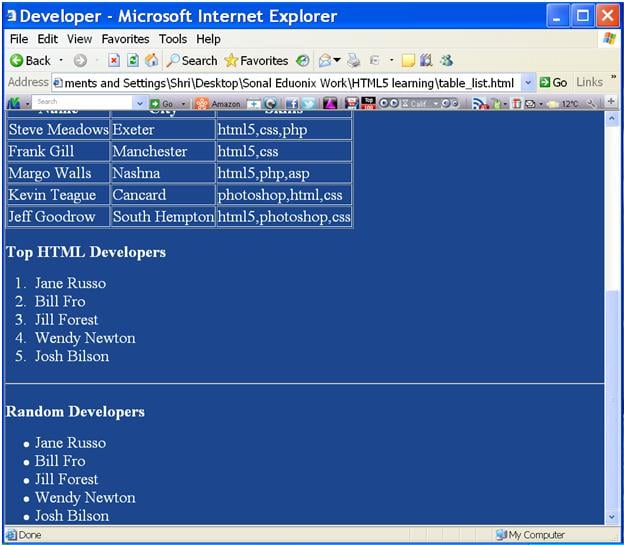
fig 2.10
<table style="width:600;">
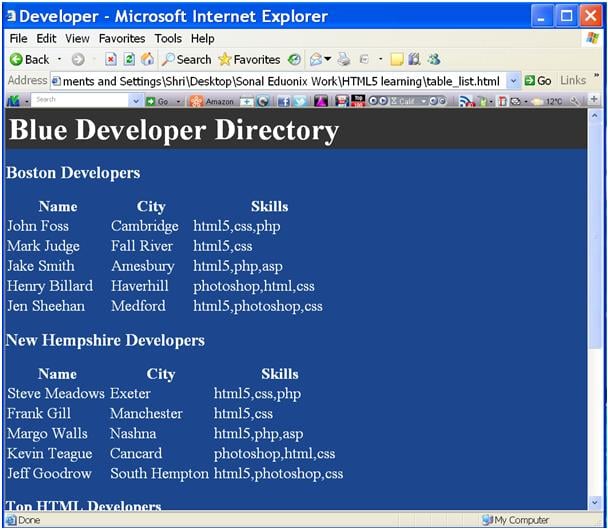
fig 3.1
<head>
	  <title>Developer</title>
	  <style>
	  td
	  {
		border-bottom:1px dashed #ffffff;
		padding:5px;
	  }
	  </style>
</head>
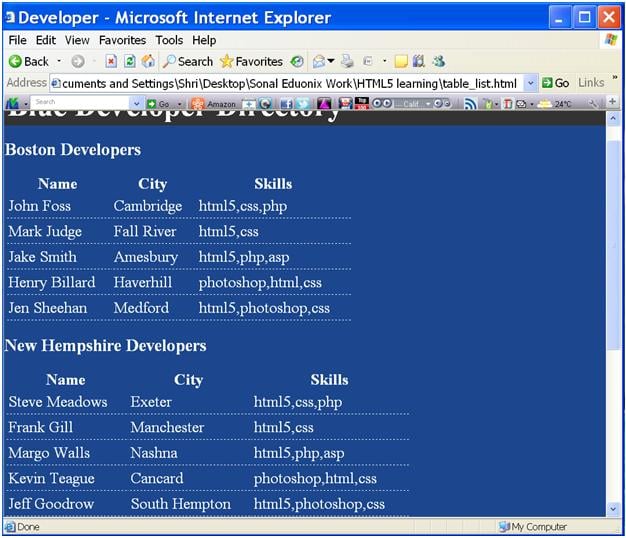
fig 3.2
<head>
	  <title>Developer</title>
	  <style>
	  td
	  {
		border-bottom:1px dashed #ffffff;
		padding:5px;
	  }

	  h3
	  {
	    background:#2658a9;
		pading:5px;
	  }
	  </style>
</head>
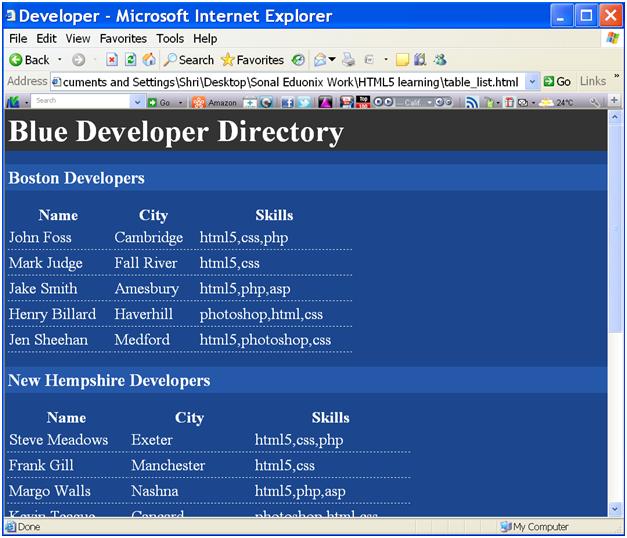
fig 3.3
• First we will style our main div tag. The reason to do this is, our whole data should fit in the width we specify.
• We will see what happens after writing the code.
<div style=”width:830px;”>
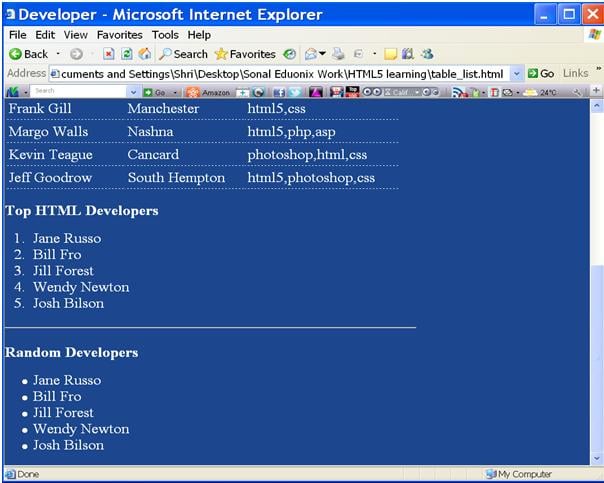
fig 3.4
<div style="width:600px;float:left;padding-right:20px;">
Padding-right:20px; leaves 20px space at the right side of the block i.e. at the right side of the tables. It will be understood after our lists come to right side of tables.
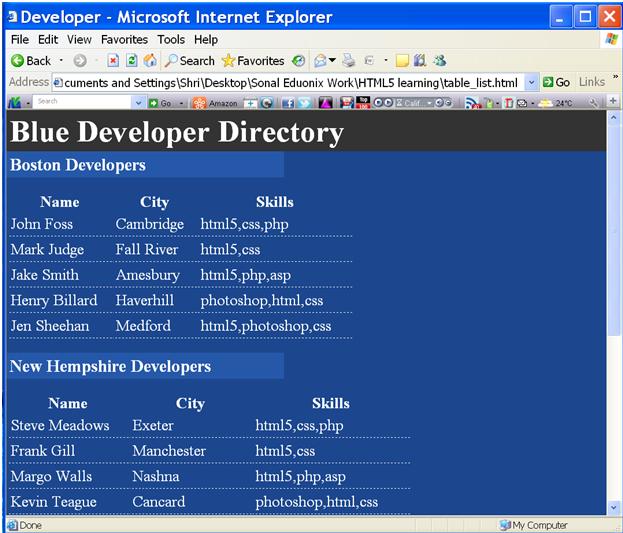
fig 3.5
<div style="width:210px;float:right;background:#333333;padding:0 10px 0 10px;">

fig 3.6
<div style="width:210px;float:right;background:#333333;
padding:0 10px 0 10px;margin-top:30px;">