

A web browser is a software application which is used for retrieving, presenting and traversing information on the World Wide Web. This article helps the user create his own Web browser in android for his device. For developing this android application, we will make use of the Android Studio.
Installation of Android Studio
Download the Linux SDK from the Android Website. Copy the downloaded file to a separate folder, where the zip file is to be extracted. Open up the terminal and direct it to the folder where the file is saved.
Now enter the following set of commands given: –
sudo apt-get install unzip
	sudo tar xvzf android-studio-ide-145.3360264-linux.zip
	cd android-studio-ide-145.3360264-linux
	./studio.sh
JDK 1.7 or 1.8 is required for the Studio 1.0 .
Download the ubuntu zip from this link and repeat the steps from the above.
Download the jdk 1.7 or 1.8 by executing the following commands.
sudo add-apt-repository ppa:webupd8team/java
	sudo apt-get update
	sudo apt-get install oracle-java7-installer
Open up the Android studio and install the SDK tools.
Implementation
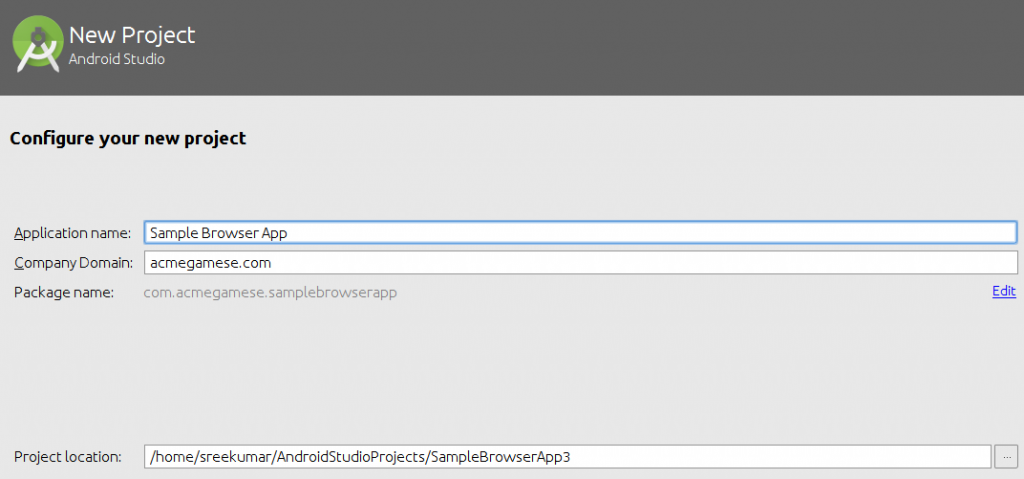
Step 1: – Open up the Android Studio. Create a new project as shown below and click next.
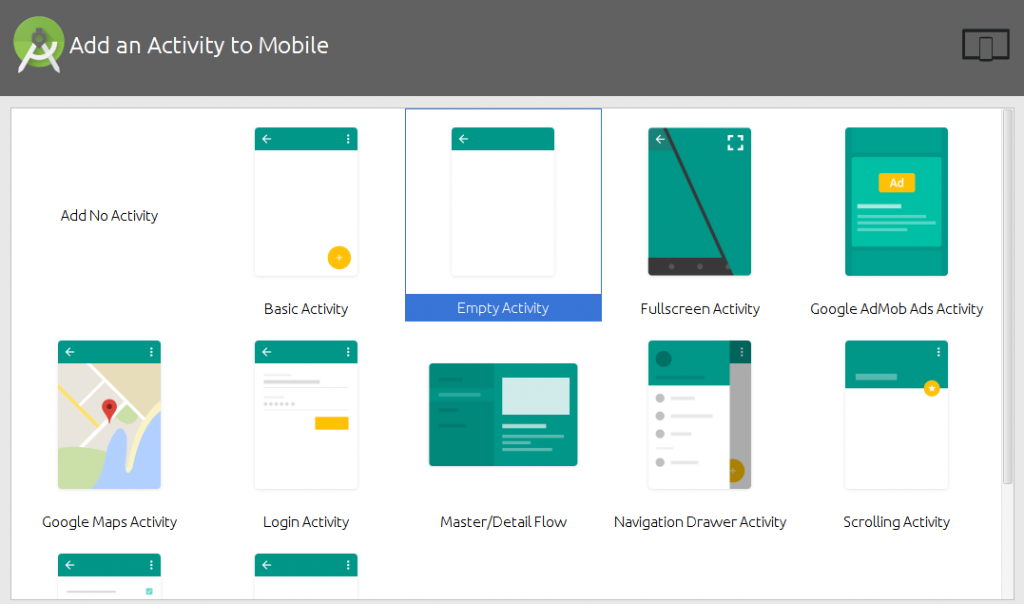
Step 2: – Choose a blank project as seen below.
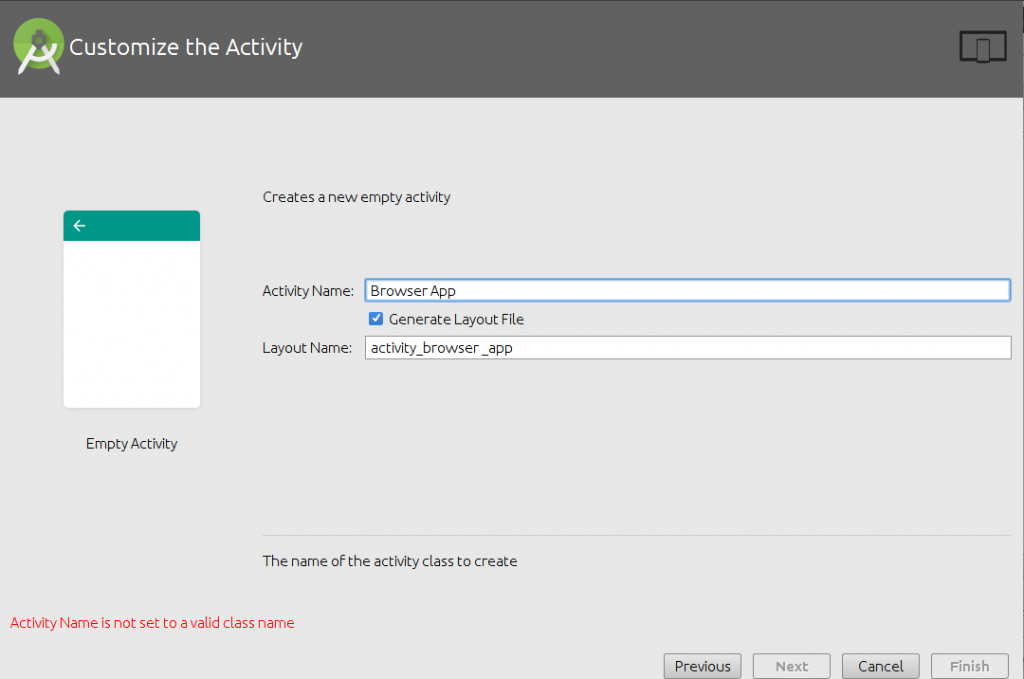
Step 3: – Customize the activity by changing the name. Here we’ve renamed it to Browser App
Step 4: – Click Finish. This will open up a window as shown below. Now open the activity_browser_app.xml file and choose the design section.
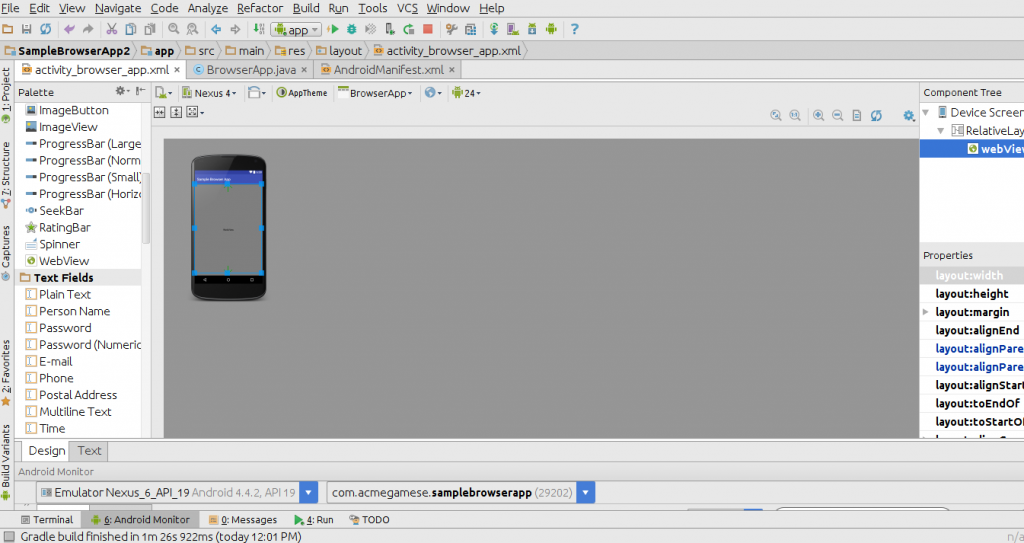
Step 5: – Drag the webview from the widgette section in the palette and drag it to every corner of the screen as shown in the above diagram.
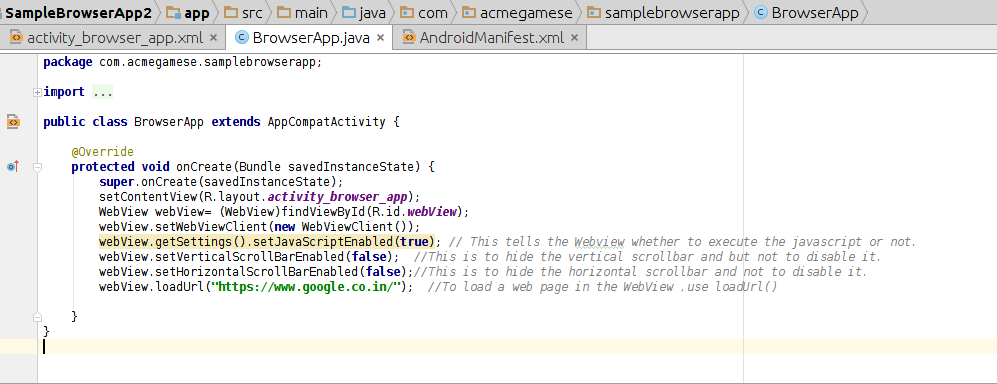
Step 6: – Now open up the BrowserApp.java document and enter the following statements below.
WebView webView= (WebView)findViewById(R.id.webView);
//findViewById returns an instance of View ,which is casted to target class
webView.setWebViewClient(new WebViewClient());
webView.getSettings().setJavaScriptEnabled(true);
//This statement is used to enable the execution of JavaScript.
webView.setVerticalScrollBarEnabled(false);
//This statement hides the Vertical scroll bar and does not remove it.
webView.setHorizontalScrollBarEnabled(false);
//This statement hides the Horizontal scroll bar and does not remove it.
webView.loadUrl(“https://www.google.co.in/”);
//This statement hides the scroll bar and does not remove it.
The BrowserApp.java should look something like this:
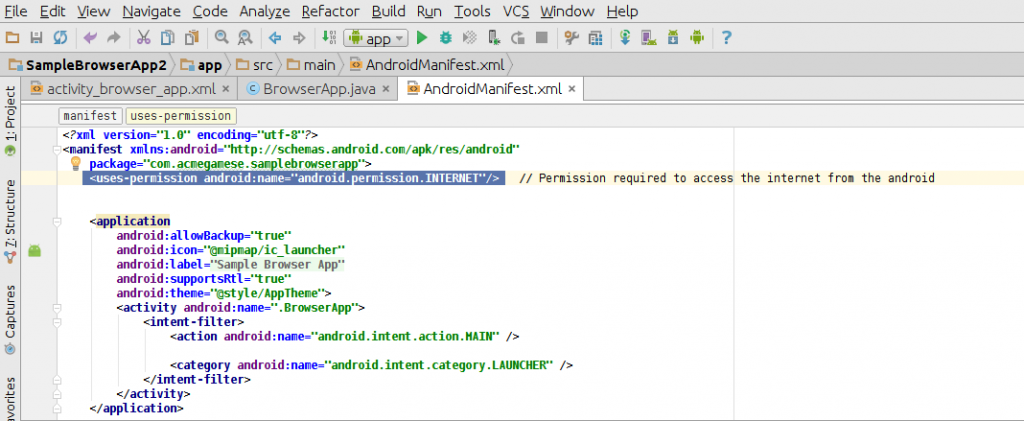
Step 7: – Open the Android Manifest xml file as shown.
Now in the android manifest xml file, enter the command/statement given below.
<uses-permission android:name=”android.permission.INTERNET”/>
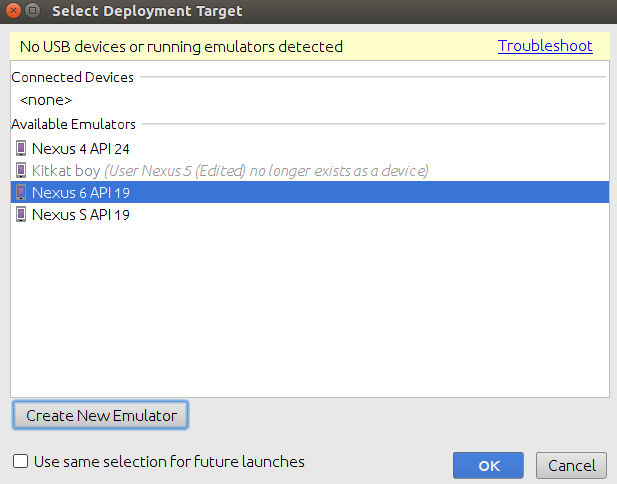
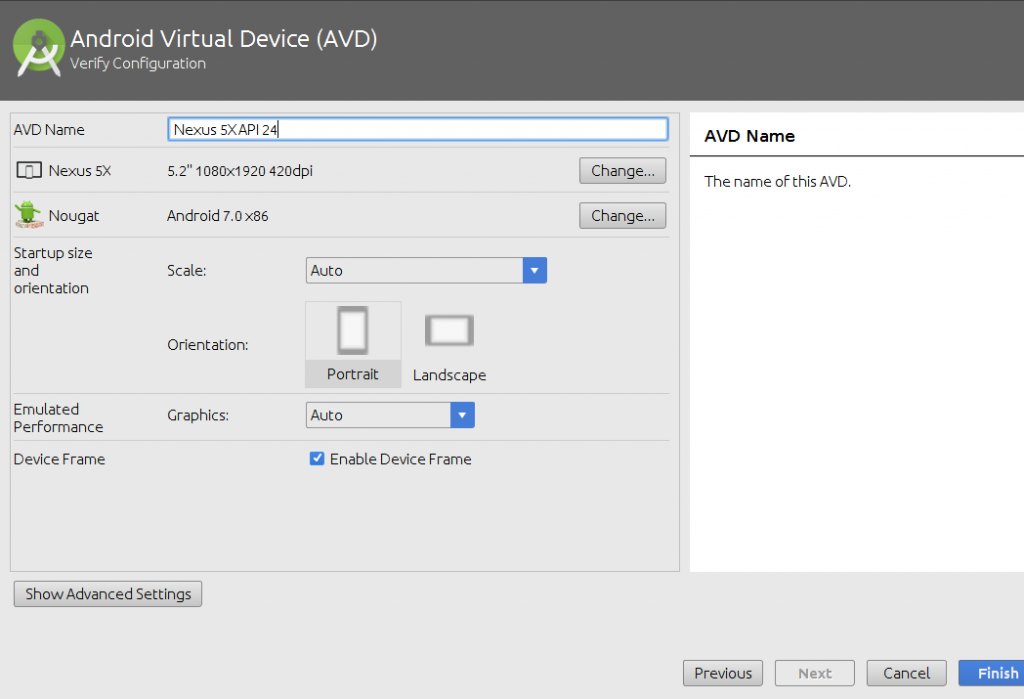
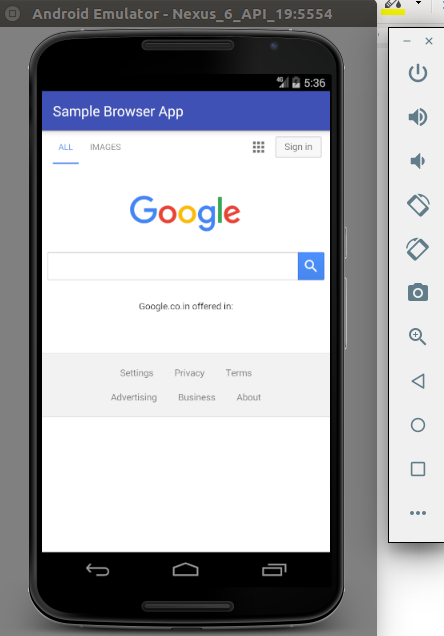
Step 8: – Save the project and click on the Run button. A new tab will be opened to select the deployment target. Now, create a new Emulator as shown below. Select the screen size depending upon and select the required Android version. This will create a new android virtual device.
After creating the AVD (Android Virtual Device), a small mobile screen will pop-up as shown.
The browser we created will automatically open and in case it doesn’t you can open it from the app dock.
We assume this article has helped you in understanding the basics in creating a web browser app.
Feel free to contact us in case if you face any issues or if you have any questions, concerns or feedback.


Hello I liked the article was what I was looking for but I would like to know how I can get the active URL at the moment and send it to the server database. Could you help me? Thank you for your attention.
You can enhance the web browsing application by adding an EditText and Buttons.
I used an Edittext and a small button to load urls from it.
Good article. very helpful blog post. Thank you very much
how to Create A “QUALITY” Web Browser Application Using Android Studio like Opera Mini, Google Chrome, …???
please help me!
Created web&app
i’m trying to make a browser app but i have no idea how to open new tab on button click can someone please help