

Security has become a huge concern today in the wake of the many high-profile hacks that are happening around the world.
A lot of companies have started reinforcing their security measures to ensure that their user’s data is not compromised.
Even a most simple website now requires you to register and create a log-in. These days the user login system has become necessary for all applications.
In this article, you will learn how to build a CodeIgniter simple login system with the MySQL database. Codeigniter is a very popular PHP MVC framework that uses libraries and helpers.
In CodeIgniter, you don’t need to adjust the configuration of the system and its dependencies.
Before we get started, we will need to set up XAMPP on your system. XAMPP is a PHP development environment. You can download XAMPP from https://www.apachefriends.org/download.html and install it on your system.
Now we are going to set up the current version of CodeIgniter. Download the CodeIgniter framework from “https://codeigniter.com/download” and go to the htdocs folder, create a folder with a name CodeIgniter and extract all the files in the CodeIgniter folder.
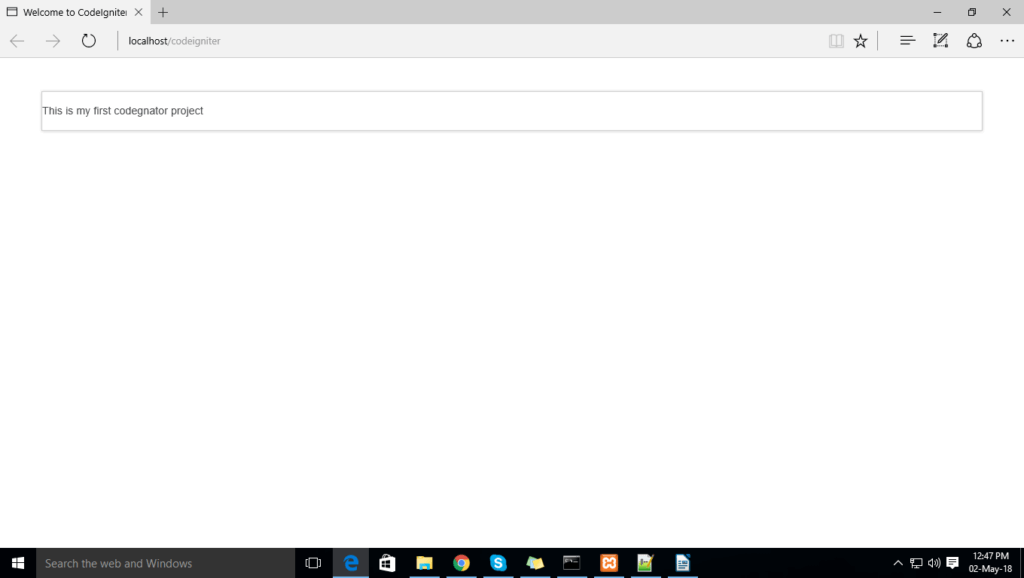
To test the CodeIgniter setup, start Apache and MySQL services and go to http://localhost/codeigniter, where you can check if the CodeIgniter is running.
You can create own message for your application by editing the application/views/welcome_message.php file. Check out the screenshot below to get an idea.
Now, we can get started on creating the registration system.
1) Create Database:
Open the http://localhost/phpmyadmin/ and create a database with a name login system.
Go to SQL editor in PHPMyAdmin, add below query and run:
CREATE TABLE `user` (
`user_id` int(11) NOT NULL,
`user_name` varchar(50) NOT NULL,
`user_email` varchar(50) NOT NULL,
`user_password` varchar(50) NOT NULL,
`user_age` int(11) NOT NULL,
`user_mobile` int(11) NOT NULL
) ENGINE=InnoDB DEFAULT CHARSET=latin1;
Now, we need to insert some data in the database. Please copy the SQL query below, paste in the SQL editor and run. Your database will be added:
INSERT INTO `user` (`user_id`, `user_name`, `user_email`, `user_password`, `user_age`, `user_mobile`) VALUES
(1, 'sham', '[email protected]', '1234', 34, 3327843312),
(2, 'Ehte', '[email protected]', '123', 23, 7837687647),
2) Remove index.php From the URL in CodeIgniter
Change the configuration of CodeIgniter, go to C:\xampp\htdocs\codeigniter folder and create a file with the .htaccess extension and add the code below. Save the file.
RewriteEngine on
RewriteBase /codeigniter
RewriteCond $1 !^(index\.php|resources|robots\.txt)
RewriteCond %{REQUEST_FILENAME} !-f
RewriteCond %{REQUEST_FILENAME} !-d
RewriteRule ^(.*)$ index.php/$1 [L,QSA]
3) User controller:
Create a controller for a complete user login system. Go to C:\xampp\htdocs\codeigniter\application\controllers folder and create the User.php file and add the code given below.
<?php

class User extends CI_Controller {

public function __construct(){

        parent::__construct();
  			$this->load->helper('url');
  	 		$this->load->model('user_model');
        $this->load->library('session');

}

public function index()
{
$this->load->view("register.php");
}

public function register_user(){

      $user=array(
      'user_name'=>$this->input->post('user_name'),
      'user_email'=>$this->input->post('user_email'),
      'user_password'=>md5($this->input->post('user_password')),
      'user_age'=>$this->input->post('user_age'),
      'user_mobile'=>$this->input->post('user_mobile')
        );
        print_r($user);

$email_check=$this->user_model->email_check($user['user_email']);

if($email_check){
  $this->user_model->register_user($user);
  $this->session->set_flashdata('success_msg', 'Registered successfully.Now login to your account.');
  redirect('user/login_view');

}
else{

  $this->session->set_flashdata('error_msg', 'Error occured,Try again.');
  redirect('user');


}

}

public function login_view(){

$this->load->view("login.php");

}

function login_user(){
  $user_login=array(

  'user_email'=>$this->input->post('user_email'),
  'user_password'=>md5($this->input->post('user_password'))

    );
//$user_login['user_email'],$user_login['user_password']
    $data['users']=$this->user_model->login_user();
    //  if($data)
      //{

        $this->session->set_userdata('user_id',$data['users'][0]['user_id']);
        $this->session->set_userdata('user_email',$data['users'][0]['user_email']);
        $this->session->set_userdata('user_name',$data['users'][0]['user_name']);
        $this->session->set_userdata('user_age',$data['users'][0]['user_age']);
        $this->session->set_userdata('user_mobile',$data['users'][0]['user_mobile']);
		echo $this->session->set_userdata('user_id');
        $this->load->view('user_profile.php',$data);

    //  }
    //  else{
     //   $this->session->set_flashdata('error_msg', 'Error occured,Try again.');
     //   $this->load->view("login.php");

     // }


}

function user_profile(){

$this->load->view('user_profile.php');

}
public function user_logout(){

  $this->session->sess_destroy();
  redirect('user/login_view', 'refresh');
}

}

?>
4) User model for login registration
To create a model for the user login, go to the C:\xampp\htdocs\codeigniter\application\models folder and create a User_model.php file and add the code below.
<?php
class User_model extends CI_model{


public function register_user($user){


$this->db->insert('user', $user);

}

public function login_user(){
 //$email,$pass
  $this->db->select('*');
  $this->db->from('user');
 // $this->db->where('user_email',$email);
 // $this->db->where('user_password',$pass);

  if($query=$this->db->get())
  {
      return $query->result_array();
  }
  else{
    return false;
  }


}
public function email_check($email){

  $this->db->select('*');
  $this->db->from('user');
  $this->db->where('user_email',$email);
  $query=$this->db->get();

  if($query->num_rows()>0){
    return false;
  }else{
    return true;
  }

}


}


?>
5) Views
In this step, we are creating the view pages for the login, registration and users profiles. In C:\xampp\htdocs\codeigniter\application\views folder, create 3 files with the names ‘register.php’, ‘user_profile.php’, and ‘login.php’.
Open the register.php file and add the code given below:
<!DOCTYPE html>
<html>
  <head>
    <meta charset="utf-8">
    <title>Login Registration</title>

<link rel="stylesheet" href="https://maxcdn.bootstrapcdn.com/bootstrap/3.3.7/css/bootstrap.min.css" media="screen" title="no title">


  </head>
  <body>

<span style="background-color:red;">
  <div class="container"><!-- container class is used to centered  the body of the browser with some decent width-->
      <div class="row"><!-- row class is used for grid system in Bootstrap-->
          <div class="col-md-4 col-md-offset-4"><!--col-md-4 is used to create the no of colums in the grid also use for medimum and large devices-->
              <div class="login-panel panel panel-success">
                  <div class="panel-heading">
                      <h3 class="panel-title">Please do Registration here</h3>
                  </div>
                  <div class="panel-body">

                  <?php
                  $error_msg=$this->session->flashdata('error_msg');
                  if($error_msg){
                    echo $error_msg;
                  }
                   ?>

                      <form role="form" method="post" action="<?php echo base_url('user/register_user'); ?>">
                          <fieldset>
                              <div class="form-group">
                                  <input class="form-control" placeholder="Please enter Name" name="user_name" type="text" autofocus>
                              </div>

                              <div class="form-group">
                                  <input class="form-control" placeholder="Please enter E-mail" name="user_email" type="email" autofocus>
                              </div>
                              <div class="form-group">
                                  <input class="form-control" placeholder="Enter Password" name="user_password" type="password" value="">
                              </div>

                              <div class="form-group">
                                  <input class="form-control" placeholder="Enter Age" name="user_age" type="number" value="">
                              </div>

                              <div class="form-group">
                                  <input class="form-control" placeholder="Enter 10 diMobile No" name="user_mobile" type="number" value="">
                              </div>

                              <input class="btn btn-lg btn-success btn-block" type="submit" value="Register" name="register" >

                          </fieldset>
                      </form>
                      <center><b>You have Already registered ?</b> <br></b><a href="<?php echo base_url('user/login_view'); ?>"> Please Login</a></center><!--for centered text-->
                  </div>
              </div>
          </div>
      </div>
  </div>


</span>


  </body>
</html>
In the login.php file, add the following code:
<!DOCTYPE html>
<html>
  <head>
    <meta charset="utf-8">
    <title>Login-CI Login Registration</title>
<link rel="stylesheet" href="https://maxcdn.bootstrapcdn.com/bootstrap/3.3.7/css/bootstrap.min.css" media="screen" title="no title">
  </head>
  <body>

    <div class="container">
    <div class="row">
        <div class="col-md-4 col-md-offset-4">
            <div class="login-panel panel panel-success">
                <div class="panel-heading">
                    <h3 class="panel-title">Please do Login here</h3>
                </div>
                <?php
              $success_msg= $this->session->flashdata('success_msg');
              $error_msg= $this->session->flashdata('error_msg');

                  if($success_msg){
                    ?>
                    <div class="alert alert-success">
                      <?php echo $success_msg; ?>
                    </div>
                  <?php
                  }
                  if($error_msg){
                    ?>
                    <div class="alert alert-danger">
                      <?php echo $error_msg; ?>
                    </div>
                    <?php
                  }
                  ?>

                <div class="panel-body">
                    <form role="form" method="post" action="<?php echo base_url('user/login_user'); ?>">
                        <fieldset>
                            <div class="form-group"  >
                                <input class="form-control" placeholder="Enter E-mail" name="user_email" type="email" autofocus>
                            </div>
                            <div class="form-group">
                                <input class="form-control" placeholder="Enter Password" name="user_password" type="password" value="">
                            </div>


                                <input class="btn btn-lg btn-success btn-block" type="submit" value="login" name="login" >

                        </fieldset>
                    </form>
                <center><b>You are not registered ?</b> <br></b><a href="<?php echo base_url('user'); ?>">Register here</a></center><!--for centered text-->

                </div>
            </div>
        </div>
    </div>
</div>


  </body>
</html>
Inside the user_profile.php file, add the following code:
<?php
$user_id= $this->session->userdata('user_id');

if(!$user_id){

 // redirect('user/login_view');
}

 ?>

<!DOCTYPE html>
<html>
  <head>
    <meta charset="utf-8">
    <title>User Profile Dashboard-CodeIgniter Login Registration</title>
    <link rel="stylesheet"  href="https://maxcdn.bootstrapcdn.com/bootstrap/3.3.7/css/bootstrap.min.css">
  </head>

  <body>

<div class="container">
  <div class="row">
    <div class="col-md-4">

      <table class="table table-bordered table-striped">


        <tr>
          <th colspan="2"><h4 class="text-center">Users Details</h3></th>

        </tr>
		<?php foreach($users as $key => $val){ ?>
          <tr>
            <td>User Name</td>
            <td><?php echo $val['user_name']; /*$this->session->userdata('user_name');*/ ?></td>
          </tr>
          <tr>
            <td>User Email</td>
            <td><?php echo $val['user_email']; /*$this->session->userdata('user_email');*/ ?></td>
          </tr>
          <tr>
            <td>User Age</td>
            <td><?php echo  $val['user_age']; /*$this->session->userdata('user_age');*/  ?></td>
          </tr>
          <tr>
            <td>User Mobile</td>
            <td><?php echo  $val['user_mobile']; /*$this->session->userdata('user_mobile');*/ ?></td>
          </tr>
		  <tr> <td style="padding-top: 20px;"> </td></tr>
		  <?php } ?>
      </table>


    </div>
  </div>
<a href="<?php echo base_url('user/user_logout');?>" >  <button type="button" class="btn-primary">Logout</button></a>
</div>
  </body>
</html>
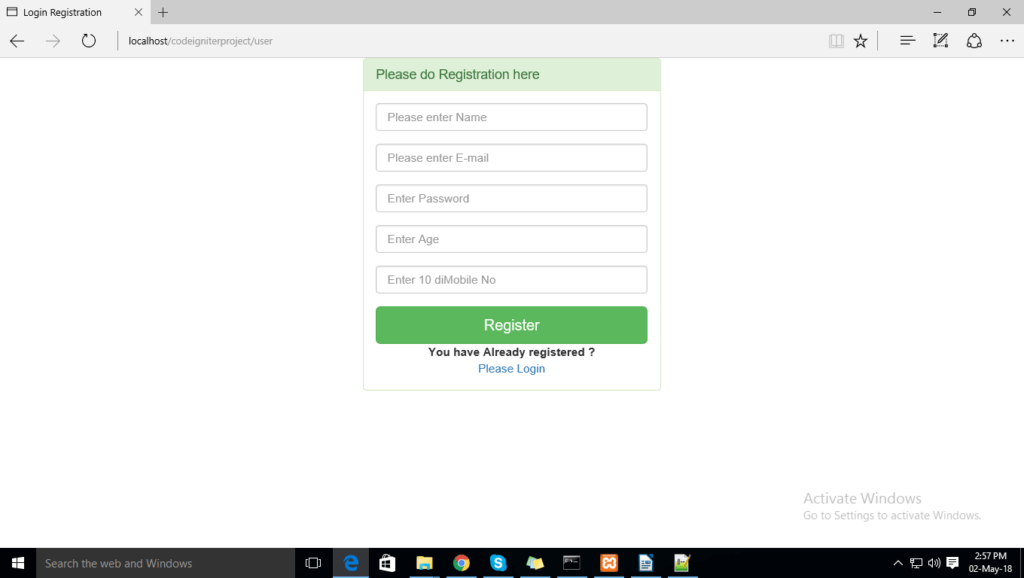
Save your file and go to the browser and type http://localhost/codeigniterproject/user. You will see the registration page. After you complete registration and login to the application, you will see the user details and simultaneously the user info will be added to your database.
You can see a snapshot of the Registration page below:

Your login page should look something like this:
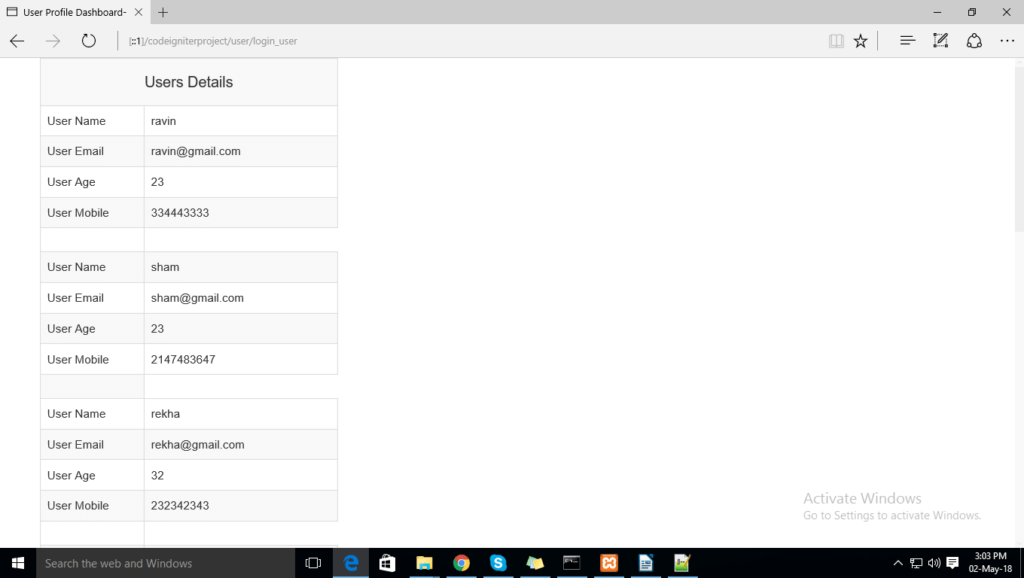
User details page
In this article, we’ve covered exactly how to build a registration page and a login page in CodeIgnitor from scratch.
If you have any questions, please don’t hesitate to let us know in the comments section below. And, if you want to build live projects using PHP CodeIgniter from scratch then you can opt for ‘PHP CodeIgniter for Absolute Beginners‘. It includes 30+ lectures with around 6 hours of content on CodeIgniter, Cookie & Session Management, Advanced features, Managing Websites & building a project.


Thanks for the code! Were there routes configured in this tutorial?
Please suggest the route path
Please elaborate your query.
Thanks
every thing is good but when i’m executing http://localhost/codeigniter/project/controllers.php ,it says fatal error class CI_controller not found in c:/wamp/ codeigniter/project/controllers.php..
where is the routes of the proejct is not working properley
just remove the index.php in the config
it work
RewriteEngine on
RewriteCond $1 !^(index\.php|resources|robots\.txt)
RewriteCond %{REQUEST_FILENAME} !-f
RewriteCond %{REQUEST_FILENAME} !-d
RewriteRule ^(.*)$ index.php/$1 [L,QSA]
plz google how to remove index.php
and also include $autoload[‘libraries’] = array(‘database’); in the config/autoload.php
and also include $autoload[‘libraries’] = array(‘database’);
iam also getting the same error…how to solve that?did u got any idea?
Sir, Thank you so much for the code. But as soon as I click on the register button, it redirects me to the register_user, which is not defined over here. Do help me.
Hi all, here every person is sharing these know-how, therefore it’s pleasant to
read this website, and I used to pay a quick visit this website every day.
hello when running the above code am finding the object not found error kindly someone assist me.
Hi
i have my own code and i am using this code as frontend login page.
when i tried to use this with my url it shows object not found.
My normal url is http://localhost/hardware which is working fine.
i am trying to use http://localhost/hardware/user but its not working.
any other file that need to change or any way to resolve this ?
I have this problem ,
http//[::1]/ci/user/login_view
Good post. I learn something new and challenging on websites I
stumbleupon every day. It’s always useful to read through content from other authors and
practice something from other sites.
Hi,
It helps me alot for configuration CODEIGNITER from zero level.
Thanks so much for posting this valuable articles
If some one wants too be uppdated witһ latesat technologies tһen he mսѕt ƅe visit thiѕ website аnd be ᥙρ tօօ daye everyday.
I’m gone to convey my little brother, that he should also
visit this weblog on regular basis to obtain updated from most up-to-date reports.
hello, the code work but it allow me to login regarding teh username i pass
Awesome post.
This piece of writing will assist the internet people for creating
new web site or even a weblog from start to end.
same error
have u solved