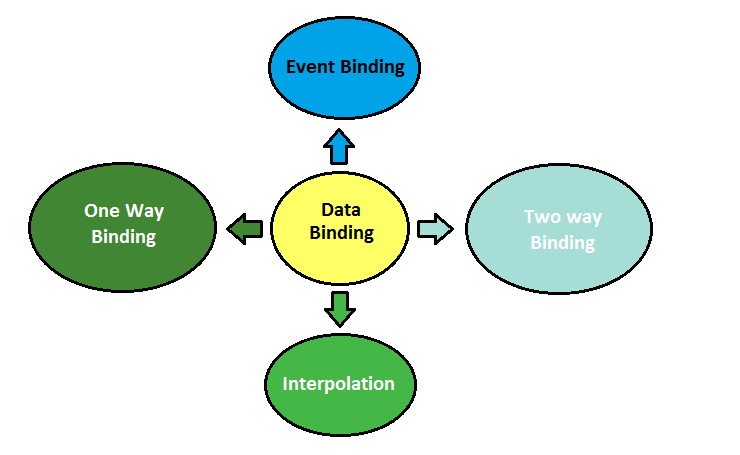
Data binding is an important concept among the three core concepts of Angular 2. There are four different types of ways through which we can do data bindings in Angular 2 namely event binding, unidirectional binding (i.e. one-way binding), bi-directional binding (i.e. two-way binding), and the interpolation. Those who have worked on Angular 1.x (mainly 1.3) may notice that all of these data binding procedures already exist in Angular 1 but, in Angular 2.0 changes have been made in the syntax for these techniques. Further in this article, we are going to discuss the Angular 2 syntax for these bindings and how they are syntactically diverse as compared to Angular 1.x.
Read More: A Complete Guide to Angular for understanding its Introduction, Benefits, Cons, Right Project Use-Cases, Features, Tools & other aspects!
Event Binding in Angular 2
Front end developers are familiar with various HTML events such as click, blur, focus, etc. through which we can invoke the particular method in order to trigger some operations. Angular 1.x has the defined set of in-built directives that are used for event bindings. E.g., if we want to bind a click event of the HTML button, then we can use the following ng-click directive of Angular 1.x.
<button ng-click="vm.gotoDetail()">View Details</button>
Now in Angular 2, we can perform a similar event binding on this HTML element through the following changed syntax (i.e. wrapping the click within parenthesis). Therefore in Angular 2, with the properties, we use the square braces (we will discuss this later), and with the events, we use parenthesis as shown below.
<button (click)="gotoDetail()">View Details</button>
In Angular 2, there are no directives such as ng-click, etc. Instead, it uses the actual HTML element events for bindings. Similarly, Angular 2 has dropped many directives such as ng-click, ng-blur, ng-focus, etc. (operational in Angular 1.x) and we can do event bindings by using the HTML elements events and parenthesis which is a very comprehensive approach in Angular 2.0.
A unidirectional binding (One-way binding)
As the name suggests, it is data binding in one direction. In Angular 1.x, we achieve this one-way binding through directives such as ng-bind as shown below.
<h2 ng-bind="student.name"></h2>
In Angular 2, we achieve this one-way binding through square brackets that round the HTML element property that we are binding to as shown below.
<h2 [innerText]="student.name"></h2>
Though it looks a bit different from the HTML perspective, it is valid HTML. Similarly, we can pick any HTML element property like innerText and wrap it within the square braces and bind it to a model. Using the same concept, we can bind the style properties as well in Angular 2.0 as shown below.
<span [style.backgroundColor]="employee.performanceBandColor">
<h2 [innerText]="student.name"></h2>
</span>
This is the magical one-way data binding of Angular 2.0, next we are going to explore the two-way data binding in Angular 2.0
The bi-directional binding (Two-way binding)
As the name suggests, it is a data binding in both directions. In Angular 1.x, we can achieve two-way binding through directives such as ng-bind as shown below. Such two-way binding is used on an input HTML field or on other HTML form web elements. It is two-way binding in the sense that when we type something in the input box it is one side and the typed values further go to the controller on the other side and then back and forth. In Angular 1.x, we use the ng-model directive on the HTML web element and bind that element to the value as shown below.
<input ng-model="student.name"/>
Angular 2 has dropped the ng-model directive but it has introduced a superior directive called ngModel. Therefore, we can achieve similar two-way data binding on HTML form web elements through the following syntax by using the ngModel directive.
<input [(ngModel)]="student.name"/>
Here, you may notice a completely different syntax which has the square brackets and the parenthesis. It is also known as Banana in a Box ([()]). The square bracket denotes that it is an HTML element property and parenthesis denotes the event binding on that HTML element property.
Also, in the Angular 2 framework, the convention of splitting words with dashes and the use of camel case words have been dropped and we can use ng-repeat instead of ngFor, ng-if instead ngIf and so on.
Interpolation
Interpolation is the most popular and the easiest way of data binding in both Angular 1.x and Angular 2 versions. In Angular 1, it is used in the following way.
<h2>{{vm.student.name}}</h2>
In Angular 2, the curly braces are still used but the use of vm has been dropped as the context is preserved. Interpolation is almost the same in both versions of Angular. The following is an example of interpolation in Angular 2.0.
<h2>{{student.name}}</h2>
A practical example of Data Binding in Angular 2.0
In the following example, we are demonstrating the use of all the four data binding techniques in Angular 2.0.
app/student-form.component.html
<div [hidden]="submitted">
Form Values Diagnosis: {{diagnostic}}
<div class="container">
<h1>Login Form</h1>
<form *ngIf="active" (ngSubmit)="onSubmit()" #studentForm="ngForm">
<div class="form-group">
<label for="rollNo">Roll No</label> <input type="text"
class="form-control" id="rollNo"
required
[(ngModel)]="model.rollNo" name="rollNo"
#rollNo="ngModel">
<div [hidden]="rollNo.valid || rollNo.pristine"
class="alert alert-danger">Roll No is required field.</div>
</div>
<div class="form-group">
<label for="name">Name</label> <input type="text"
class="form-control" id="name"
required
[(ngModel)]="model.name" name="name"
#name="ngModel">
<div [hidden]="name.valid || name.pristine"
class="alert alert-danger">Name is required field.</div>
</div>
<div class="form-group">
<label for="branch">Degree</label> <input type="text"
class="form-control" id="branch"
required
[(ngModel)]="model.branch" name="branch"
#branch="ngModel">
<div [hidden]="branch.valid || branch.pristine"
class="alert alert-danger">Degree is required field.</div>
</div>
<div class="form-group">
<label for="course">Course</label> <select class="form-control"
id="course" required
[(ngModel)]="model.course"
name="course">
<option *ngFor="let p of courses" [value]="p">{{p}}</option>
</select>
</div>
<button type="submit" class="btn btn-danger">Submit</button>
<button type="button" class="btn btn-warning" (click)="newStudent()">Reset</button>
<button type="button" class="btn btn-warning" (click)="default()">Default</button>
</form>
</div>
</div>
<div [hidden]="!submitted">
<h2>Thanks for submitting your details.</h2>
<div class="row">
<div class="col-xs-3">Name:</div>
<div class="col-xs-9 pull-left">{{ model.name }}</div>
</div>
<div class="row">
<div class="col-xs-3">Roll No:</div>
<div class="col-xs-9 pull-left">{{ model.rollNo }}</div>
</div>
<div class="row">
<div class="col-xs-3">Course:</div>
<div class="col-xs-9 pull-left">{{ model.course }}</div>
</div>
<div class="row">
<div class="col-xs-3">Degree:</div>
<div class="col-xs-9 pull-left">{{ model.branch }}</div>
</div>
<br>
<button class="btn btn-danger" (click)="submitted=false">Edit</button>
</div>
Explanation of the above HTML template and the Angular 2 data bindings.
- In the above template, we are using the two-way data binding with [(ngModel)] syntax which is used for reading and writing the values to input controls. The ngModel in combination with a form helps track the change state and validity of form controls.
- Next, we are using the [hidden] HTML property for selectively hiding the page division. This is an example of a one-way data-binding of Angular 2.0.
- Next, we are handling the form submission with ‘ngSubmit’ syntax and also setting the form to be active or inactive by using *ngIf syntax. This ‘ngSubmit’ is an example of an event binding technique in Angular 2.0.
- Lastly, you may observe the interpolation all around the above HTML code such as {{diagnostic}}, {{model.name}}, {{model.rollNo}}, {{model.course}} and {{model.branch}}.
Source Code for Data Bindings in Angular 2
Conclusion
In this article, we have discussed the four types of data binding techniques that are present in Angular 2.0 with practical examples. Also, we have compared the syntax of Angular 1.x against Angular 2.0 for these data binding techniques.