

In the last session we learned some of the PHP fundamentals. So we now very well know that PHP is a server side language. Hence it requires a server to run its programs. It is not like JavaScript where we directly write the JavaScript code in the html page and open the html page in the browser. The files of php have to be placed on the server for execution. For this you can use any of your host server/private server or any of the server application platform like xampp or wamp that gives you an apache server and MYSQL database. So we are going to study the requirements for PHP in this PHP Environment Setup tutorial.
We will use xampp server platform for our PHP programs. So follow the steps to download and install the xampp server.
- Open your browser and go to apachefriends.org. The following page will open:
- Now click on Download tab above in the horizontal menu bar. The following page will appear:
- Download the setup by clicking on the download button and save it.
- Install the setup following the instructions given same like any other setup.
- After the setup is installed completely it will automatically open the xampp control panel as shown below:
- This xampp server contains Apache, MYSQL, FileZilla server, etc. We need only Apache and MYSQL for PHP. It will work only when we start the Apache and MYSQL.
- We can allow the Apache and MYSQL to start along with windows by clicking on the cross sign besides it as shown below:
- When you click on the cross shown by the arrow, a dialog box appears asking you to “Click Yes to install the Apache service”.
- So click on the “Yes” button and the red cross sign will change to the green color tick mark sign as shown below:
- Follow the same process for MYSQL to start it with windows.
- You can also start it by clicking on the “Start” button in front of Apache and MYSQL. When you click on it, the text of the button will change from “Start” to “Stop” and vice-versa. Just see in the figure below:
- You can see the text changed from “Start” to “Stop” as shown by arrow. This means our apache and MYSQL has been started.
- Now close the xampp control panel.
- Now we know that xampp server has been installed on our computer, but the PHP applications that we wish to run cannot be run from anywhere on our computer. Let us first see the xampp structure:
- When xampp is installed, a folder named xampp gets created in the C drive of our computer.
- This xampp folder consists of many folders and files like htdocs, apache, mysql, php etc. as shown below:
- If we wish to run our PHP or any other application using server, we need to place the folder or file of our application in the htdocs folder shown by an arrow in the above figure.
- Now let us see if xampp have been installed properly.
- For this, open the browser and type localhost in the address bar.
- A splash.php page will be opened, which is inside the xampp folder.
- It is shown below:
- This shows that now our xampp is successfully installed without any error.
- Next step is giving password to MYSQL.
- We have MYSQL also, but it is not secure. To make it secure we need to give it a password.
- For this select the English language when you run the localhost i.e. click on the English link shown in the above figure.
- Following page will appear:
- In the page appeared click on Security which is shown using the black color arrow in the above figure.
- When you click on “Security” you will get the following page:
- In this page above you will notice that it is written The MYSQL admin user root has NO password.
- Now click on the link http://localhost/security/xamppsecurity.php which is placed at the lower side of the page shown above in fig 10.
- Again a page will open where you have to enter your password.
- Enter your password in the above fields for new password and repeat password as I did in the above figure and then click on Password changing button.
- After you click on the Password changing button you will get a message saying, The root password was successfully changed. Please restart MYSQL for loading these changes!
- For this just open the xampp control panel. Click on the Stop button in front of the MYSQL to stop the MYSQL service and again click on the Start button in front of the MYSQL to again start the MYSQL service.
- Thus we have successfully changed the MYSQL password and restarted it.
- Now let’s test if our applications work on xampp.
- First we will test html document.
- Create a new folder in the htdocs folder which is inside the xampp folder on C drive and name it as Test.
- Open a notepad++ document and save it as index.html in the Test folder in the htdocs folder.
- Write the following in the index.html document and save it:
- Now open the browser and write localhost/Test in the address bar. Test is the folder containing index.html document in the htdocs folder.
- You will get the following output:
- HTML file will show the correct output even if you place the file anywhere on your computer, because it doesn’t need server to run.
- Testing a .php file.
- Now change the extension of file index.html from .html to .php. You can do this by renaming index.html file.
- After renaming the file write the following PHP code in it and save the file:
- Now reload the browser and see the output as shown below:
- Now do one thing, copy the index.php file from the Test folder and paste it on the desktop.
- Open this index.php file with Google Chrome. You will see the following output:
- The PHP code is printed as it is on the web page. This shows us that PHP programs needs a server to run, without a server we cannot run PHP pages.
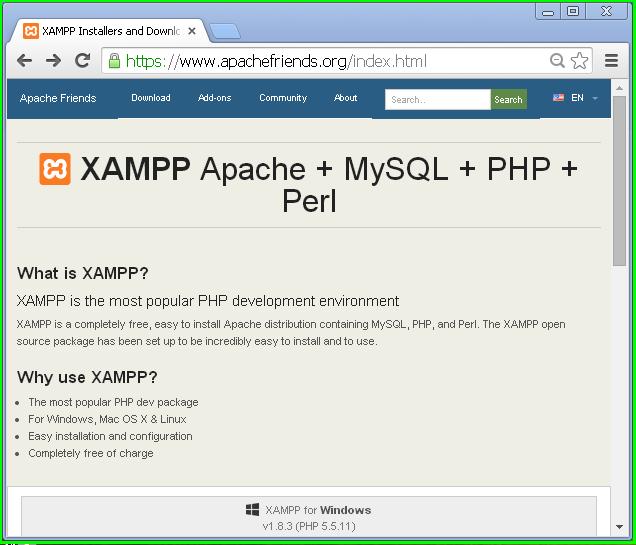
fig 1
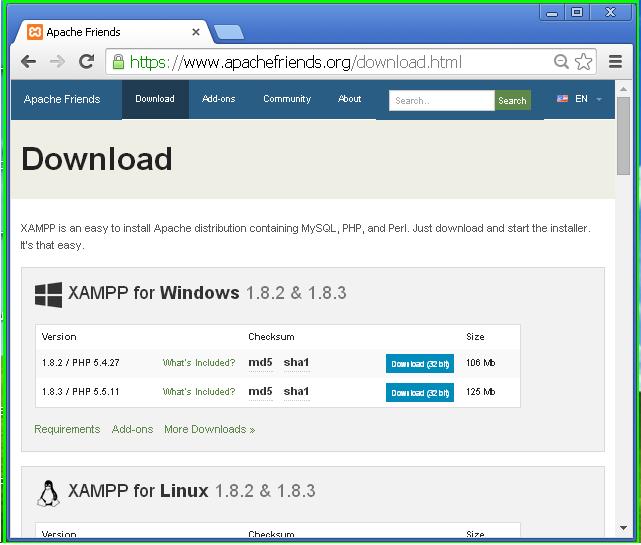
fig 2
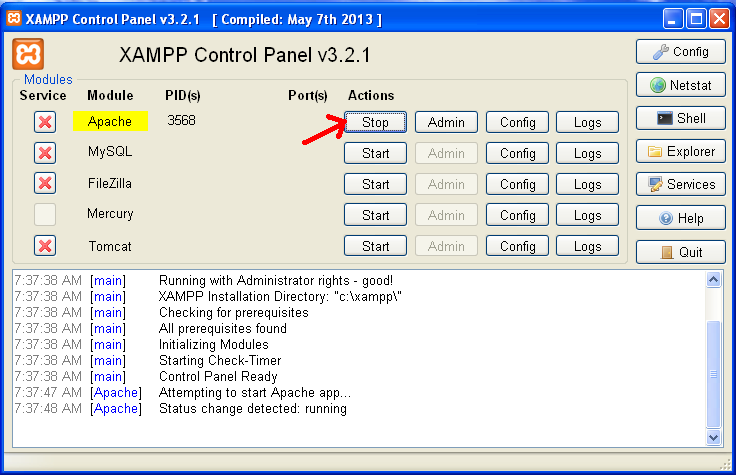
fig 3
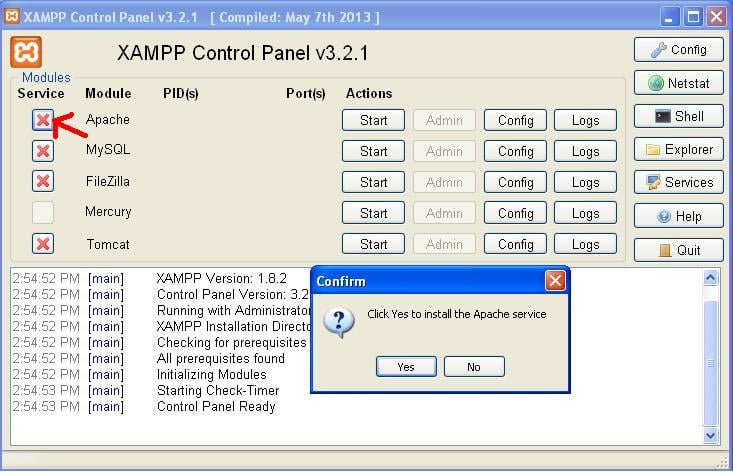
fig 4
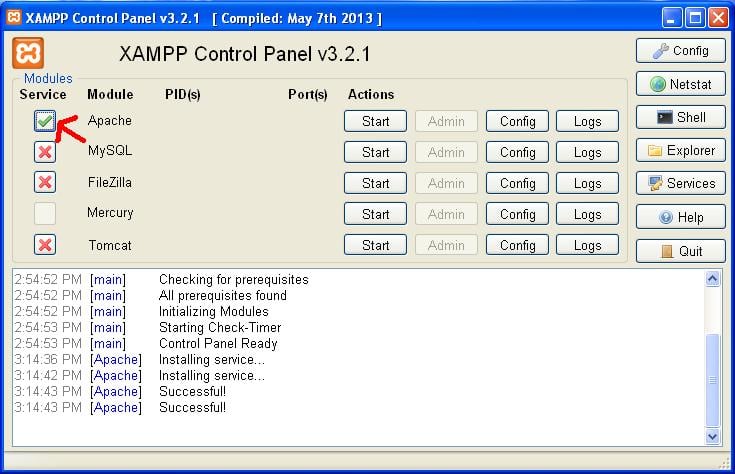
fig 5
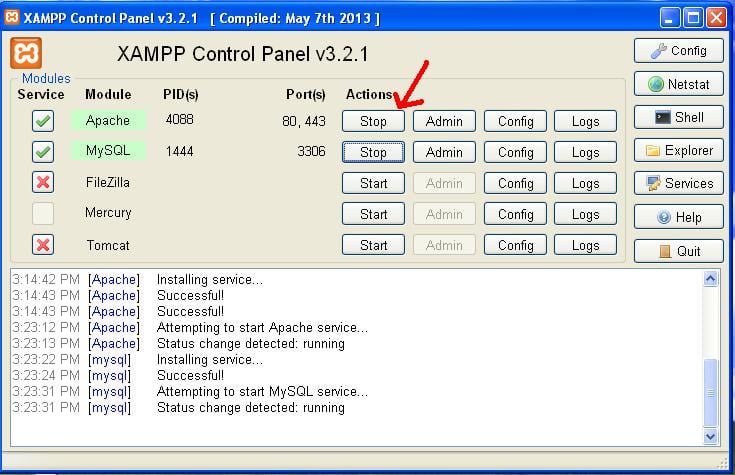
fig 6
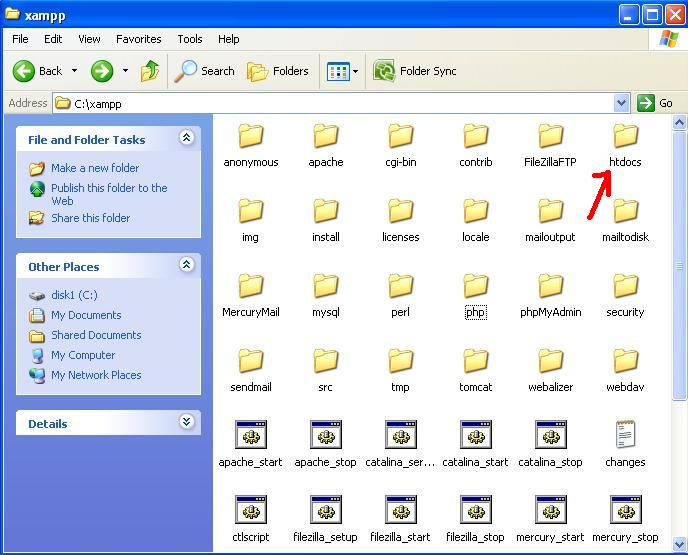
fig 7
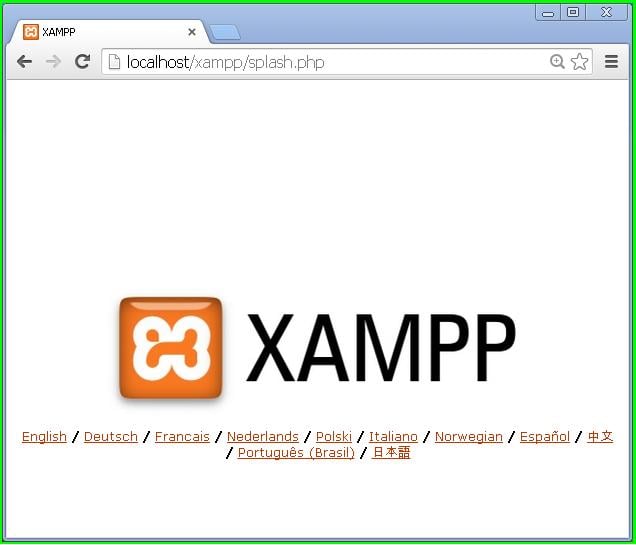
fig 8
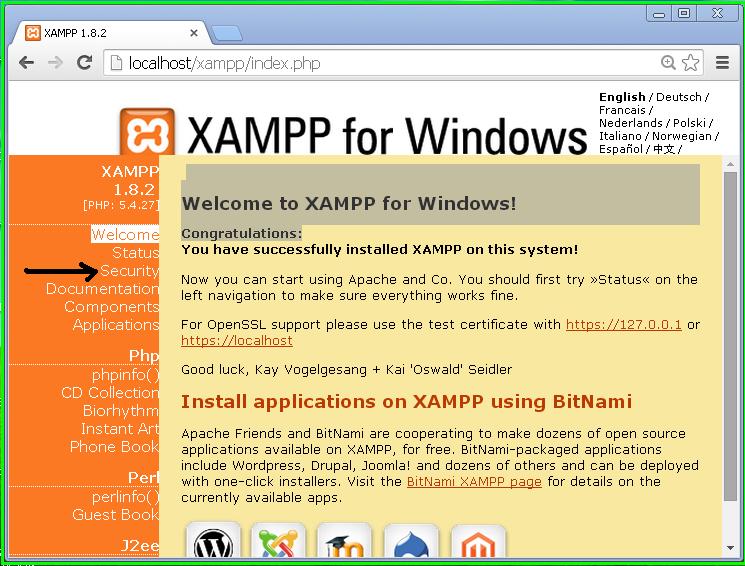
fig 9

fig 10

fig 11
TESTING

fig 12
<?php echo 'TEST';?>

fig 13
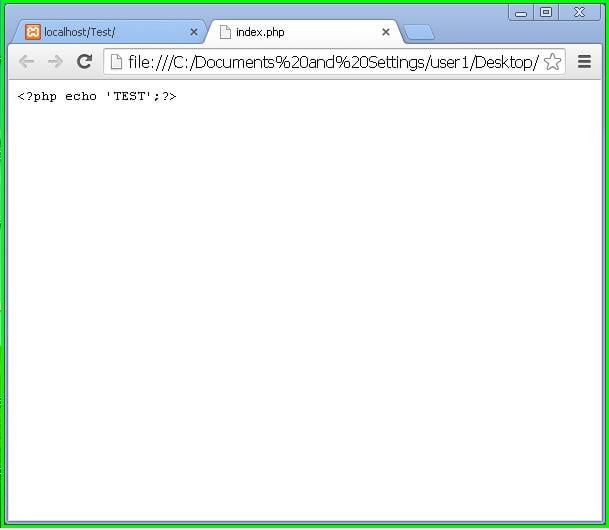
fig 14
Thus we studied the requirements and the environment needed for PHP in this PHP Environment Setup tutorial.

