
After learning the GUI method for partitioning disks into basic partitions (Palimpsest Disk Utility), it is time to discuss the other method: using the fdisk utility.
The fdisk Utility
From the fdisk command man page:
fdisk is a menu-driven program for creation and manipulation of partition tables.
Syntax
fdisk –l [DEVICE]
This will list the partition tables.
fdisk DEVICE
This will start the utility menu for the specified device.
For example, to list the existing devices on your Linux box:

From the above output, you could easily recognize the following facts:
- There are two hard disks on the system: /dev/sda and /dev/sdb.
- The first disk /dev/sda is about 10 GB size, and contains two partitions, one of them is the boot partition.
- The second disk /dev/sdb is about 4.3 GB size, and has not been partitioned yet.
Creating Partitions
To start dividing /dev/sdb into basic partitions, go through the following steps:
- Open your terminal, and switch to user root.
- Run the following command:
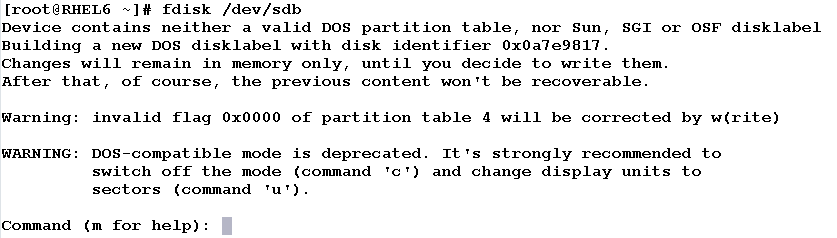
fdisk /dev/sdb
You should get the following screen:
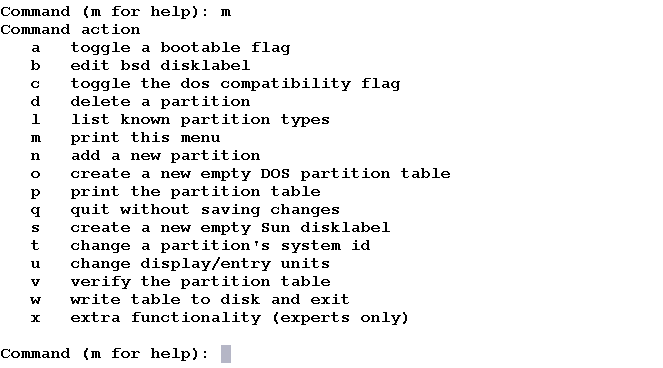
- Type m o get help.
- Type n to add a new partition.

- Type p to select primary partition, then enter 1 as the partition number

- Now, you are asked to specify the boundaries of your new partition. You are asked first to specify the first cylinder. You could type a number between 1 (the first cylinder in the disk) and 522 (the last cylinder in your 4GB hard disk) or you could leave the default value 1.

- You are asked to specify the other boundary of your partition, which is the last cylinder. Options are: last cylinder, number of cylinders, or size in kilobytes, megabytes, or gigabytes. In our example, I will specify a size of 1 gigabyte.

- To print the current partition table, enter p:
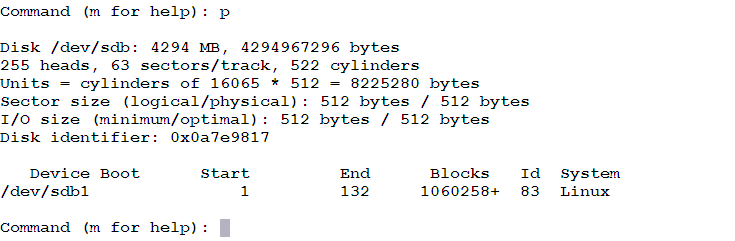
- To save the changes, enter w.

Now, we have a raw partition on /dev/sdb1 with 1 gigabyte size. What we need now is to configure that raw partition into something useable.
Creating File System
The mkfs command and its derivatives are used to build a file system on a device, usually a hard disk partition.
Syntax
mkfs –t FSTYPE PARTITION_DEVICE_NAME
mkfs.ext2 PARTITION_DEVICE_NAME
mkfs.ext3 PARTITION_DEVICE_NAME
mkfs.ext4 PARTITION_DEVICE_NAME
mkfs.msdos PARTITION_DEVICE_NAME
mkfs.vfat PARTITION_DEVICE_NAME
To format the /dev/sdb1 partition using the ext3 type:
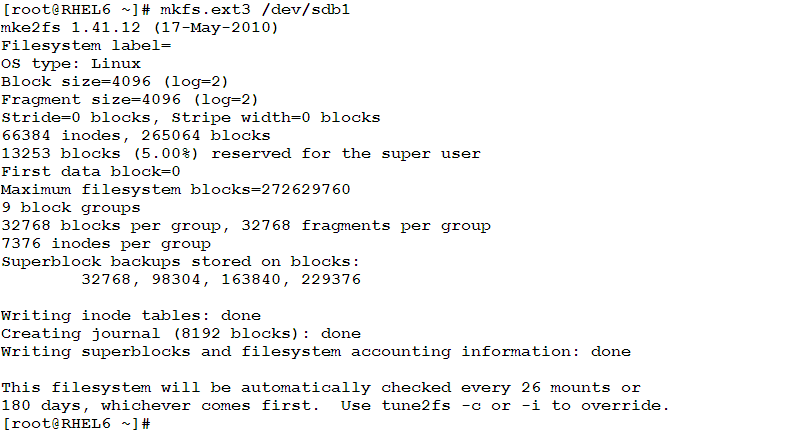
Now, the partition /dev/sdb1 contains a valid ext3 file system. To use it, we need to mount it first.

To verify it is mounted:
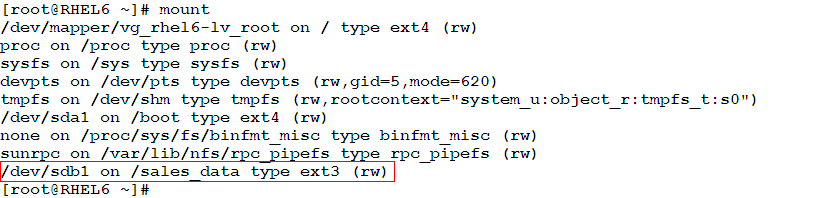
The file system is mounted and ready to use. However, if you reboot your box, you will notice that the /sales_data file system is not mounted. Although the /sales_data directory exists, the /dev/sdb1 file system is not mounted on it. To configure your system to mount /sales_data automatically on startup, we need to add a line for it in the /etc/fstab file:
/dev/sdb1 /sales_data ext3 defaults 0 0
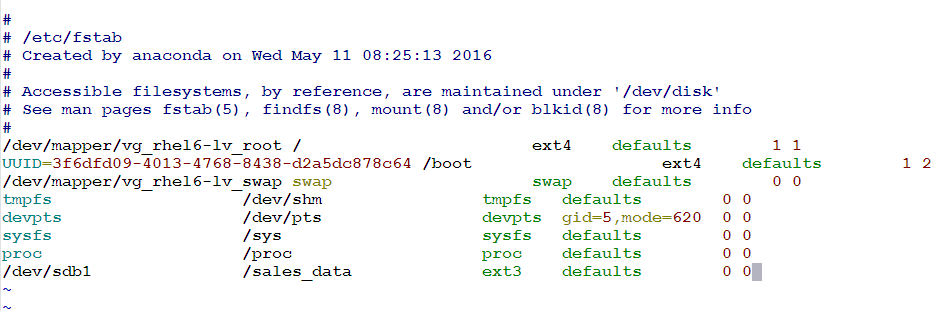
Save and exit the file.
You have made great job today. Congratulations!!
Summary
In this article, we have learned the second method used to partition disks: the fdisk command line tool.
- The fdisk command is a menu-driven tool that could be used to:
- List the available disks, and the partition table in each.
- Create, modify, and remove partitions on a disk.
- A raw partition needs to be formatted using one of the available file system types: ext2, ext3, ext4, msdos, and vfat.
- The mkfs command is used to build a file system on a disk device.
- For a file system to be used, it needs to be mounted on a directory using the mount
- To make sure a file system will be mounted automatically after system reboot, we need to add a line for it in /etc/fstab.
That is it for basic partitions. In the next article, we will start talking about Logical Volume Manager LVM: an important constitutive article to wait for. So, stay here. We won’t be late.

