

In this chapter, we are going to learn about the data backup and data restore features of MongoDB. In today’s world where almost all the businesses have become online, it is very crucial to protect the business data against any loss or damage in case of disaster or unwelcomed outages. Therefore, irrespective of the type of the database that an application operates on, it is mandatory to take and retain the data backup regularly in order to make data available during data server crash or data corruption due to virus attack. Data backup is one of the prerequisite that every small to big organization prefer to have during their application operation in order to counter the threat of cyberattacks and prevent loss of business data due to corruption.
Data Backup feature in MongoDB
In MongoDB, it is quite simple to take a data backup and it gets triggered just by firing a mongodump command on the command line. When this command is executed, the system will dump the entire data present on the server into the dump directory of MongoDB. It also provides the number of options through which we can limit the amount of data or create data backup of our remote server.
The following is the basic syntax to take the date backup in MongoDB.
> mongodump
Let’s understand it with the help of the following example.
Step 1: – Start a MongoDB session specifying the dbpath as shown below. It will wait for the MongoDB client to make connections on the port 27017.
C:\Program Files\MongoDB\Server\3.2\bin>mongod.exe --dbpath="C:\mongodb_data"
2017-01-28T13:01:31.451-0500 I CONTROL  [initandlisten] MongoDB starting : pid=6788 port=27017 dbpath=C:\mongodb_data 64-bit host=APARAJITA-PC
2017-01-28T13:01:31.455-0500 I CONTROL  [initandlisten] targetMinOS: Windows 7/Windows Server 2008 R2
2017-01-28T13:01:31.456-0500 I CONTROL  [initandlisten] db version v3.2.10
2017-01-28T13:01:31.456-0500 I CONTROL  [initandlisten] git version: 79d9b3ab5ce20f51c272b4411202710a082d0317
2017-01-28T13:01:31.456-0500 I CONTROL  [initandlisten] OpenSSL version: OpenSSL 1.0.1t-fips  3 May 2016
2017-01-28T13:01:31.456-0500 I CONTROL  [initandlisten] allocator: tcmalloc
2017-01-28T13:01:31.456-0500 I CONTROL  [initandlisten] modules: none
2017-01-28T13:01:31.457-0500 I CONTROL  [initandlisten] build environment:
2017-01-28T13:01:31.457-0500 I CONTROL  [initandlisten]     distmod: 2008plus-ssl
2017-01-28T13:01:31.457-0500 I CONTROL  [initandlisten]     distarch: x86_64
2017-01-28T13:01:31.457-0500 I CONTROL  [initandlisten]     target_arch: x86_64
2017-01-28T13:01:31.457-0500 I CONTROL  [initandlisten] options: { storage: { dbPath: "C:\mongodb_data" } }
2017-01-28T13:01:31.584-0500 I STORAGE  [initandlisten] wiredtiger_open config: create,cache_size=1G,session_max=20000,eviction=(threads_max=4),config_base=false,statistics=(fast),log=(enabled=true,archive=true,path=journal,compressor=snappy),file_manager=(close_idle_time=100000),checkpoint=(wait=60,log_size=2GB),statistics_log=(wait=0),
2017-01-28T13:01:33.617-0500 I FTDC     [initandlisten] Initializing full-time diagnostic data capture with directory 'C:/mongodb_data/diagnostic.data'
2017-01-28T13:01:33.618-0500 I NETWORK  [HostnameCanonicalizationWorker] Starting hostname canonicalization worker
2017-01-28T13:01:34.555-0500 I NETWORK  [initandlisten] waiting for connections on port 27017
Step 2: – Open another command line window and execute ‘mongo.exe’ command that will connect the client at port 27017 as shown below.
C:\Program Files\MongoDB\Server\3.2\bin>mongo.exe
MongoDB shell version: 3.2.10
connecting to: test
> use application_db
switched to db application_db
> db.application_db.save ( { name: 'Aparajita', role: 'Computer Engineer', work: 'banking'})
WriteResult({ "nInserted" : 1 })
> db.application_db.save ( { name: 'Mohit', role: 'Computer Engineer', work: 'homemaker'})
WriteResult({ "nInserted" : 1 })
> db.application_db.find()
{ "_id" : ObjectId("588cdf437ef81d955e38f523"), "name" : "Aparajita", "role" : "Computer Engineer", "work" : "banking" }
{ "_id" : ObjectId("588cdf6f7ef81d955e38f524"), "name" : "Mohit", "role" : "Computer Engineer", "work" : "homemaker" }
>
Step 3: – Create a database ‘application_db’ and store few documents or record inside it as shown above.
Step 4: – Check how many databases exist on the server by using ‘show dbs’ command as shown below. There are two databases i.e. local and ‘application_db’ which we have just created.
> show dbs
application_db  0.000GB
local           0.000GB
>
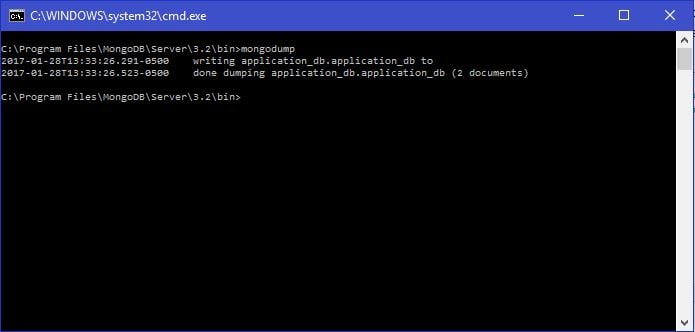
Step 5: – Let’s trigger the data backup after executing ‘mongodump’ command as shown below. Here, we have to open a new command prompt window and navigate to the bin directory (here C:\Program Files\MongoDB\Server\3.2\bin) of the MongoDB. Execute ‘mongodump’ command to complete the backup of the ‘application_db’.
C:\Program Files\MongoDB\Server\3.2\bin>mongodump
2017-01-28T13:33:26.291-0500    writing application_db.application_db to
2017-01-28T13:33:26.523-0500    done dumping application_db.application_db (2 documents)

C:\Program Files\MongoDB\Server\3.2\bin>
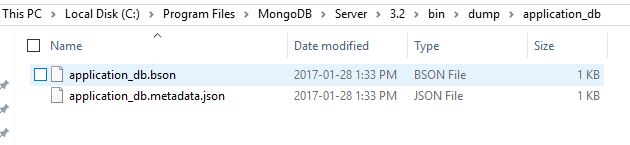
Here, we can observe the two documents or records which we created in step 3, has been backed up successfully, under the dump directory as shown below.
The following is a list of available options which could be used along the mongodump command on the command line window.
|
S No. |
Syntax |
Description |
Example |
|
1. |
mongodump –host HOST_NAME –port PORT_NUMBER |
This command will take the backup of all the databases which are specified in the current mongodb instance. |
mongodump –host APARAJITA-PC –port 27017 |
|
2. |
mongodump –dbpath DB_PATH –out BACKUP_DIRECTORY |
This command will take the backup of the database present at the specified path. |
mongodump –dbpath “/mongodb_data/db/” –out “/mongodb_data/backup/” |
|
3. |
mongodump –collection COLLECTION –db DB_NAME |
This command will take the backup of the specified collection of a specified database. |
mongodump –collection mycollection –db test |
Data Restore feature in MongoDB
In MongoDB, it is quite simple to restore data and it gets triggered just by firing a mongorestore command on the command line. When this command is executed, the system will restore all of the data from the backup directory. The following is the basic syntax to take the date backup in MongoDB.
> mongorestore
Let’s understand it with the help of the following example.
Step 1: – Firstly, we will drop the database by executing ‘db.dropDatabase ()’ command as shown below. This command will drop the database ‘application_db’ which we had created before.
> db.dropDatabase()
{ "dropped" : "application_db", "ok" : 1 }
>
Step 2: – Next, we will restore the ‘application_db’ database from the backup or dump by executing ‘mongorestore’ command as shown below. Here, we have to open a new command prompt window and navigate to the bin directory (here C:\Program Files\MongoDB\Server\3.2\bin) of the MongoDB. Now, execute ‘mongorestore’ command to complete the data restoration of the ‘application_db’.
C:\Program Files\MongoDB\Server\3.2\bin>mongorestore
2017-01-28T13:57:56.775-0500    using default 'dump' directory
2017-01-28T13:57:56.799-0500    building a list of dbs and collections to restore from dump dir
2017-01-28T13:57:56.803-0500    reading metadata for application_db.application_db from dump\application_db\application_db.metadata.json
2017-01-28T13:57:57.911-0500    restoring application_db.application_db from dump\application_db\application_db.bson
2017-01-28T13:57:57.933-0500    restoring indexes for collection application_db.application_db from metadata
2017-01-28T13:57:57.935-0500    finished restoring application_db.application_db (2 documents)
2017-01-28T13:57:57.935-0500    done

C:\Program Files\MongoDB\Server\3.2\bin>
Step 3: – Check how many databases exist on the server by using ‘show dbs’ command as shown below. There are two databases i.e. local and ‘application_db’ (which we have just restored from backup).
> show dbs
application_db  0.000GB
local           0.000GB
>
Conclusion: –
In this chapter, we have learnt about the data backup and data restore features of the MongoDB with the help of suitable examples.

