
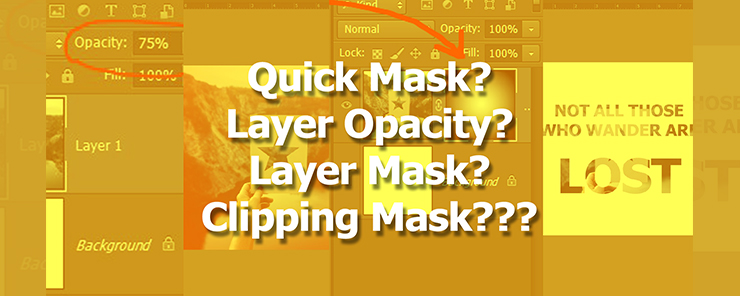
End The Confusion: Here’s What You Need To Know About Photoshop’s Quick Mask, Layer Opacity, Layer Mask and Clipping Mask
Adobe Photoshop is a powerful editing tool, but it can have a steep learning curve to beginners.
Early in your design process, you may have been able to learn the basics of Photoshop commands but there are functions that could still confuse you.
So today we’re gonna break down one of the most easily-confused topics around Photoshop: What is the difference between Quick Mask, Layer Opacity, Layer Mask and Clipping Mask?
But first, what is a Photoshop “mask”?
As you go through the ropes of being a pro designer, you’ll soon learn that Photoshop layers are the biggest important thing in its interface.
Photoshop’s powers rely on the ability to mount several layers to create one image. This is essential to artists who need flexibility in modifying a single element without ruining the whole picture.
So to understand masks, we go to the basic meaning of the word:
To “mask” is to cover or conceal something on top of another.
In Photoshop, there are two kinds of masks: –
* Layer Masks
* Clipping Masks
But we will focus on the types of masking & transparency instead: –
1. Quick Mask
2. Layer Opacity
3. Layer Mask
4. Clipping Mask
A lot of people interchange these four concepts, but they are entirely different in nature. We will tackle each of this below.
Note: – Transparency in Photoshop works as follows – white is for retaining the visible area and anything that is black becomes transparent.
Photoshop Quick Mask
Considered as the easiest method to mask, in one stroke of a shortcut you could enter the Quick Mask mode.
To do this, just press Q on your keyboard.
It might seem like it didn’t do anything but all you gotta do is pay attention to the file name tab to confirm if you’re in Quick Mask mode. (See the tab highlighted in yellow)
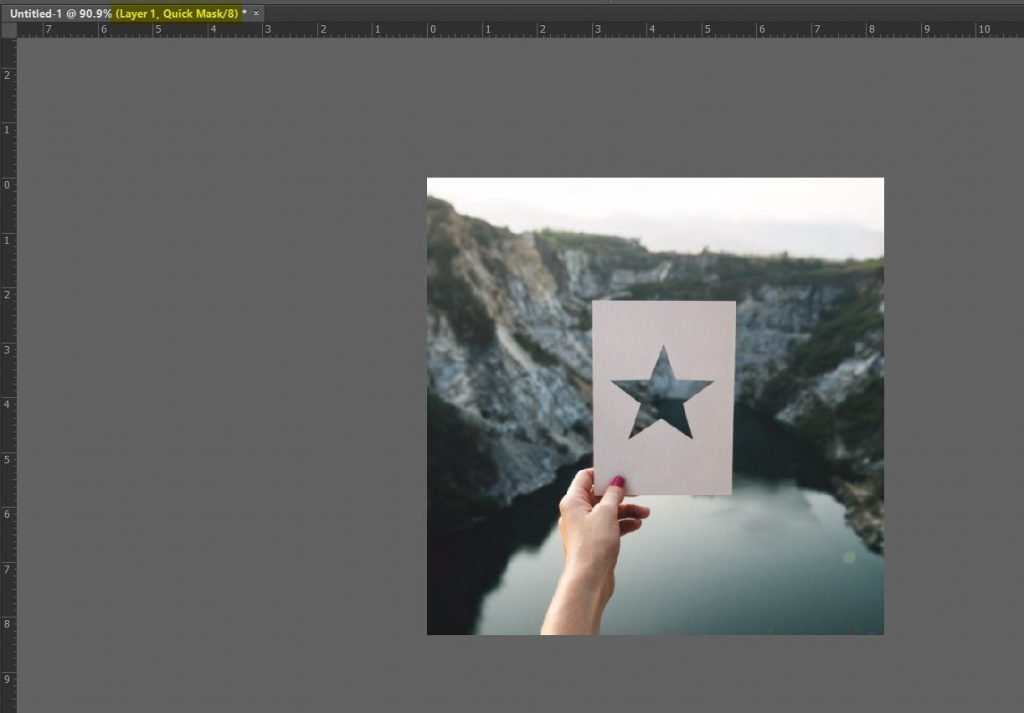
Once you’re in the Quick Mask mode, you can apply any method you like to do your transparency.
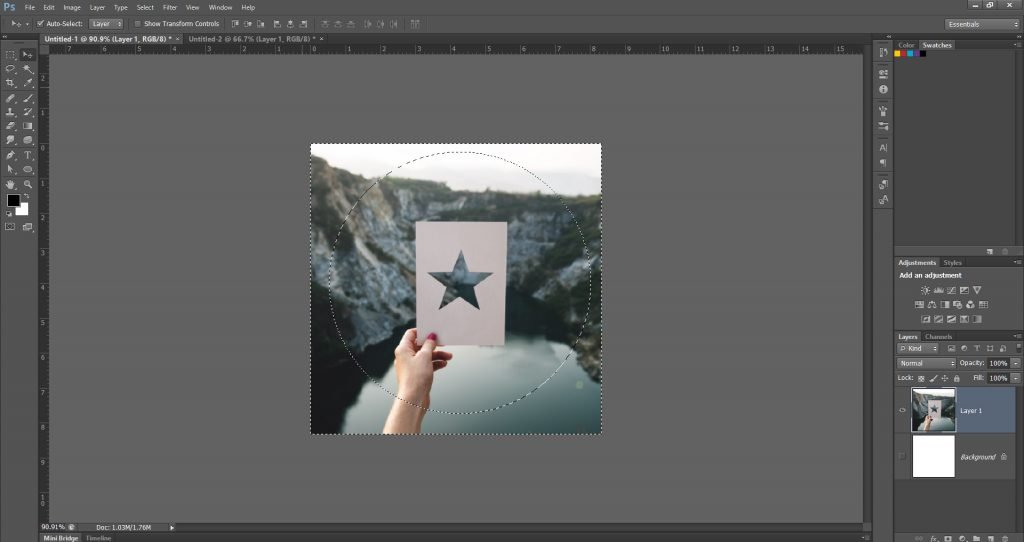
Here I’ve applied a circular gradient to the photo. Once I have done that, it enters what we can all as “the red zone”.
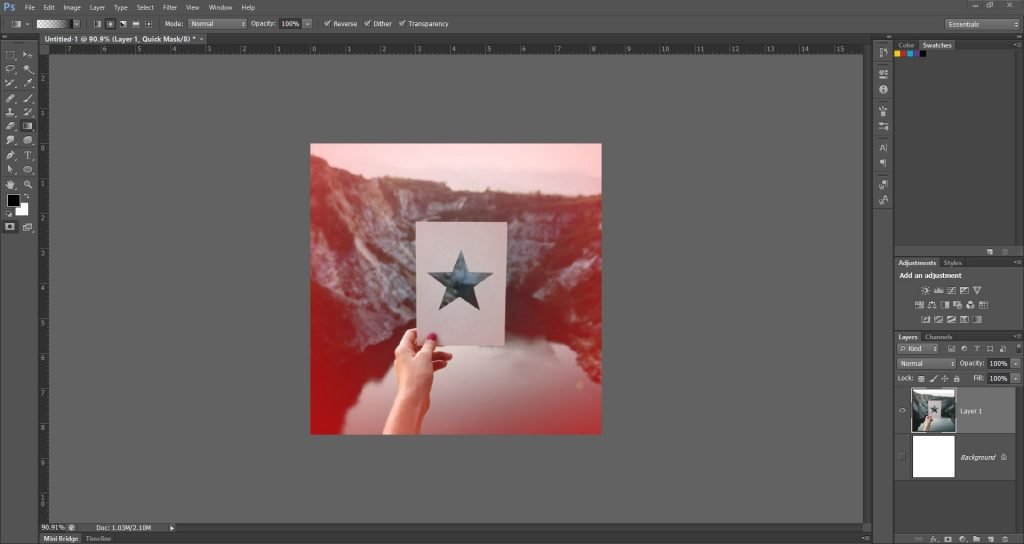
Watch what happens when we exit the red mask. To do this, just press Q again.
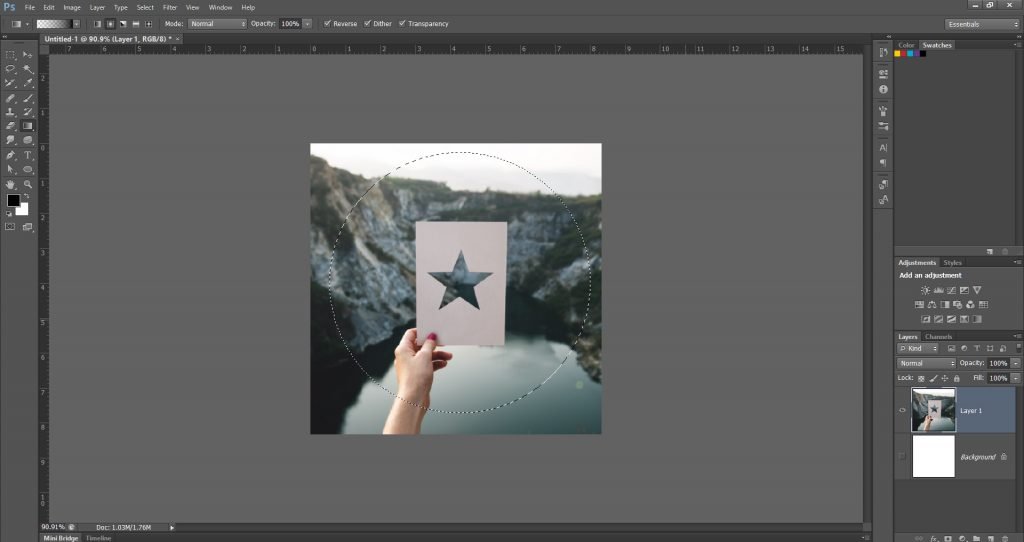
Now you can see there’s a circular selection on the photo. This means that once we’ve exited the Quick Mask mode, Photoshop does a selection based on the gradient applied. For most designers, they call this selection the “marching ants”.
What we will do now is invert this selection to erase the background. Head over to the menu Select > Inverse or you can do the Photoshop keyboard shortcut.
Keyboard shortcut: Ctrl + Shift + I (Windows) / Cmd + Shift + I (Mac)
Notice how the previous circular selection is now accompanied with another square “marching ants” selection.
This time, Photoshop has selected the area up to the photo’s borders as well. We’re going to delete that and we’ll have the result we want.
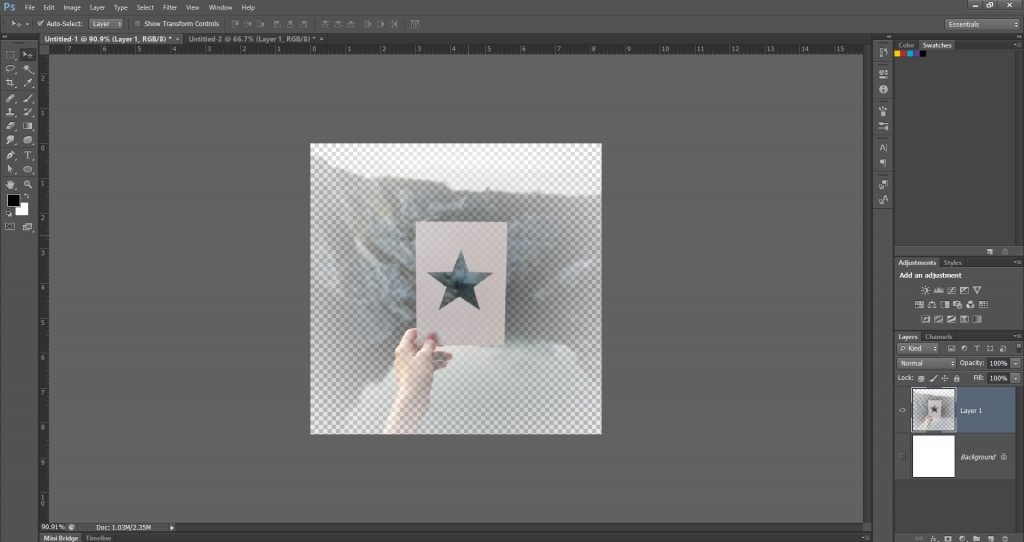
And there you have it, opacity using Quick Mask mode!
Photoshop Layer Opacity vs. Layer Masks
By now you’ve already known what a Photoshop layer is. Now’s the time to introduce you to what we call “layer masks”.
Layer masks are masks that you apply to well… layers.
The purpose of a layer mask is to control and modify a layer’s specifically-targeted transparency.
So why do people confuse the two? It might have to do with the name. But let’s explore their function to see a little further.
Layer Opacity
You may be already familiar with the Layer Opacity option where you can shift the slider from 0% to 100%. While this is great for setting instant transparency, what it does is it affects the opacity of the whole layer.
Layer Mask
Layer mask, on the other hand, controls precisely where you could set this opacity.
This gives you, as the designer, a leeway to create whatever possible design you could do by telling Photoshop where to place the transparency.
To clearly define this difference, see the examples below: –
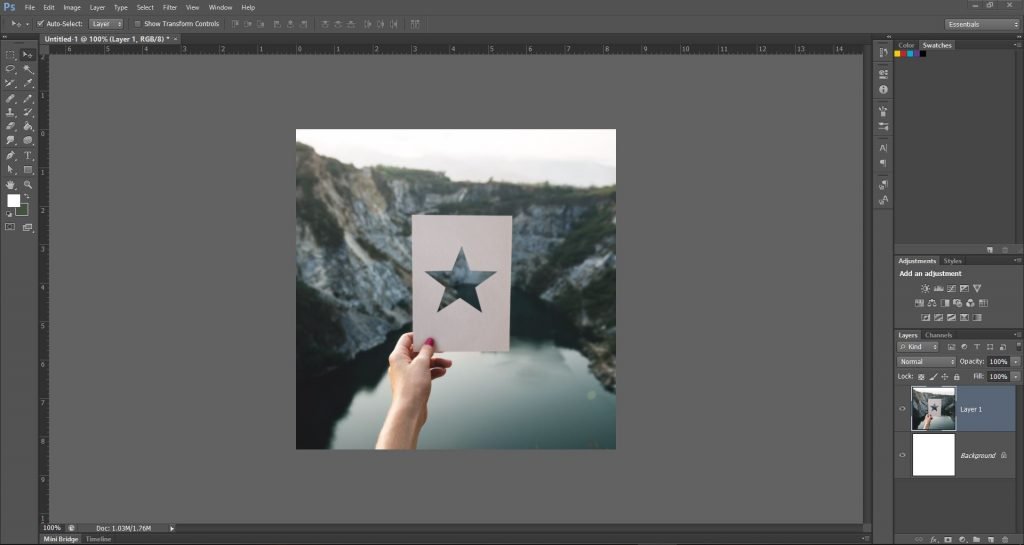
In this example, you can see the original photo in 100% opacity using Layer Opacity and not Layer Mask.
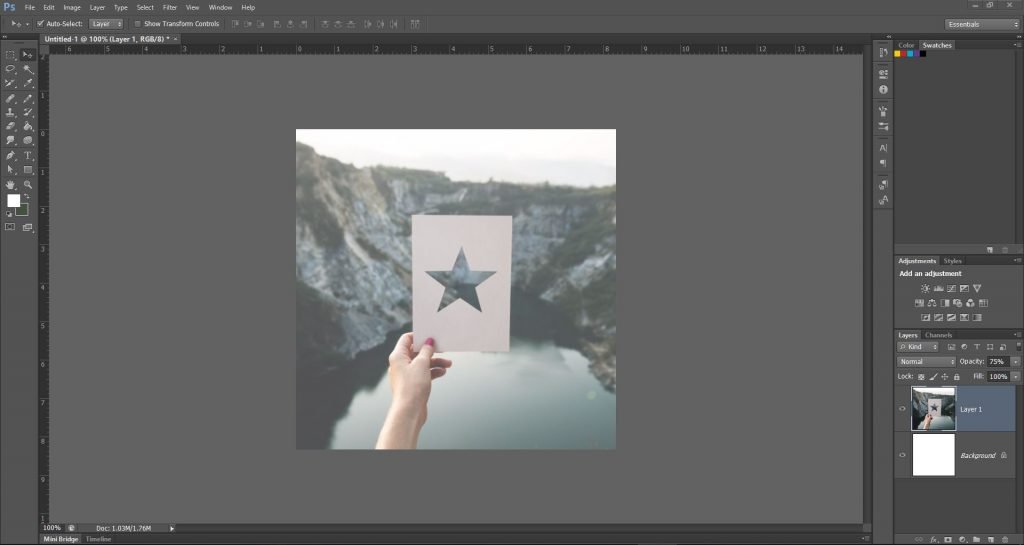
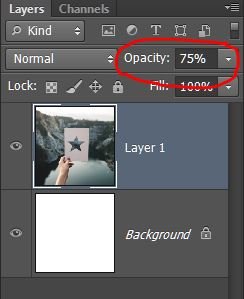
Whereas in this next photo, we reduced the image to 75% layer opacity.
Now here’s the fun part: this is how you do Photoshop’s layer mask:
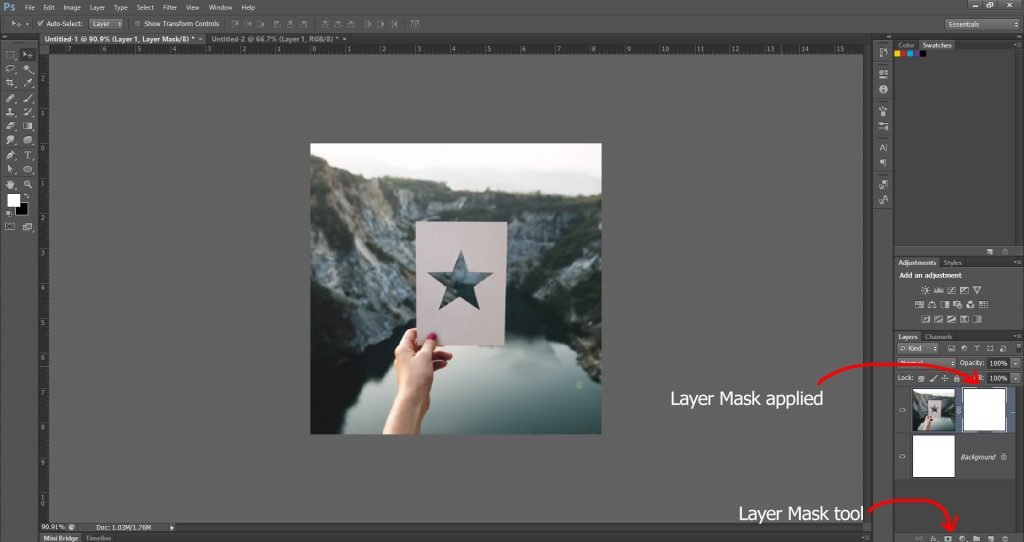
You go to the bottom of the Layers pane as seen above, and click on the 3rd option to select the Layer Mask. This is next to Layer Style (fx icon).
We will do the same thing to create transparency: apply the gradient on the image.
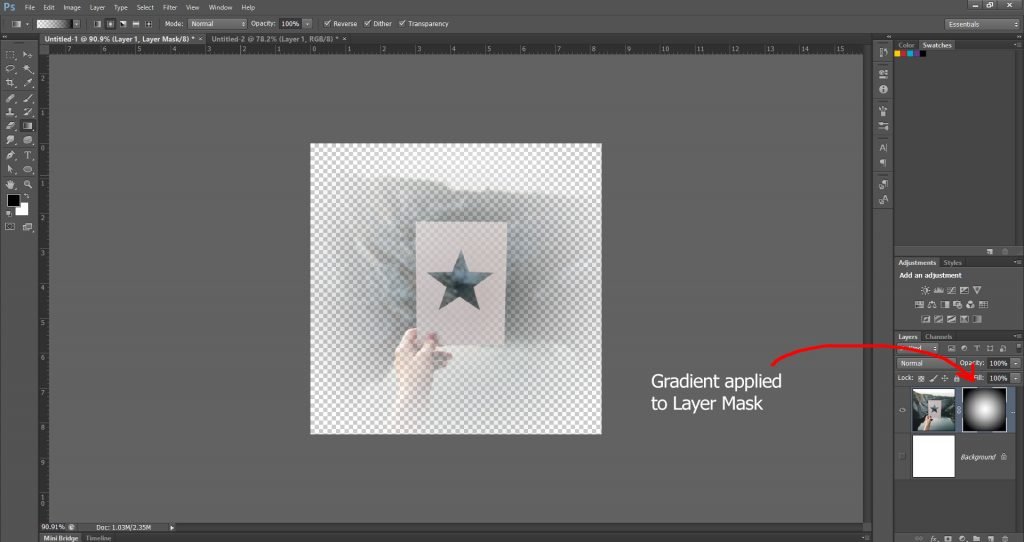
As you can see the blank Layer Mask has now turned into a black and white circular gradient, where the white center retains the visible image and the black parts hide the background.
Photoshop Clipping Masks
Clipping Masks don’t only exist in Adobe Illustrator, but they are also in Photoshop.
Related: – 7 Illustrator Tips & Tricks You Need To Master Now
Clipping Mask is quite similar to Layer Mask except it is another separate layer that’s not linked parallel to the first layer.
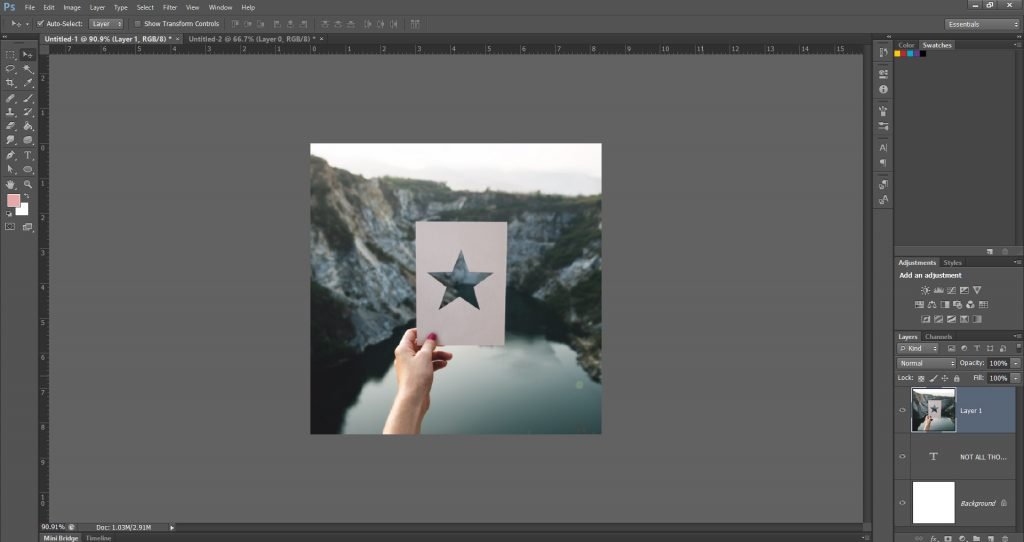
In this tutorial, we will create a Text Clipping Mask.
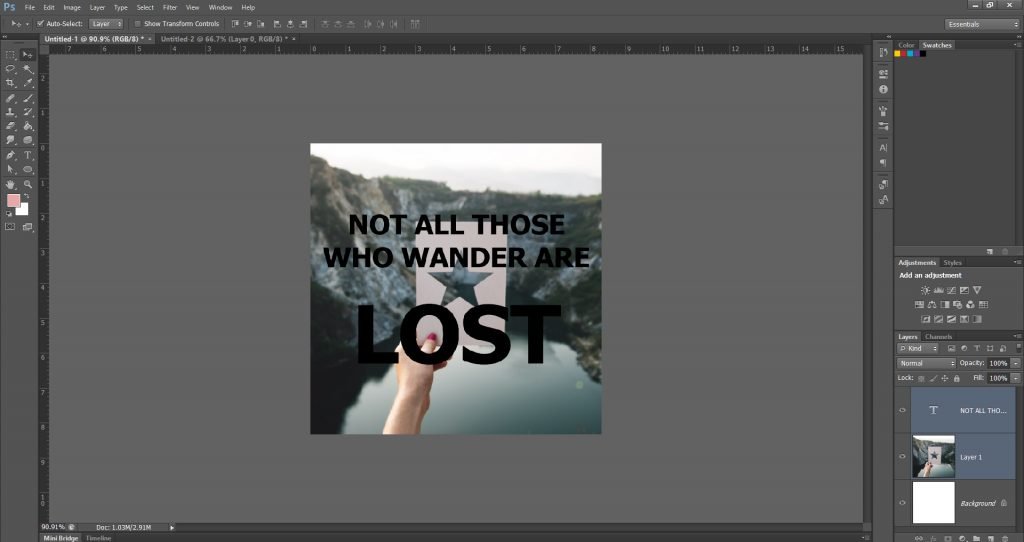
First, let’s create a block of text on top of our image.
Next, let’s bump up the layer to the top so that the text layer is underneath the image of which we are clipping from.
Now that we’ve got that settled, we use the Create Clipping Mask function. You can perform this via several methods below.
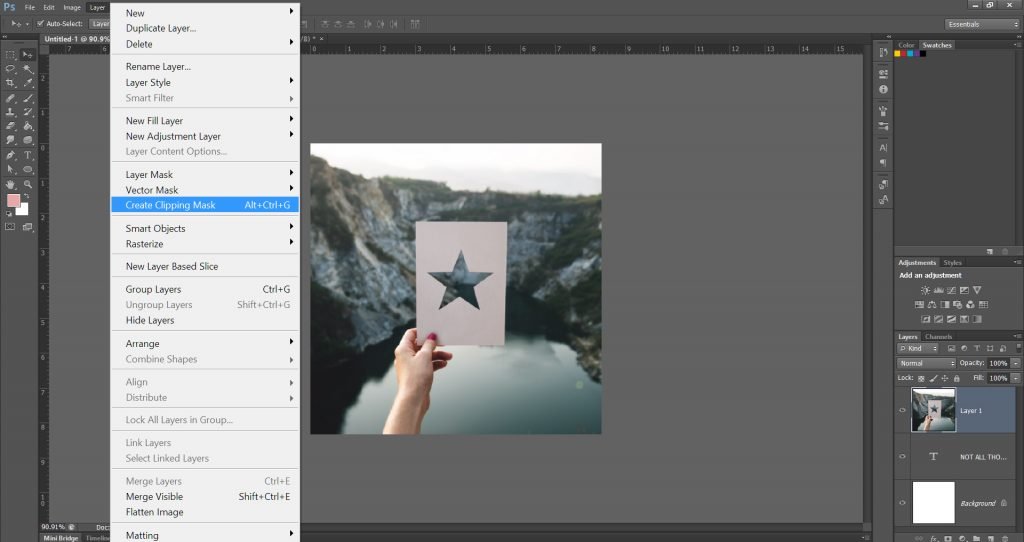
Method #1: – Go to menu and select Layer > Create Clipping Mask

Method #2: – Right click the image > Create Clipping Mask
Method #3: – Keyboard shortcut: Alt + Shift + G (Windows) / Cmd + Option + G (Mac)
Method #4: – Hold down the Alt button (Option in Mac) and point the pointer in between the line of the two layers (between the image and the text) and click.
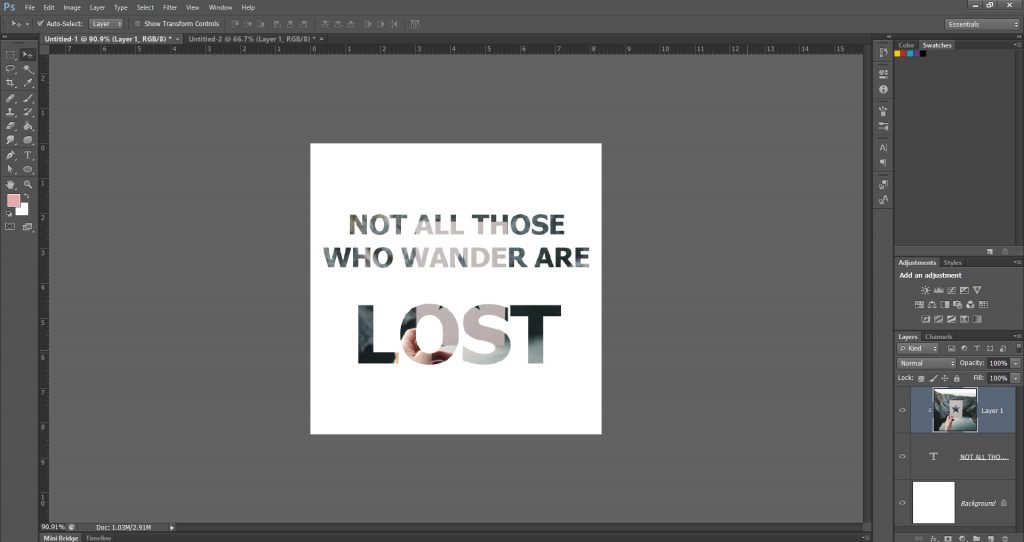
And what you’ll have is this nice visual text!
You will now see that the image layer gets “tabbed” or attached to the text layer but instead of it being next to the text layer like in Layer Mask, the Clipping Mask is above it.
Pretty nifty huh?
Conclusion: –
So to summarize what we’ve learned today, here’s a helpful guide:
Quick Mask: Press Q, do a gradient or any black-white shape and you’ll enter the red zone. Press Q again to exit, invert the selection and then hit Delete.
Layer Opacity: Controls the opacity of the WHOLE layer.
Layer Mask: Controls and modifies the opacity a specific area in the layer. The layer mask is next to the layer.
Clipping Mask: A separate layer mask on top of a layer. Usually, this is an image on top of a text. To perform clipping mask, you can select Layer > Create Clipping Mask or do the keyboard shortcut: Alt + Shift + G (Windows) / Cmd + Option + G (Mac). You can also hold down the Alt button and click the line between the two layers.
We hope that this tutorial has made Photoshop easier for you. Should you have any questions, let us know how we can help! Contact us or leave us a comment.


Astounding article for the photograph altering applications, It’s extremely useful. Thanks