Hello friends!!! In this tutorial we are going to implement radio button.
- All we will do in this tutorial is on clicking the specific radio button the text will be set to the specific button clicked .
- So follow the Steps :
- Create a new project and for example name it as RadioButton.
- Your MainActivity and activity_main files will be generated respectively.
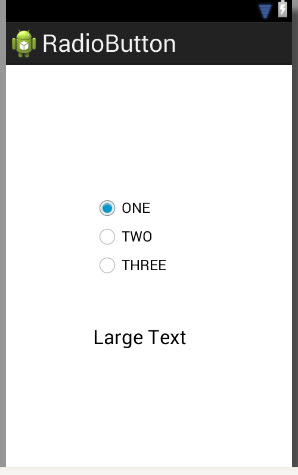
- Now go to your activity_main.xml file and in your graphical Layout take RadioGroup also take one LargeText in the layout .
- So now your activity_main.xml file graphical layout will as shown below :
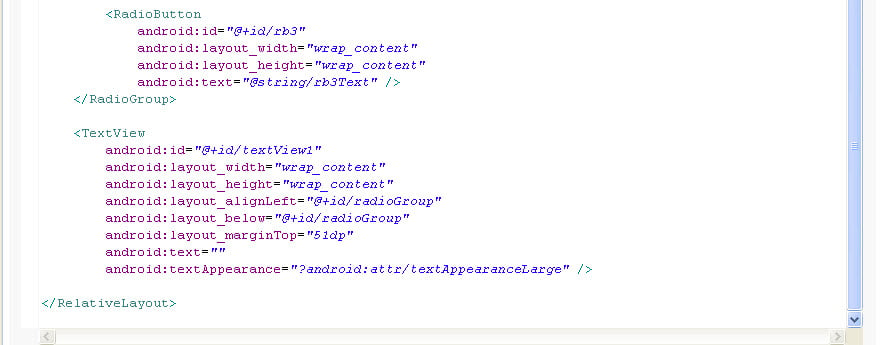
- Now set the text of the TextView as -> android:text = “ ”
So that the Large Text will not be seen on the layout. - Also set the id of the RadioGroup as radioGroup
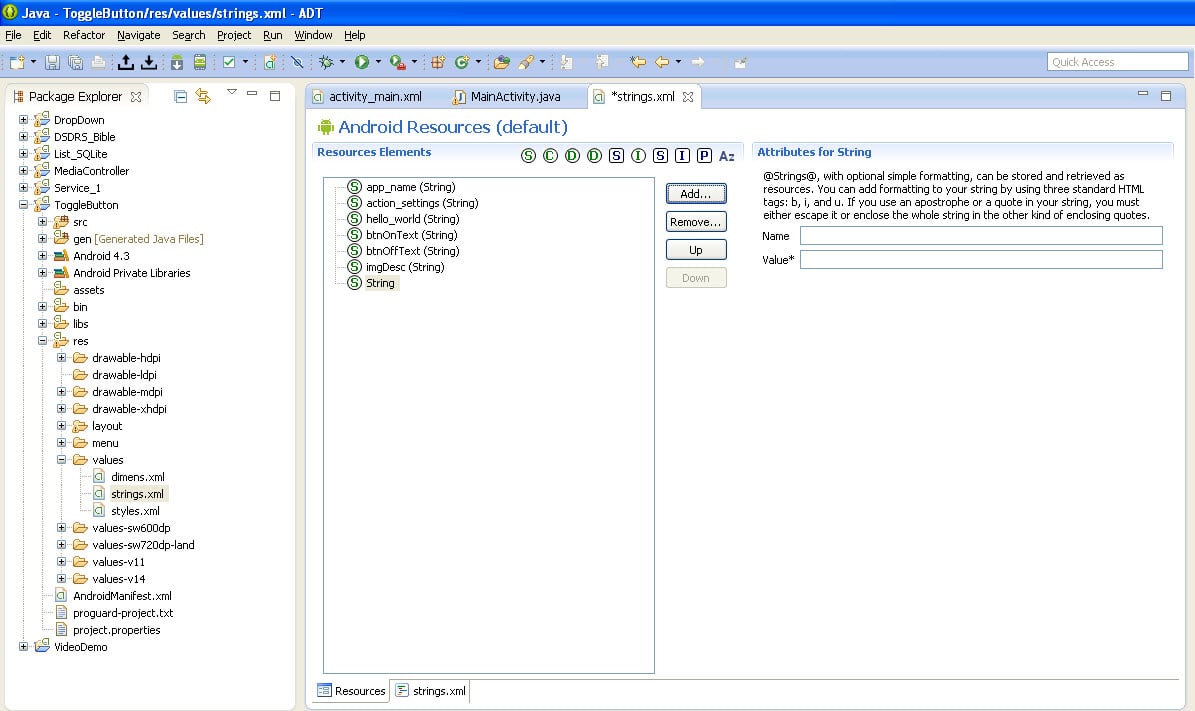
- Also set the text of the radio button’s as ONE ,TWO ,THREE in the strings.xml file
- So go to res->values->strings.xml.
- Click on the Add button
- In the Name column write : rb1Text and in the
value column write : ONE (which will be displayed as text of the Radio button) - Again click on the Add button and perform same steps for second and third button.
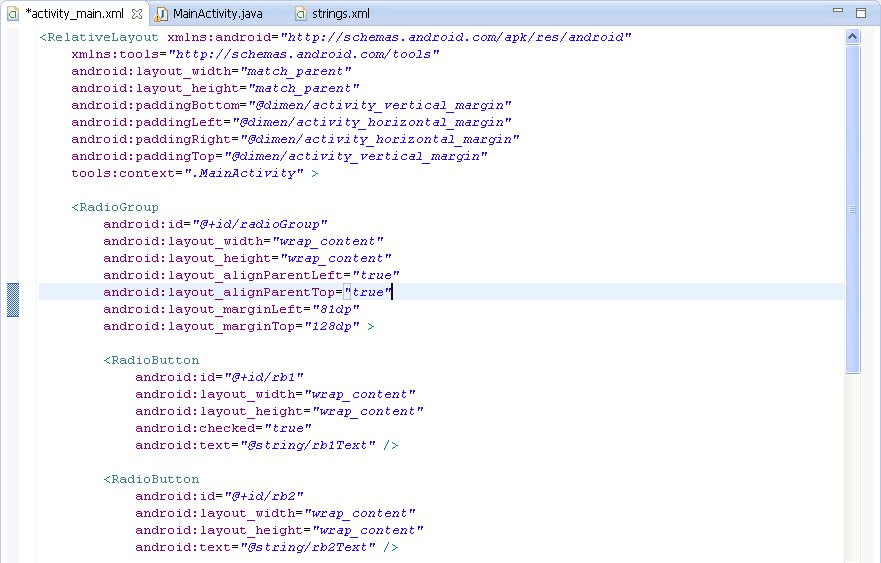
- The code of your activity_main.xml file is shown below :
- Your window will look like as shown below :
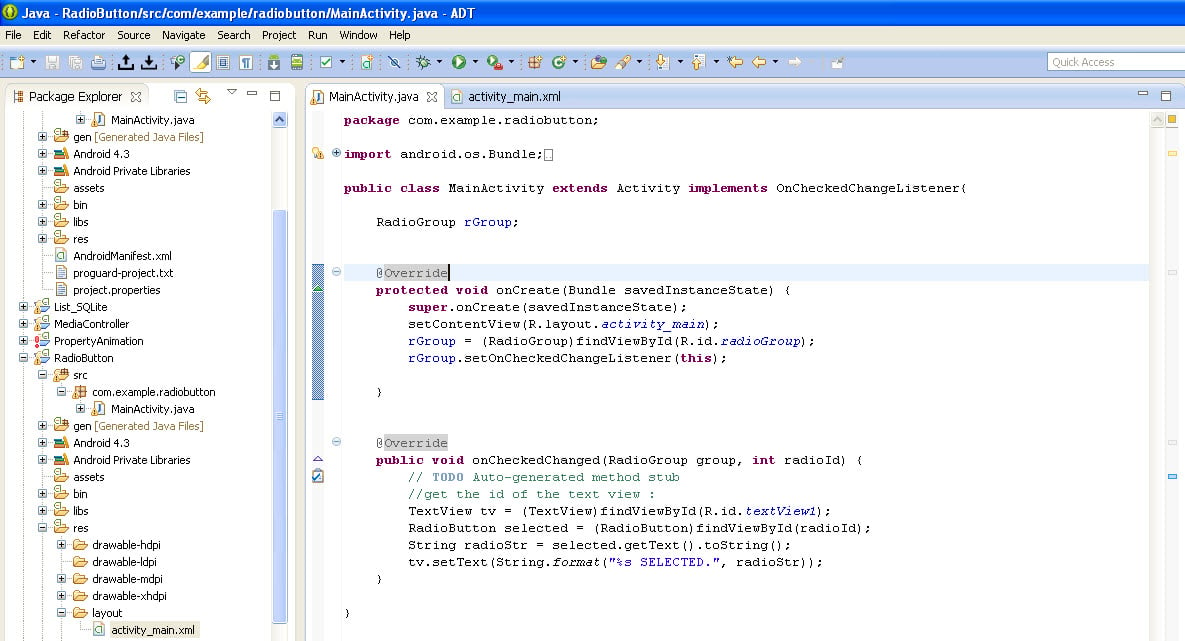
- Now go to your MainActivity.Java file and let the Activity implement OnCheckedChangeListener .
- Create object of the RadioGroup as rGroup
- In onCreate( ) method write the code for getting the id of the radioGroup and set it to OnCheckedChangeListener.
- Where the code will be :
- Now write the code for the onCheckedChanged( )method for which the radio button when clicked will set the text to the respective radio button selected.
- The code is as follows :
- Now your MainActivity.Java file will look as shown below :
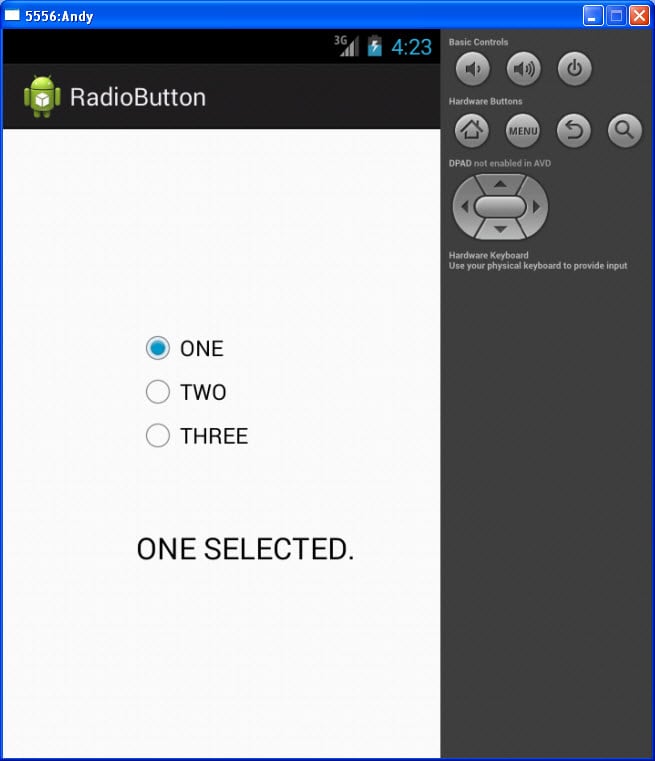
- Now run your application and you will have following output :
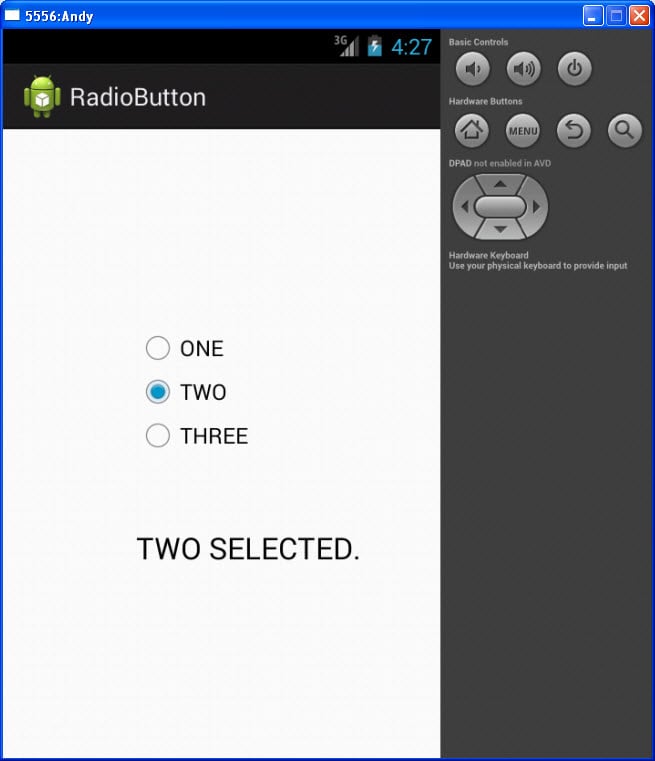
- Now select TWO and you will have your text to be set to display “ TWO SELECTED “
- Thus we have implemented radio button successfully !!
[code language=”xml”]<RelativeLayoutxmlns:android="http://schemas.android.com/apk/res/android"
xmlns:tools="http://schemas.android.com/tools"
android:layout_width="match_parent"
android:layout_height="match_parent"
android:paddingBottom="@dimen/activity_vertical_margin"
android:paddingLeft="@dimen/activity_horizontal_margin"
android:paddingRight="@dimen/activity_horizontal_margin"
android:paddingTop="@dimen/activity_vertical_margin"
tools:context=".MainActivity" >
<RadioGroup
android:id="@+id/radioGroup"
android:layout_width="wrap_content"
android:layout_height="wrap_content"
android:layout_alignParentLeft="true"
android:layout_alignParentTop="true"
android:layout_marginLeft="81dp"
android:layout_marginTop="128dp" >
<RadioButton
android:id="@+id/rb1"
android:layout_width="wrap_content"
android:layout_height="wrap_content"
android:checked="true"
android:text="@string/rb1Text" />
<RadioButton
android:id="@+id/rb2"
android:layout_width="wrap_content"
android:layout_height="wrap_content"
android:text="@string/rb2Text" />
<RadioButton
android:id="@+id/rb3"
android:layout_width="wrap_content"
android:layout_height="wrap_content"
android:text="@string/rb3Text" />
</RadioGroup>
<TextView
android:id="@+id/textView1"
android:layout_width="wrap_content"
android:layout_height="wrap_content"
android:layout_alignLeft="@+id/radioGroup"
android:layout_below="@+id/radioGroup"
android:layout_marginTop="51dp"
android:text=""
android:textAppearance="?android:attr/textAppearanceLarge" />
</RelativeLayout>
[/code]
[code language=”java”]protected void onCreate(Bundle savedInstanceState)
{
super.onCreate(savedInstanceState);
setContentView(R.layout.activity_main);
rGroup = (RadioGroup)findViewById(R.id.radioGroup);
rGroup.setOnCheckedChangeListener(this);
}
[/code]
[code language=”java”]public void onCheckedChanged(RadioGroup group, int radioId)
{
// TODO Auto-generated method stub
//get the id of the text view :
TextView tv = (TextView)findViewById(R.id.textView1);
RadioButton selected = (RadioButton)findViewById(radioId);
String radioStr = selected.getText().toString();
tv.setText(String.format("%s SELECTED.", radioStr));
}
[/code]