In this article, we are going to demonstrate how to build a serverless app using Firebase Cloud Functions. Serverless is a cloud computing implementation model through which a provider like Firebase can easily manage dynamic allocation of machine resources. You as a developer do not have worry about migration and other stuff. You only use services of the cloud provider and pay as per your usage.
Firebase Cloud Functions lets you run the backend infrastructure by providing resources for routing requests and trigger REST resources such as GET, POST, PUT and DELETE. It helps you to focus on the front end of your application, regardless of what framework or library you are using to build one. By using Firebase Cloud Functions, you do not have to set up much, maintain and scale your backend. All that will be taken care of. For JavaScript developers, the delightful thing about Cloud functions is that it has support for Node.js and thus while developing your application, there will be not much context change.
To understand this article, please make sure you have working knowledge of JavaScript and Node.js installed on your local machine.
Creating a Firebase Project
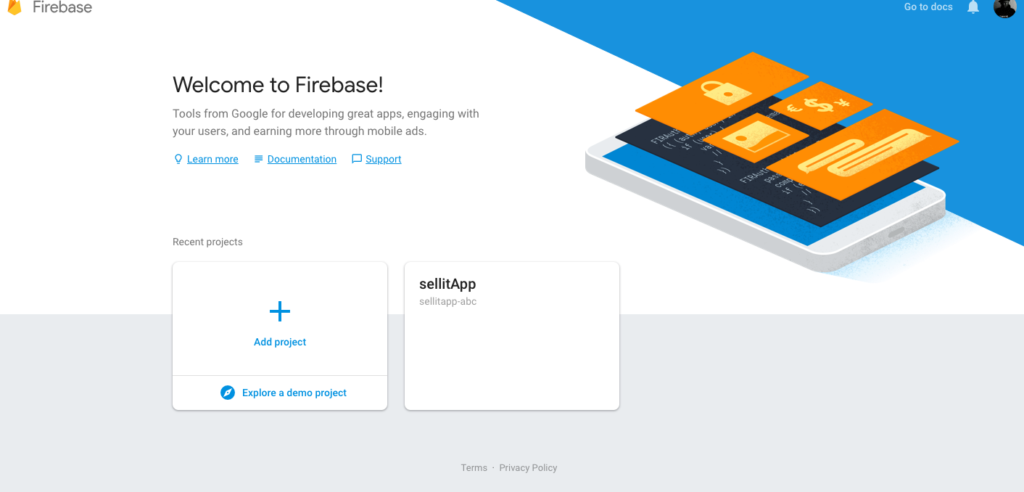
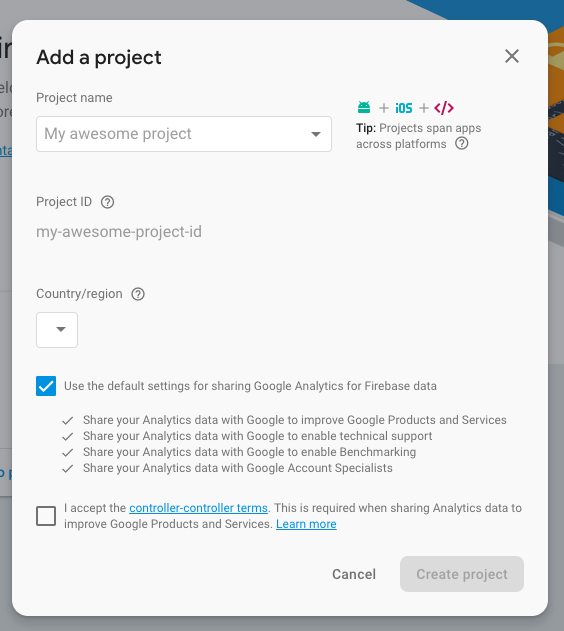
Open Firebase console from https://console.firebase.google.com/ and login with your Google account. Go to console and click on Add Project to create a new project.
We will also setup Firebase locally on our machine to leverage and integrate it with our application.
npm install --global firebase-tools
Now, we will start by initializing our project. First step is to authenticate firebase in our local machine.
Firebase login
This will prompt you with some questions and fields to fill, do that and once you are logged in run Firebase Functions.
firebase init functions
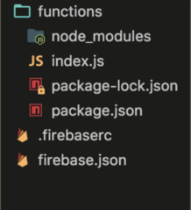
This will also prompt with a list of all available projects from your Firebase console. Choose the newly created project and then choose the language JavaScript and say n when asked to ESLint. For brevity of this article, we are not going to demonstrate the usage of ESLint with JavaScript. If you are familiar with both, you can go ahead. Lastly, it will prompt you to let it install all dependencies with npm and you must answer with a y. This will setup our Firebase project and install all dependencies. To see if what dependencies are installed in our project, you can always visit package.json in the project directory.
Creating an Endpoint and Deploying a serverless app
We will start by creating an endpoint to see how Cloud Functions work and how we can leverage it to create more pragmatic endpoints for our application. Open index.js file:
const functions = require('firebase-functions');

exports.helloWorld = functions.https.onRequest((req, res) => {
    res.send('Hello from a Serverless App!');
});
Yes, you can use ES6 syntax for now. Since we are writing JavaScript on our back end, our code above is similar to what you will call a controller inside a Node.js/Express application. We are exporting helloWorld and using req and res objects to receive and send the response from the server. The only and a major difference here is that we are using Cloud Functions custom function to create HTTP events: functions.https. Secondly, onRequest method, take req and res objects as arguments.
Now we will deploy this endpoint from our terminal:
firebase deploy –only functions:helloWorld
The above command specifies that we are deploying only one URL to Cloud Functions provider. At this stage, even if the index.js contain other endpoints, they will not get deployed. This is how the URL will be generated on success. Notice only the /helloWorld part. Rest will be unique for everyone.
Enabling CORS
Right now, our server does accept or allows any request from any other public content. In simple terms, we do not have access to any universal JavaScript code. We need to enable CORS. CORS is cross-origin resource sharing specification that allows open access from cross-domain.
To enable cors in our app, we will install its module:
npm install -S cors
Next, we will import it in index.js file:
const cors = require('cors')({ origin: true });
Enabling Database
To create our custom endpoints for our application, we need to have a database where all the data will be stored. For that, we are going to use Firebase as database and here is how it can be configured in index.js file:
const admin = require('firebase-admin');
admin.initializeApp();

const db = admin.database().ref('/todo');
Performing CRUD Operations
For demonstration purposes, we are following the pattern of a simple todo application that will CRUD operations we will create two routes to demonstrate just that. The first route in our serverless application is going to be addItem. This function allows a user to add an item to the list.
exports.addItem = functions.https.onRequest((req, res) => {
    return cors(req, res, () => {
        if (req.method !== 'POST') {
            return res.status(401).json({
                message: 'Not allowed'
            });
        }
        const item = req.query.item;
        db.push({ item });
        let items = [];
        return db.on(
            'value',
            snapshot => {
                snapshot.forEach(item => {
                    items.push({
                        id: item.key,
                        items: item.val().item
                    });
                });
                res.status(200).json(items);
            },
            error => {
                res.status(error.code).json({
                    message: `Error: ${error.message}`
                });
            }
        );
    });
});
ddItem will communicate with Realtime Firebase database. We start by return a cors function that three parameters: req, res and a callback function which will trigger whenever addItem URL is called from the client. Using db.push we are saving data to our database and to read or return the data from the database we are using snapshot that is made available to us by Firebase. If you are not familiar with this terminology, please have a look at Firebase documentation.
To deploy this URL, we are going to type in our terminal:
firebase deploy --only functions:addItem
This time you will get an endpoint similar to this:
To see it in action, we will add some dummy data in our Firebase database. Open your favorite REST Client such as POSTMAN and send a POST request to the newly deployed cloud function URL.
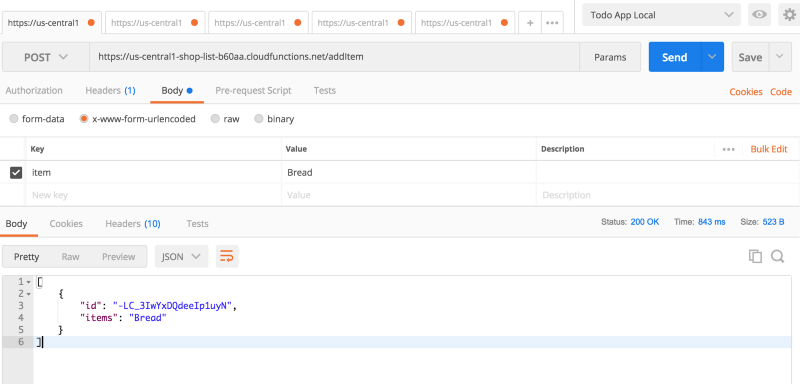
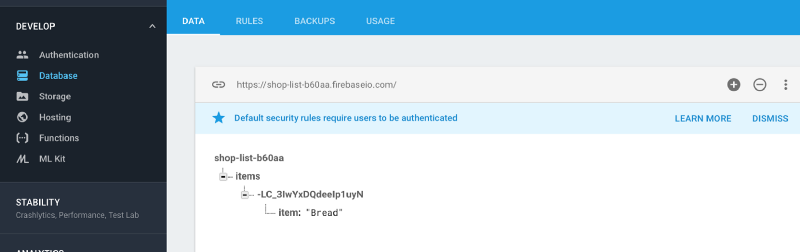
You can verify that the data is added to our database and that too with a unique id generated automatically by Firebase by going to Database Section inside the Develop tab from Firebase Console.
Next, we will add another url to our Firebase app for getting the list of items from the database.
exports.getItems = functions.https.onRequest((req, res) => {
    return cors(req, res, () => {
        if (req.method !== 'GET') {
            return res.status(404).json({
                message: 'Not allowed'
            });
        }

        let items = [];

        return db.on(
            'value',
            snapshot => {
                snapshot.forEach(item => {
                    items.push({
                        id: item.key,
                        items: item.val().item
                    });
                });

                res.status(200).json(items);
            },
            error => {
                res.status(error.code).json({
                    message: `Error: ${error.message}`
                });
            }
        );
    });
});
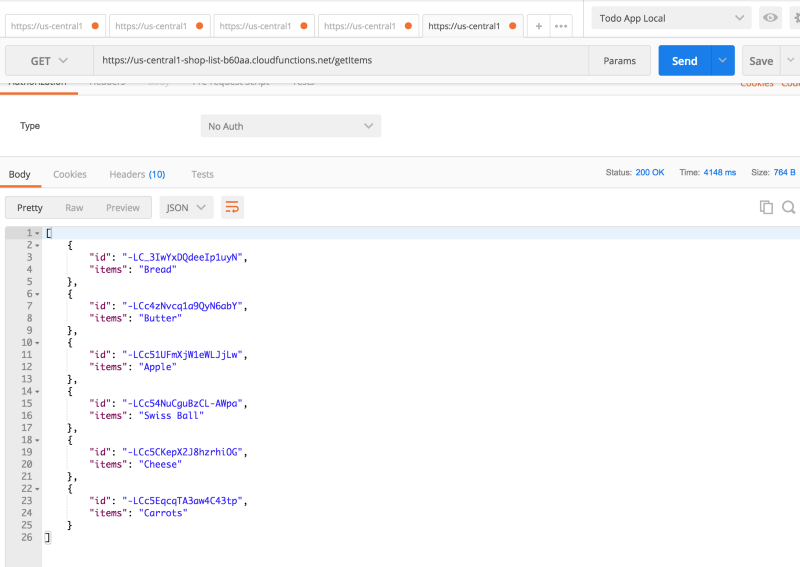
Now you get the idea of how easy it is to communicate with a firebase database using a JavaScript back end infrastructure. In above snippet, we created a function getItems to retrieve the list of items from the database. To deploy this endpoint, you can simply type:
Firebase deploy
This command deploys single or multiple urls provided. You can test the URL with POSTMAN:
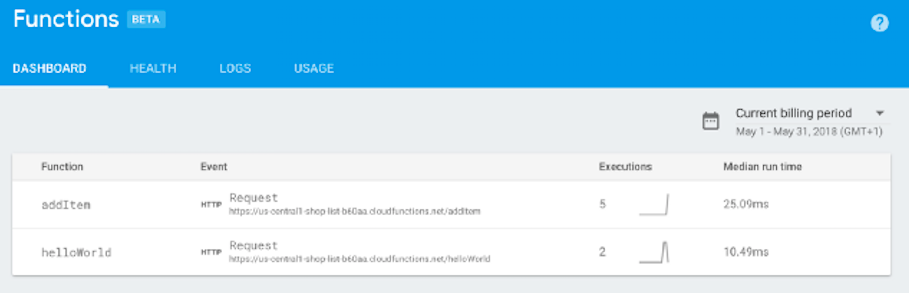
You can now easily integrate any other front end framework such as Angular or React and consume this serverless application or API just like any other REST API. Lastly, to monitor an endpoint and trace any other thing, you can always visit Functions section in the Develop from firebase console.