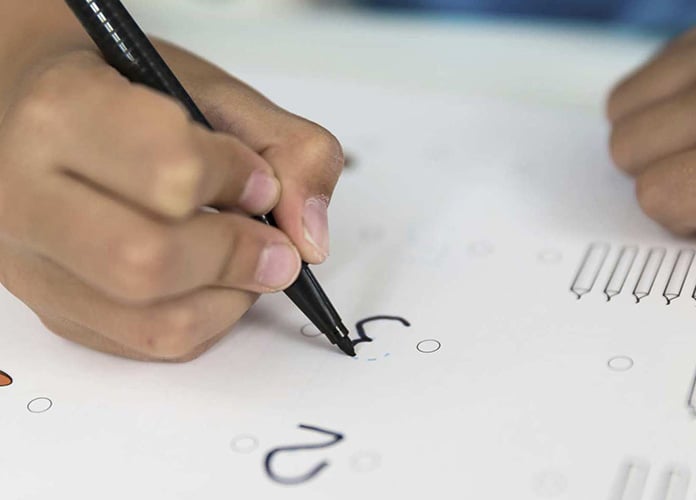
This tutorial has been designed to guide and understand the working of handwritten digit recognition system with the help of MNIST dataset in Python language. We will be using the MNIST dataset which is like the “hello world” for object classification in deep learning and machine learning. This dataset was created in 1999 and since has been used as a benchmark for classification algorithms. MNIST is ‘Modified National Institute of Standards and Technology’ and it as a common dataset used for computer vision.
This dataset will make us learn and understand the classification algorithms like Support Vector Machines(SVM) or K-nearest neighbor. We will be using SVM to classify and recognize images as it gives us favorable outputs and is more accurate.
The MNIST Dataset
The MNIST dataset was developed by Yann LeCun. It consists of 60,000 images as train images and 10,000 as test images. It is a good database for enthusiasts who want to practice learning techniques and pattern recognition methods on real-world data without spending much time on preprocessing and formatting.
Before touching my technique for enabling this implementation, I would like to point out Tensorflow can also be used to implement handwritten recognition in Python. Neural networks are the networks which consist of neurons that are continuously connected and transferring information to each other. They have the capability to think like humans and come up with complex ideas. In short, it mimics the human brain for decision-making.
Convolutional Neural Networks are instrumental for this. They are a group or network of nodes that pass information to one another and have some pre-defined weight. CNN has its application in video and image recognition, recommender systems and natural language processing. As Tensorflow requires more resources and probably more time, I chose to carry on with support vectors as they are probably more intuitive and can be used for classification problems where it can classify images and give us maximum accuracy.
Before getting started with the implementation, let’s learn a little about SVM
Support Vector Machines
This algorithm is normally a second stepping stone for those who have learned linear and logistic regression. It is quite a popular algorithm used mostly in classification problems. It creates high-performance accuracy models with fewer efforts and minimum resources. Though it can be used for regression, its application is mostly found in classification scenario.
There is n number of data points which are features of our dataset. These points are plotted in an n-dimensional graph or space. After classification, these features are divided by a hyperparameter line which separates the two plains and helps us find the best one.
There are many possible criteria for finding the optimum hyperplane. Our objective is to find a plane in which has the maximum distance between the data points of both the classes. The dimension of a hyperplane is directly proportional to the number of features. If were input only 2 features, then the hyperplane is just a line. If it’s 3 or more, then the hyperplane becomes a two-dimensional plane. It becomes more complex when it exceeds 3.
These data points are support vectors that are closer to hyperplane and influence the position and orientation of the hyperplane. With the help of these vectors, we maximize the margin of the classifier. If we change or delete support vectors, it will change the position of the hyperplane. These points help us build our SVM model.
Now that we have gone through the basics of SVM, let’s implement handwritten recognition using MNIST dataset in Python.
Prerequisites
Python v3.7 or less required to carry on with the implementation and Jupiter for the environment.
Importing all the basic libraries in Python
import numpy as np
import pandas as pd
from sklearn.model_selection import train_test_split
import matplotlib.pyplot as plt, matplotlib.image as mpimg
from sklearn import svm
%matplotlib inline
Importing the train and test data
train_df=pd.read_csv(‘trainDG.csv’)
test_df=pd.read_csv(‘testDG.csv’)
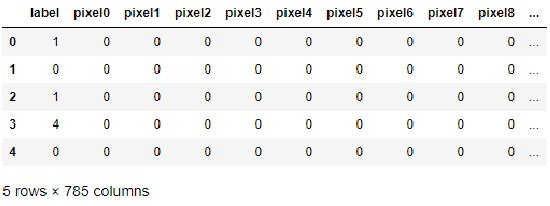
Check for first five rows for train data
train_df.head()
For now, let’s try it out on the first 5000 images
images = train_df.iloc[0:5000,1:]
labels = train_df.iloc[0:5000,:1]
train_images, test_images,train_labels, test_labels = train_test_split(images, labels, train_size=0.8, random_state=0)
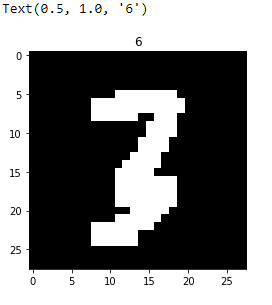
Reshaping the images to match the 28×28 shape size
i=1
img=train_images.iloc[2].as_matrix()
img=img.reshape((28,28))
plt.imshow(img,cmap=’gray’)
plt.title(train_labels.iloc[i,0])
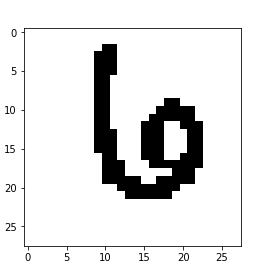
Doing the same for test data
test_images[test_images>0]=1
train_images[train_images>0]=1
img=train_images.iloc[i].as_matrix().reshape((28,28))
plt.imshow(img,cmap=’binary’)
plt.title(train_labels.iloc[i])
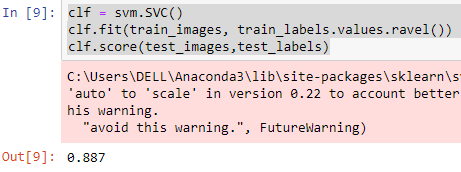
Applying the SVM model
clf = svm.SVC()
clf.fit(train_images, train_labels.values.ravel())
clf.score(test_images,test_labels)
Prediction for test data
est_data=pd.read_csv(‘testDG.csv’)
test_data[test_data>0]=1
results=clf.predict(test_data[0:5000])
Generating the output file(if required)
df = pd.DataFrame(results)
df.index.name=’ImageId’
df.index+=1
df.columns=[‘Label’]
df.to_csv(‘sample_submission.csv’, header=True)
The accuracy for this model is 88.7% which is better compared to K-NN implementation. I have considered only first 5000 images as it eases implementation and enables better accuracy with desired results.