

Google made headlines in May 2018 when CEO Sundar Pichai demonstrated the Google Duplex that could hold a naturally flowing conversation in autonomy with another human on call for say, booking an appointment to the hairdresser for the user.
Google Duplex AI could not only understand the voice of the human on the other end of the call, but it could respond back with correct answers to that real person’s inquiries and questions as well. Google Duplex’s voice even put in words like “um” and pause breaks to make it sound even more like a real human.
As of 2019, it is in plans to roll out the ‘Duplex on the Web’ project that can be used for car rentals or to purchase movie tickets.

Let’s say, for example, you get a calendar reminder about an upcoming trip. You can then ask Google to rent a car for your next trip.

Duplex will then open the car rental company’s website and fill out all of the necessary information on your behalf. Before submitting the request, you can double-check the details.

Well, like it or not, you have to admit it’s disruptively convenient.
Understanding language is one component of perfecting Natural Language-based chatbots. Another is empathy. We talked about Emotional AI in the previous blog because we would clearly feel the rise of such systems. A new wave of startups is injecting emotional intelligence into chatbot-based communication which could have far-reaching applications for medicine, psychology and assistive systems.
Which is precisely why we’re here with this blog.
The Heart of NLP & Emotional AI
In our previous Keras series, we talked about Recurrent Neural Networks (RNNs) that are used to develop such sequence models. The intuition was simple. Language needs context to be understood, and context means getting access to past data points. Without having access to past data, or in cases where the complete sequence like a sentence after it’s been spoken is available, even future data for that matter, contextual learning is off the table.
And that’s exactly where RNNs come in.
We’ve covered RNNs extensively in our previous Keras series, if you’re a little unfamiliar or out of touch with RNNs, we highly recommend you to go & check Recurrent Neural Networks and LSTMs with Keras. Some other useful blogs on Keras are listed below:
With this brief introduction, we’re ready to go further. Off we go, then.
Types of Sequential Models
Sequence models are mainly of four types. They’re not conceptually heavy as you’ll come to see, so we’ll describe them quickly and keep the examples concise.
- Sequential Prediction Models.
As the name suggests, it involves predicting the next value after a given input. Say we have the following as input, “The sky is”. A sequence prediction model would return or predict, “blue”.
- Sequence Generation Models
Sequence Generation Models are involved in generating a new output sequence that has the same general characteristics as other sequences in the dataset. For example, if we were to give the input as “The sky is blue”, you’d expect something on the lines of, “The ocean is blue”.
- Sequence to Sequence Models
The next type is Sequence to Sequence Models. These models are involved in predicting an output sequence given an input sequence. Perhaps the best example for such models is the problem of Machine Translation, where you want to translate a sentence in one language to another, say English to French. As an example, if you were to give, “happy journey” as input, you’d get a “bon voyage” as output. For an input sequence, we produced the desired output sequence.
- Sequence to Label Models
This is not hard to figure out. Sequence to Label Models would involve predicting a class label for a given input sequence. These models are sometimes also referred to as Sequence Classification models. But we prefer calling them as Sequence to Label Models as that tells you exactly what the model is doing: mapping an input sequence to the desired output label.
As a matter of fact, it is these types of models that we’ll be covering today in this blog.
At Eduonix, we focus heavily on the type of learning that is actually of use to our students in the real world when they take up a job or have establishments of their own. Consequently, with our every blog we make sure that the theory and concepts described in the blog, are followed up by a relevant code along with example otherwise that’s just half the learning and we’re not in the business of that at all.
Quick Question: Have you ever been to the Amazon?
Well yes, of course, we’re talking about amazon.com (you’re on an AI blog, what else did you expect?)
We’re betting your answer is yes. And it must have been a common experience for you to note how Amazon automatically segregates your reviews into two categories, especially if you’re a seller:
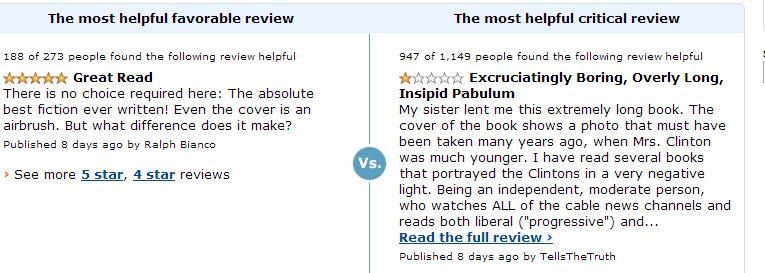
This is often called Sentiment Analysis and the name is justified because we’re doing exactly that: extracting the sentiment from the review and putting it into one of two classes: Most Helpful Favourable Review and Most Helpful Critical Review. This as we now know, is an example of a Sequence to Label Model running at the backend where the input sequence is the review and the desired output label is one of two classes.
Today in this blog, we’ll be doing something similar. As a code example to go with your understanding of a Sequence to Label Model, we’ll perform Sentiment Analysis on Amazon Reviews and classify them into two categories, Bad (1-2 stars) and Good (4-5 stars).
The Dataset
The dataset can be found on the below link and has been taken from Xiang Zhang’s Google Drive dir, and has been converted from .csv to a compressed text format:
https://drive.google.com/file/d/1O3VP3qKBXVZSLkMVFuNgZbF3-EFvarDU/view?usp=sharing
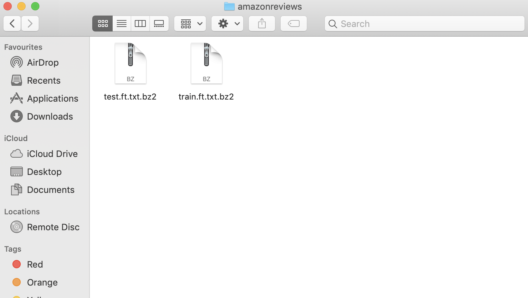
After unzipping, you’ll find two files:
These files are in the compressed format (.bz2) as we mentioned so the natural first step will be to find a way to read them enabling us to parse the reviews.
As you’d expect, Python has support for parsing .bz2 files provided by the bz2 module.
So let’s first import that module:
import bz2
Now that we’ve imported our module that will help us parse the files, let’s get to work and understand how the data has been formatted:
train_file = bz2.BZ2File(‘../train.ft.txt.bz2’)  //You’ll put your own path here
test_file = bz2.BZ2File(‘../test.ft.txt.bz2')   //You’ll put your own path here

train_file_lines = train_file.readlines()
test_file_lines = test_file.readlines()
We’ve read the files but for us to parse them we’ll have to convert from raw binary strings to strings that can be parsed:
train_file_lines = [x.decode('utf-8') for x in train_file_lines]
test_file_lines = [x.decode('utf-8') for x in test_file_lines]
Now let’s print out one training example (1 review) from our dataset:
train_file_lines[0]
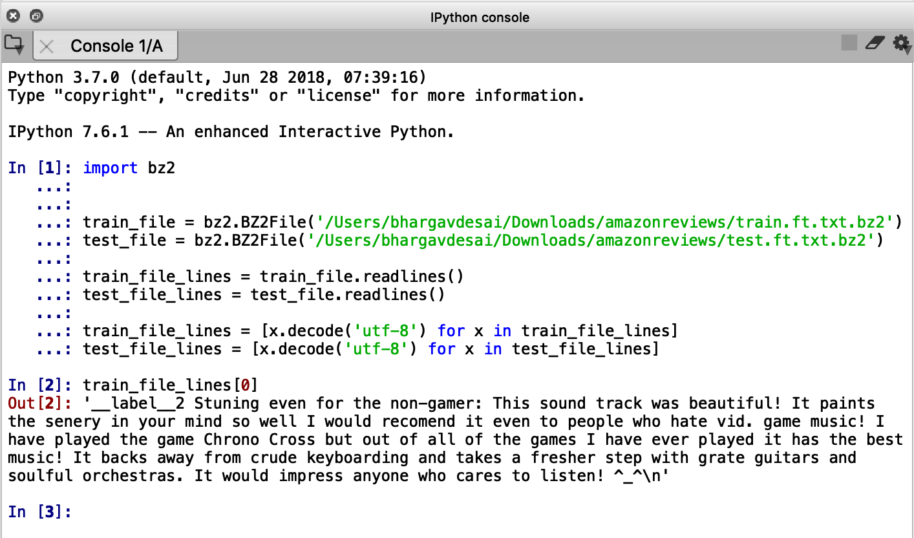
The format is clear now. The first 10 characters, that is, “__label__2” gives us the label for the particular review and the rest of the body is the review itself.
It’s a little odd, but the labels are “__label__2” and “__label_1” corresponding to a Good review (4-5 Stars) and a Bad review (1-2 Stars). A neutral review (3 Star) isn’t a part of this dataset since it does not express any sentiment. Fair enough.
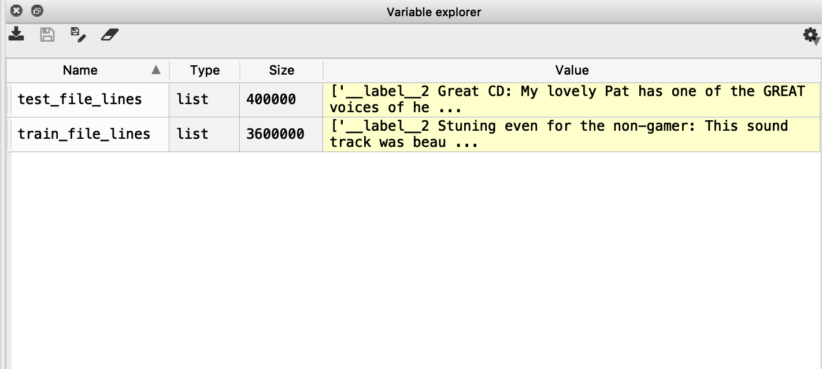
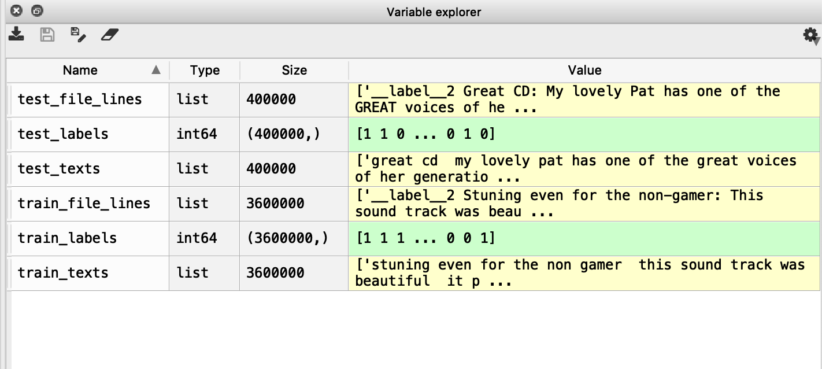
If you’re using an IDE, in the variable space or variable explorer (the naming depends on the IDE you use), you can see the size of training and test data.
It seems we have 3600000 training reviews and 400000 reviews to test our Sequence to Label Model on.
Let’s begin our Amazon Review Sentiment Analysis.
Separating Reviews & Labels
Now that we how our data looks like, we can define a function that returns the data (reviews) and its corresponding labels for train and test data respectively.
Note: we’ve used the same functions as we did for the visualization to read and parse the data.
def get_labels_and_reviews(file):
    labels = []
    reviews = []
    for line in bz2.BZ2File(file):
       x = line.decode("utf-8")
       labels.append(int(x[9]) - 1) //convert ‘__label__1’,’__label__2’ to 0 & 1
       texts.append(x[10:].strip()) //extract the reviews from the text body
    return np.array(labels), texts

train_labels, train_texts = get_labels_and_reviews('../input/train.ft.txt.bz2')
test_labels, test_texts = get_labels_and_reviews('../input/test.ft.txt.bz2')
This function will separate the reviews and their corresponding labels for training data and testing data respectively.
Text Preprocessing
The first thing we’re going to do to process the text is to convert everything to lowercase and then remove non-word characters. We’ll replace these with spaces since most are going to be punctuation. After this, we’re going to remove any other characters (like letters with accents or text made emojis). It would be a better approach to replace these with regular ASCII characters but for the sake of simplicity, we’re just going to ignore that here. This rationale is supported by the fact that if we look at the counts of the different characters that there are very few unusual characters in this corpus, so it shouldn’t be a problem and we’ll still get good accuracy.
For our preprocessing purposes, we’ll use the Python’s ‘re’ module which stands for “Regular Expression”
import re
NON_ALPHANUM = re.compile(r'[\W]')
NON_ASCII = re.compile(r'[^a-z0-1\s]')
def normalize_texts(texts):
    normalized_texts = []
    for text in texts:
        lower = text.lower()
        no_punctuation = NON_ALPHANUM.sub(r' ', lower)
        no_non_ascii = NON_ASCII.sub(r'', no_punctuation)
        normalized_texts.append(no_non_ascii)
    return normalized_texts

train_texts = normalize_texts(train_texts)
test_texts = normalize_texts(test_texts)
Just to get an even more clear intuition as to what preprocessing we’ve done, we’ll compare the output of our unprocessed training example (which we’ve already shown above while we were trying to figure out the formatting of the dataset) with the same example, only preprocessed this time. The difference is clear.

Unprocessed (Raw):

After Preprocessing:
As a sanity check, we recommend you look at your workspace and see if the dimensionality is the same and also that the class labels are indeed in the format that we desire:
Great! Looks perfect!
Now that we have our training data, training labels, test data, and test labels prepared, let’s go ahead and get to the training business.
Train/Validation Split
Standard procedure, the train/validation split.
We’re going to set aside 20% as our validation data.
This can easily be efficiently done through sklearn library.
from sklearn.model_selection import train_test_split
train_texts, val_texts, train_labels, val_labels = train_test_split(
    train_texts, train_labels, random_state=57643892, test_size=0.2)
Tokenizing
We said we’re ready to train with our data already prepared. But there’s a catch here.
We cannot feed raw text directly into deep learning models.
Text data must be encoded as numbers to be used as input or output for machine learning and deep learning models.
How do you convert text to numbers?
The Keras deep learning library provides some basic tools to help you prepare your text data.
Keras provides a sophisticated API for preparing text that can be fit and reused to prepare multiple text documents. We recommend this be the preferred approach of students when dealing with large projects in the future.
Keras provides the Tokenizer class for preparing text documents for deep learning. The Tokenizer must be constructed and then fit on either raw text documents or integer encoded text documents.
import tensorflow
from tensorflow.keras.preprocessing.text import Tokenizer, text_to_word_sequence

MAX_FEATURES = 12000
tokenizer = Tokenizer(num_words=MAX_FEATURES)
tokenizer.fit_on_texts(train_texts)
train_texts = tokenizer.texts_to_sequences(train_texts)
val_texts = tokenizer.texts_to_sequences(val_texts)
test_texts = tokenizer.texts_to_sequences(test_texts)
Padding
One final step before we build our model, we need to make sure each review is of the same length. This is in no way compulsory. In fact, it might be advantageous to have variable length sequences in the data and we’ll it to the readers as an exercise on how to do this.
We’re going to make everything the length of the longest sentence in the training set.
The code for this is straightforward:
from tensorflow.keras.preprocessing.sequence import pad_sequences

MAX_LENGTH = max(len(train_ex) for train_ex in train_texts)
train_texts = pad_sequences(train_texts, maxlen=MAX_LENGTH)
val_texts = pad_sequences(val_texts, maxlen=MAX_LENGTH)
test_texts = pad_sequences(test_texts, maxlen=MAX_LENGTH)
Building the Sequence to Label Model
For the Recurrent Neural Network model, we’re going to use an embedding layer so that each word is represented by a unique integer. We’ll be using the Functional API in Keras which we covered in the previously written Keras series. If you’ve missed it, do check it out.
Coming to the model architecture, we’ve opted for two GRU layers, followed by 2 dense layers and then the standard one neuron output layer to predict whether the input sequence is class 0 or class 1. If you’re running code on a GPU, we recommend swapping GRU out for CuDNNGRU because the later will run much faster (over a factor of 10).
def build_rnn_model():
    sequences = layers.Input(shape=(MAX_LENGTH,))
    embedded = layers.Embedding(MAX_FEATURES, 64)(sequences)
    x = layers.GRU(128, return_sequences=True)(embedded)
    x = layers.GRU(128)(x)
    x = layers.Dense(32, activation='relu')(x)
    x = layers.Dense(100, activation='relu')(x)
    predictions = layers.Dense(1, activation='sigmoid')(x)
    model = models.Model(inputs=sequences, outputs=predictions)
    model.compile(
        optimizer='rmsprop',
        loss='binary_crossentropy',
        metrics=['binary_accuracy']
    )
    return model

rnn_model = build_rnn_model()
Training & Evaluation
Keras makes this part a no-brainer. All you have to do is call the .fit() command for the model to start training:
rnn_model.fit(
    train_texts,
    train_labels,
    batch_size=128,
    epochs=1,

You can increase the number of epochs but you’ll see, just 1 epoch gives us over 93% accuracy on training and over 95% accuracy on validation data as well. It is not likely to increase significantly by increasing the number of epochs. In fact, we might run into an overfitting problem.
We encourage our reads to play with these nuances and conclude on the optimum model setting for our problem.
Evaluation is just as simpler. Let’s first import some evaluation metrics:
from sklearn.metrics import f1_score, roc_auc_score, accuracy_score

preds = rnn_model.predict(test_texts)
print('Accuracy score: {:0.4}'.format(accuracy_score(test_labels, 1 * (preds > 0.5))))
print('F1 score: {:0.4}'.format(f1_score(test_labels, 1 * (preds > 0.5))))
print('ROC AUC score: {:0.4}'.format(roc_auc_score(test_labels, preds)))

It seems good enough for a simple model. Don’t you think?
On a concluding note, we learned all the types of Sequential Models and did a hands-on for one particular type which was Sequence to Label Model.


